

Handling repair requests (tickets)
Guide published:
Use tickets for a repair, a complaint or any other request about a unit. A tenant can raise a ticket from their own account, or you can raise one yourself. Each ticket has its own conversation. Every reply and every status change sends the other side an email and an in-app notification.
Prefer to watch first? This 30-second video shows the same screens, with no sound.
On screen the page is called Tickets. It takes about five minutes to handle a simple repair.
Opening the tickets page
Section titled “Opening the tickets page”- Click Tickets in the menu.
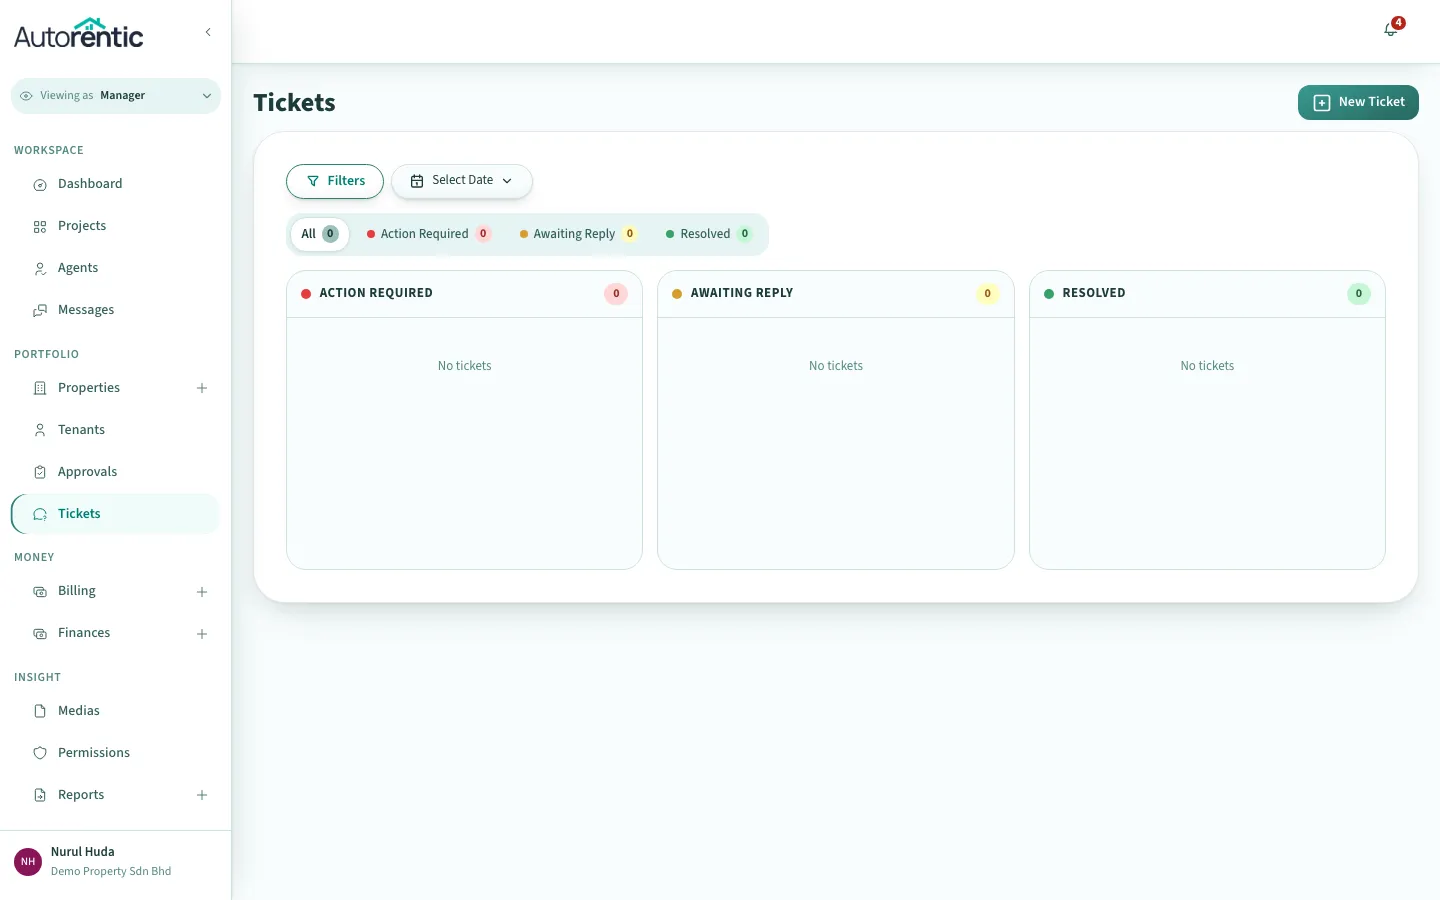
The tickets are sorted into three columns. Action Required means it is your turn to act. Awaiting Reply means the next message is with the tenant. Resolved holds tickets that are closed.
Raising a ticket yourself
Section titled “Raising a ticket yourself”Use this when a tenant reports a problem by phone, by message or in person, and you want it on record.
- Click New Ticket.
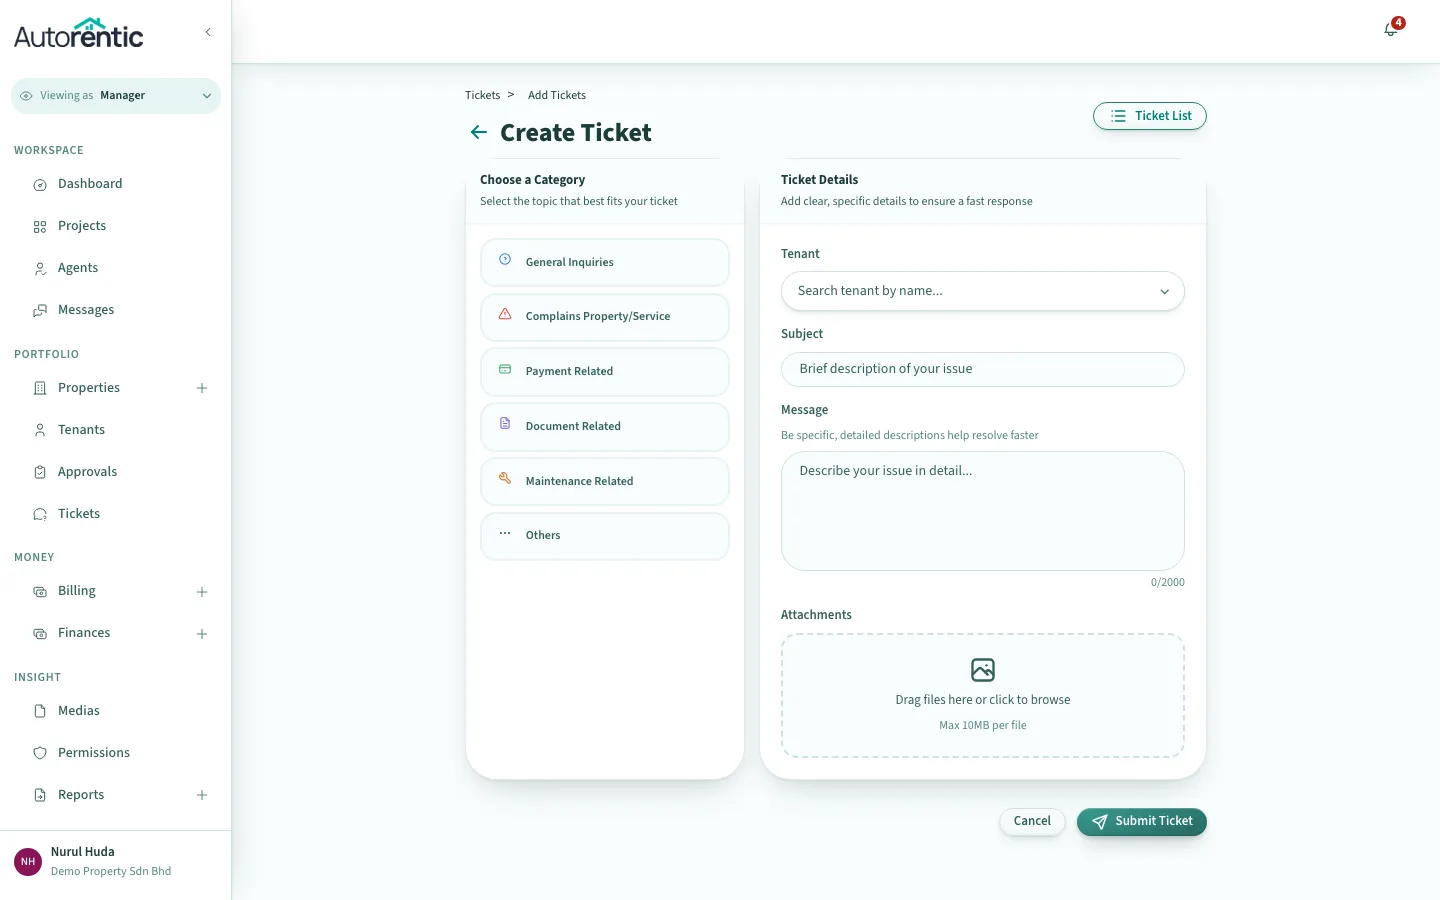
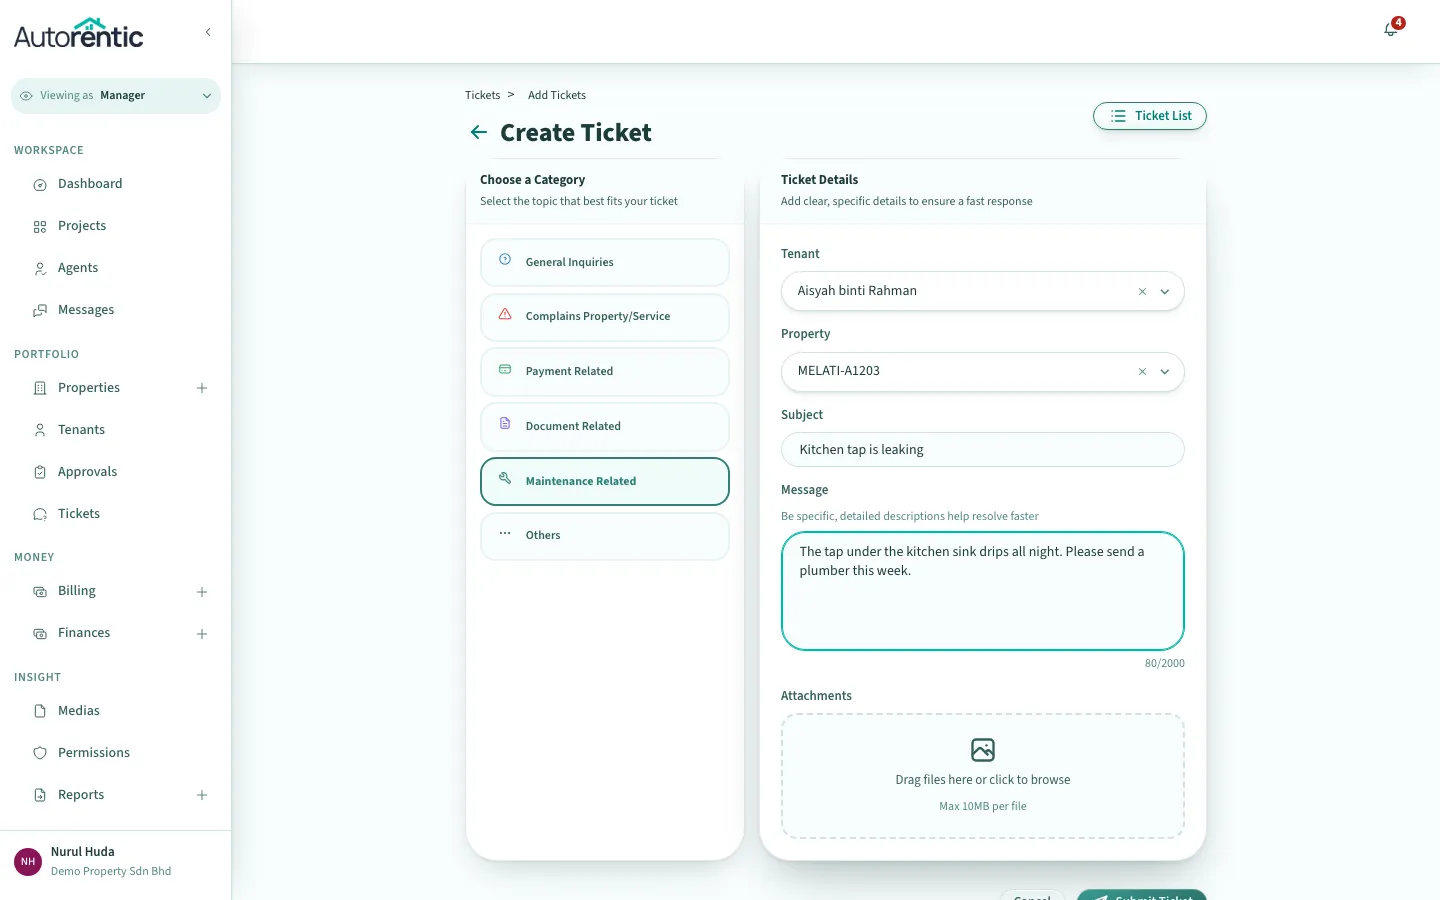
- Click the category that fits the request. The categories are General Inquiries, Complains Property/Service, Payment Related, Document Related, Maintenance Related and Others.
- Click the Tenant box, type the tenant’s name, then click the name in the list.
- Check the Property box. If the tenant has one unit, it fills in by itself. If the tenant has more than one unit, click the unit you need. If the unit is rented by the room, a Room box appears, and you choose the room.
- Click the Subject box and type a short description of the problem.
- Click the Message box and describe the problem in detail. The box stops at 2,000 characters.
- Optional: under Attachments, add up to five photos or files.
- Click Submit Ticket.
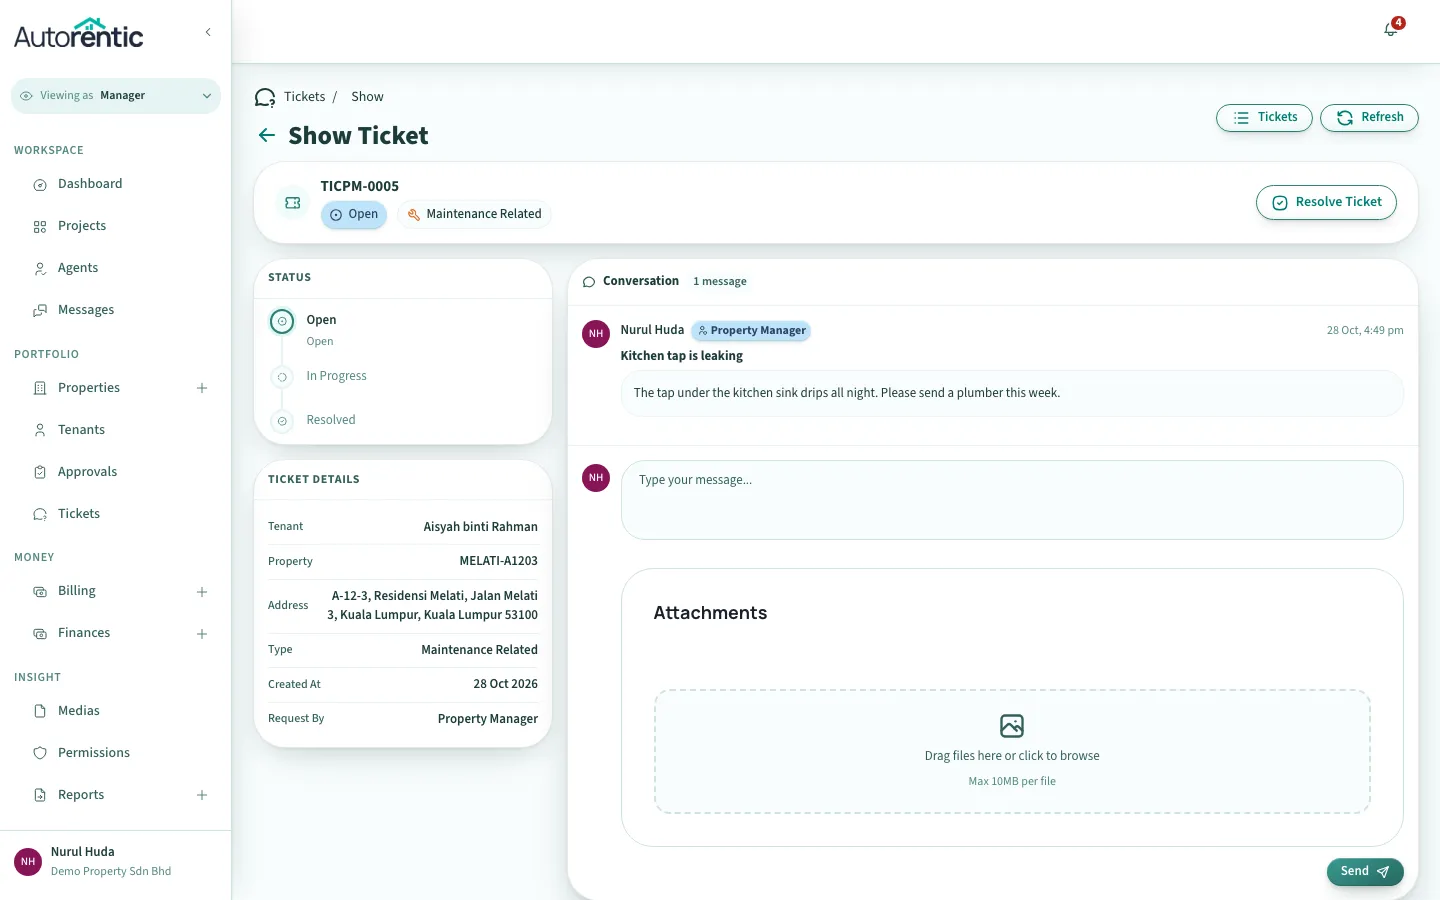
The ticket opens. Its number is at the top, and the tenant is notified straight away.
Replying to a ticket
Section titled “Replying to a ticket”Open the ticket from the board. Its conversation is on the right, and the box to type in is at the bottom of it.
- Click the box that says Type your message….
- Type your reply.
- Optional: attach up to three files under the box.
- Click Send.
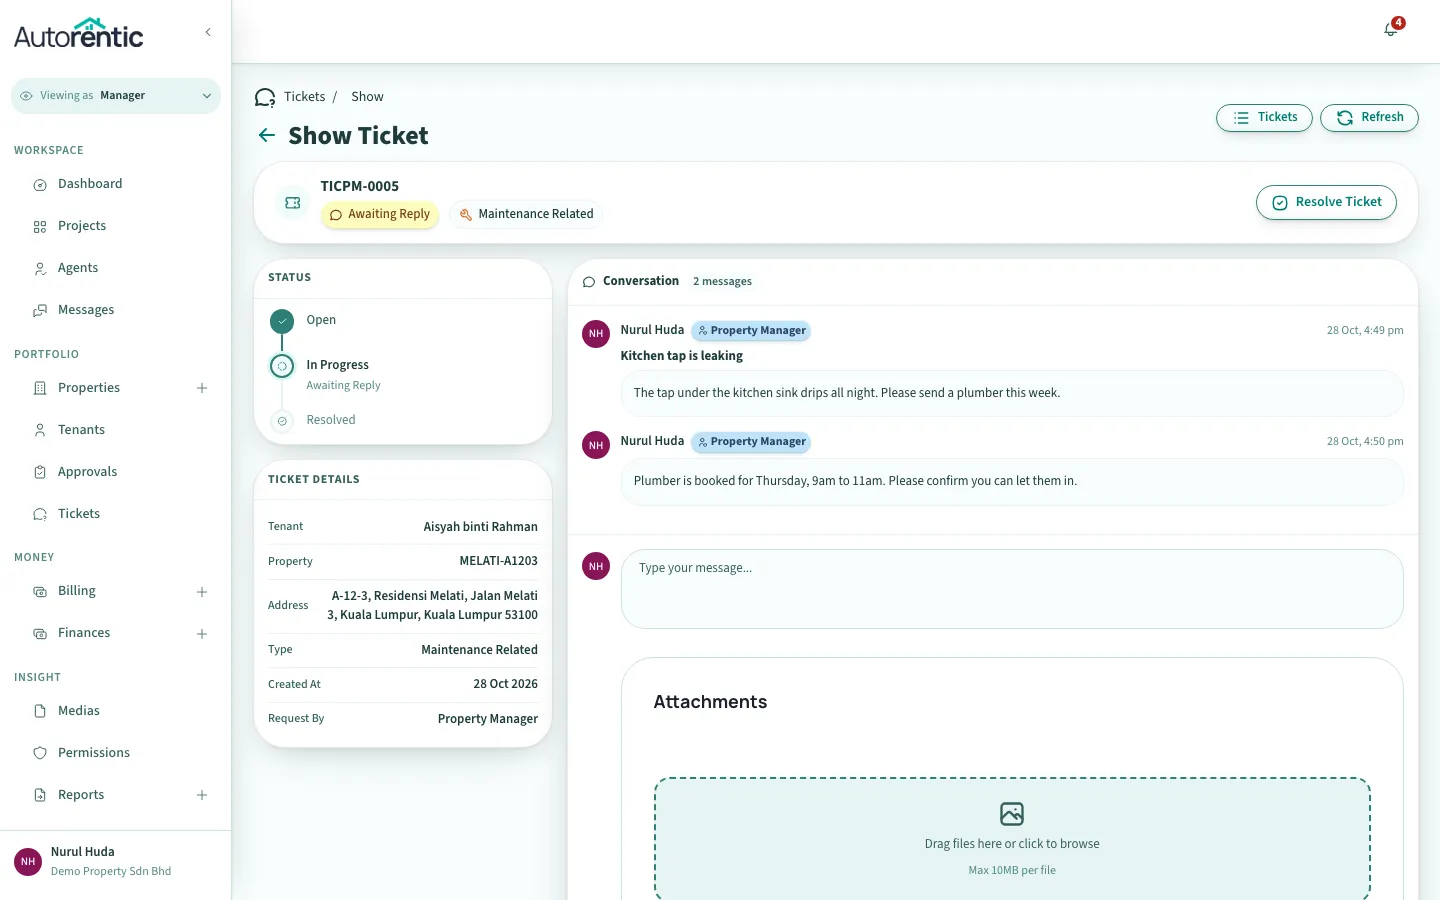
The reply appears in the conversation, and the tenant is emailed to say a reply is waiting for them. The ticket moves to Awaiting Reply.
Resolving a ticket
Section titled “Resolving a ticket”Resolve a ticket once the problem is fixed.
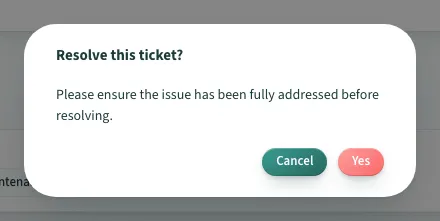
- Click Resolve Ticket at the top right of the ticket.
- Read the question. It asks you to confirm the issue has been fully addressed.
- Click Yes.
The ticket shows This ticket has been resolved and the reply box is removed. The tenant is emailed that the ticket has been marked as complete.
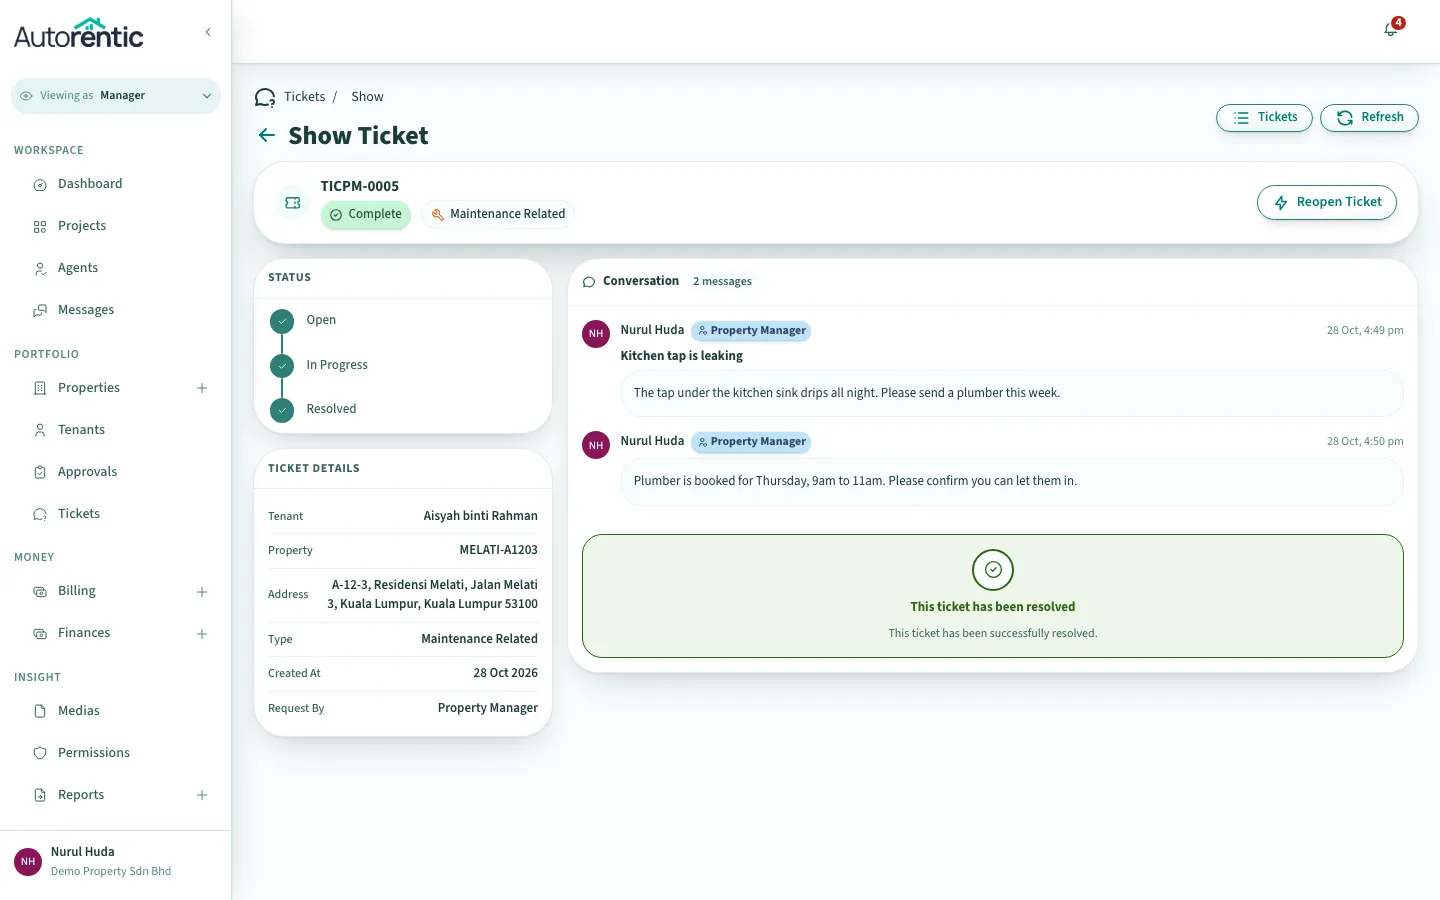
Reopening a ticket
Section titled “Reopening a ticket”Reopen a resolved ticket if the problem comes back. Only a member of your agency can reopen a ticket.
- Click Reopen Ticket at the top right of the ticket.
- Click Yes in the dialog.
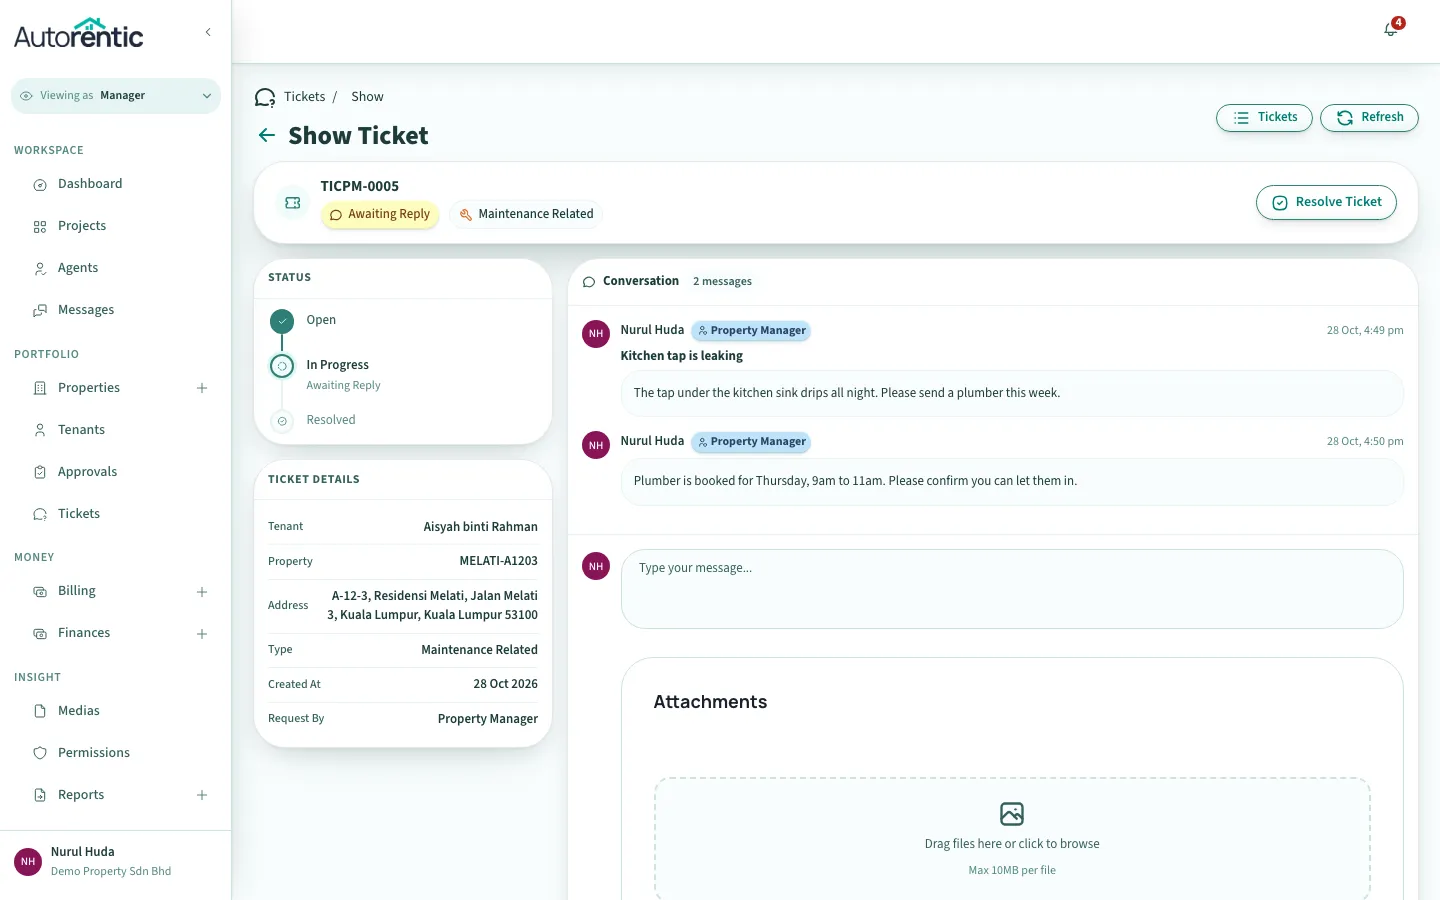
The reply box returns and the ticket moves back to Awaiting Reply. The dialog says this notifies the tenant, and it does.
Things this page does not do
Section titled “Things this page does not do”- There is no button to cancel a ticket, or to mark it In Progress.
- There is no field to assign a ticket to a person in your team.
- You cannot add a contractor quote from this page. An agent adds a quote from the agent’s own ticket screen. The quote then appears on this ticket for you.
Contractor quotes
Section titled “Contractor quotes”When an agent adds a quote, its amount decides who has to approve it.
- If the quote is above the limit your agency has set for landlord approval, and the landlord can see the ticket, the landlord must approve it. The ticket shows Waiting on landlord until they decide.
- If the landlord approves, it shows Landlord approved. An agency admin can cancel an approved quote with Cancel quote. You must give a reason, and the landlord is told.
- If the landlord declines, it shows Landlord declined.
- If the agent’s quote is above the agent’s own spending limit, you see Approve the spend with a Review and approve button. Approving it lets the agent book the work.
Quotes appear only in the agency’s view. The tenant does not see the quote card, the landlord’s details or the spend approval.
What the tenant sees
Section titled “What the tenant sees”- When you raise a ticket: the tenant gets an email titled with the ticket number and “A new ticket has been created”, and an in-app notification.
- When you reply: the tenant gets an email titled with the ticket number and “Waiting for your reply”, and an in-app notification that says to respond.
- When you resolve it: the tenant gets an email saying the ticket has been marked as complete, and an in-app notification that the ticket is closed.
- When you reopen it: the tenant is notified that it is waiting for their reply again.
- On their own ticket page: the tenant sees the conversation and the status steps, and can reply until the ticket is resolved.
What to do next
Section titled “What to do next”- If a ticket sits in Action Required, open it and reply, or resolve it if the problem is fixed.
- If the ticket is about rent or a payment, read recording a cash or bank-transfer payment.
Ready to try it?
Go back to Autorentic and do it now, while the steps are fresh.