

Adding a tenant and sending the tenancy agreement
Guide published:
This guide takes you from the Tenants list to a tenancy agreement sent for e-signing. It takes about ten minutes. You need a property with a vacant unit first; see adding your first property.
Prefer to watch first? This 40-second video shows the same screens, with no sound.
Autorentic calls the contract the agreement. The tenant signs it online first, then you sign as landlord.
Opening the Add Tenant form
Section titled “Opening the Add Tenant form”- Click Tenants under Portfolio.
- Click Add Tenant.
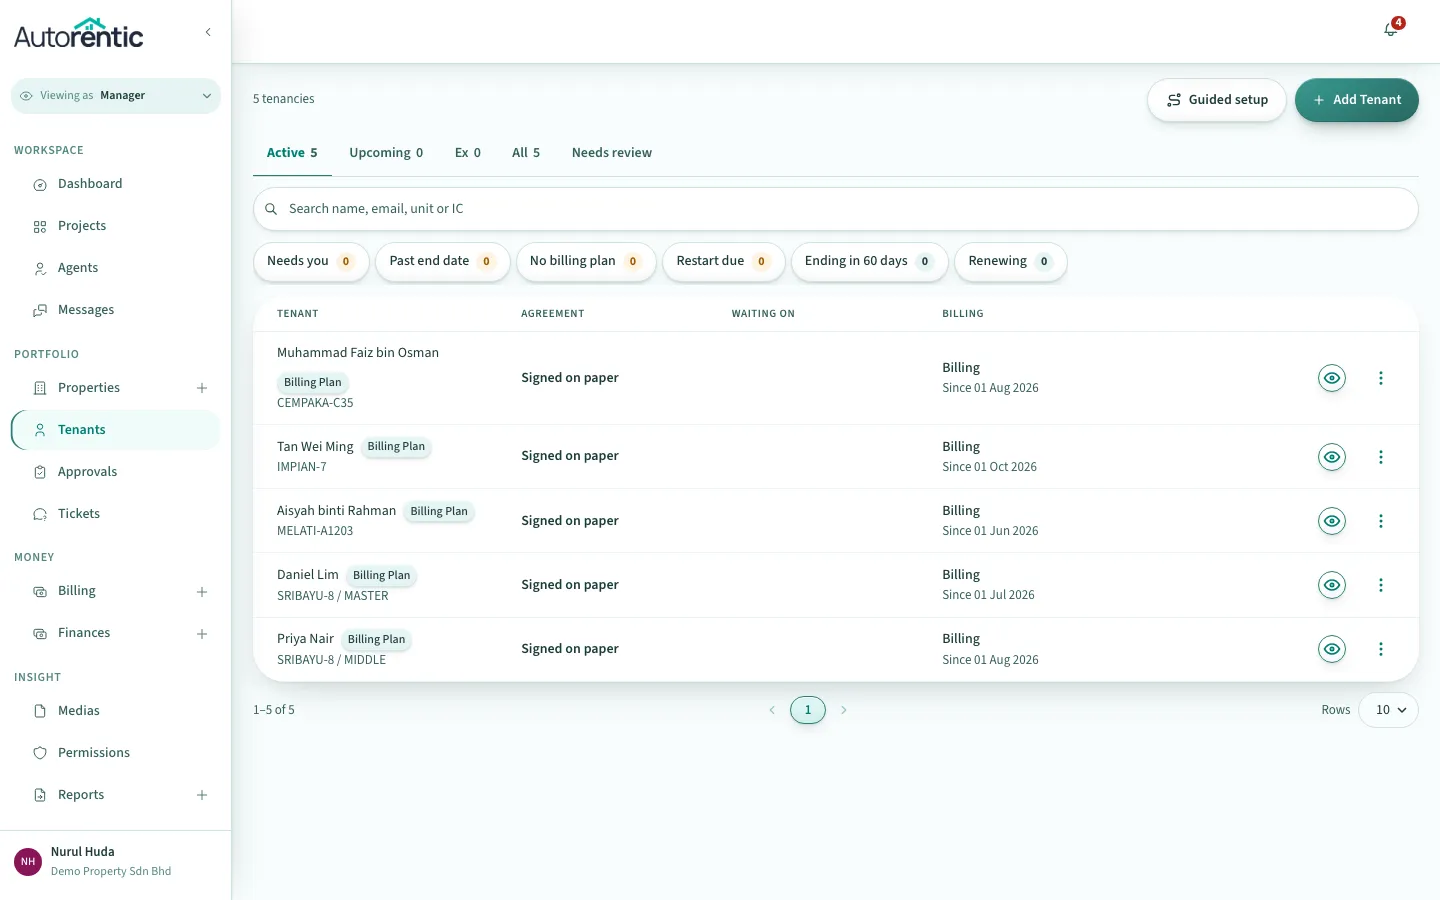
The form has four steps: Who is moving in?, Pick a unit, Contract & invoicing and Charges & agreement. Nothing is saved until you finish the last one.
Adding the tenant
Section titled “Adding the tenant”- Click Send for e-signing on the first card.
- Type the tenant’s email in Email. It must be a real inbox, because the invitation goes there.
- Type the tenant’s First name, Last name and Contact number.
- Click Next: Unit.
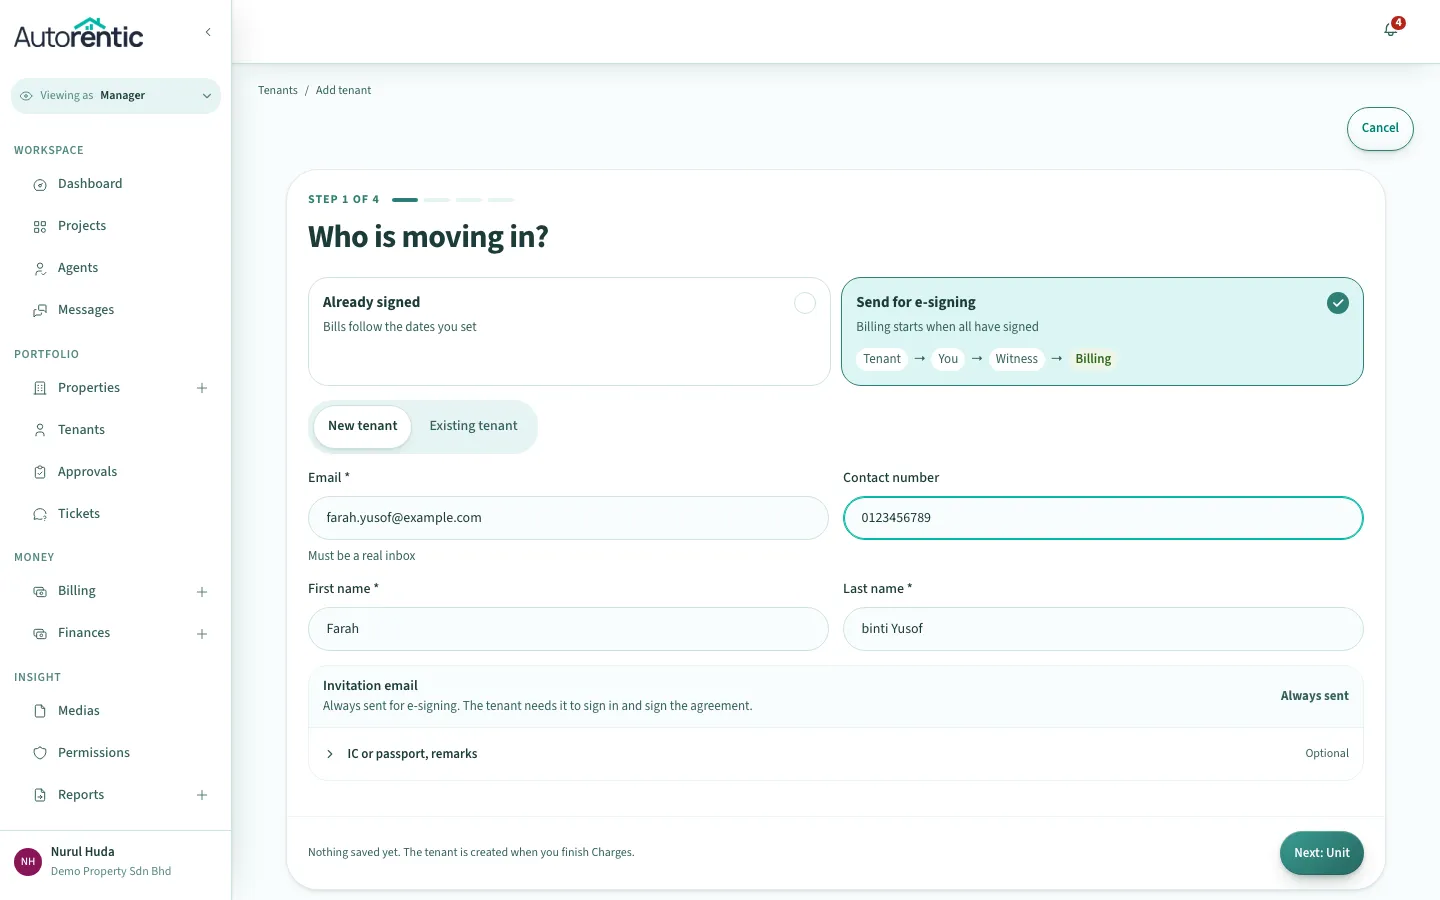
Choose Already signed instead if the tenancy was signed on paper and only needs its bills set up. This guide follows e-signing.
If Send for e-signing is greyed out with an Advanced plan tag, your plan does not include e-signing. Click See plans on that card to compare plans.
The invitation email is always sent for e-signing, because the tenant needs it to sign in and sign the agreement.
Picking the unit
Section titled “Picking the unit”- Search for the unit by its property code and pick it from the list.
- Check the figures under the unit: Monthly rent, Service charge and Deposits.
- Click Next: Contract.
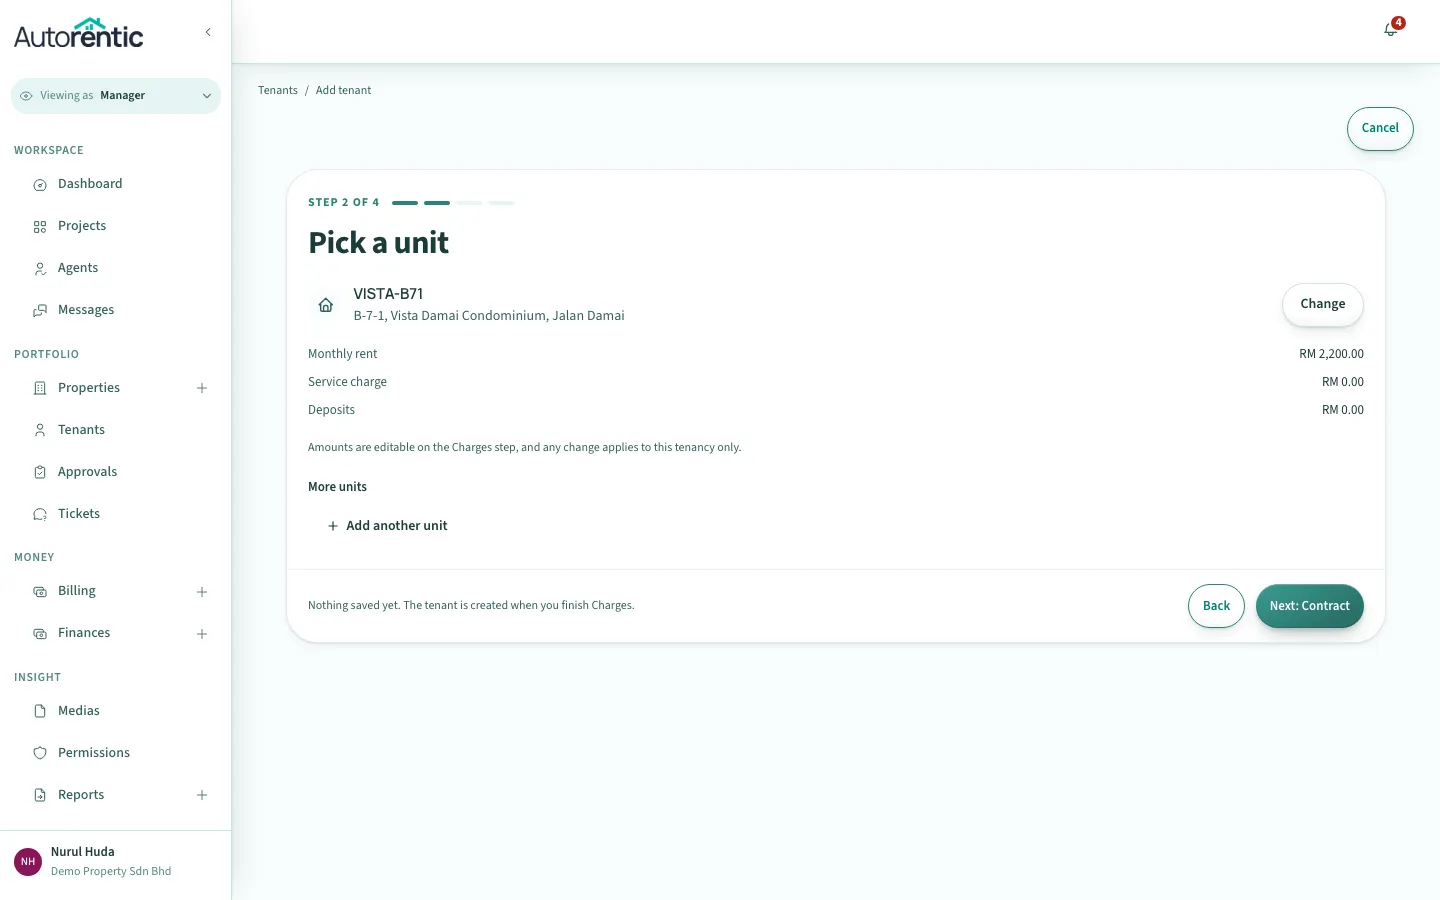
These amounts come from the property. You can change them on the Charges step, and a change applies to this tenant only.
Setting the tenancy dates
Section titled “Setting the tenancy dates”- Check Move-in date and First rent due.
- Choose a Tenancy length: 6 months, 1 year, 2 years or Custom.
- Click Next: Charges.
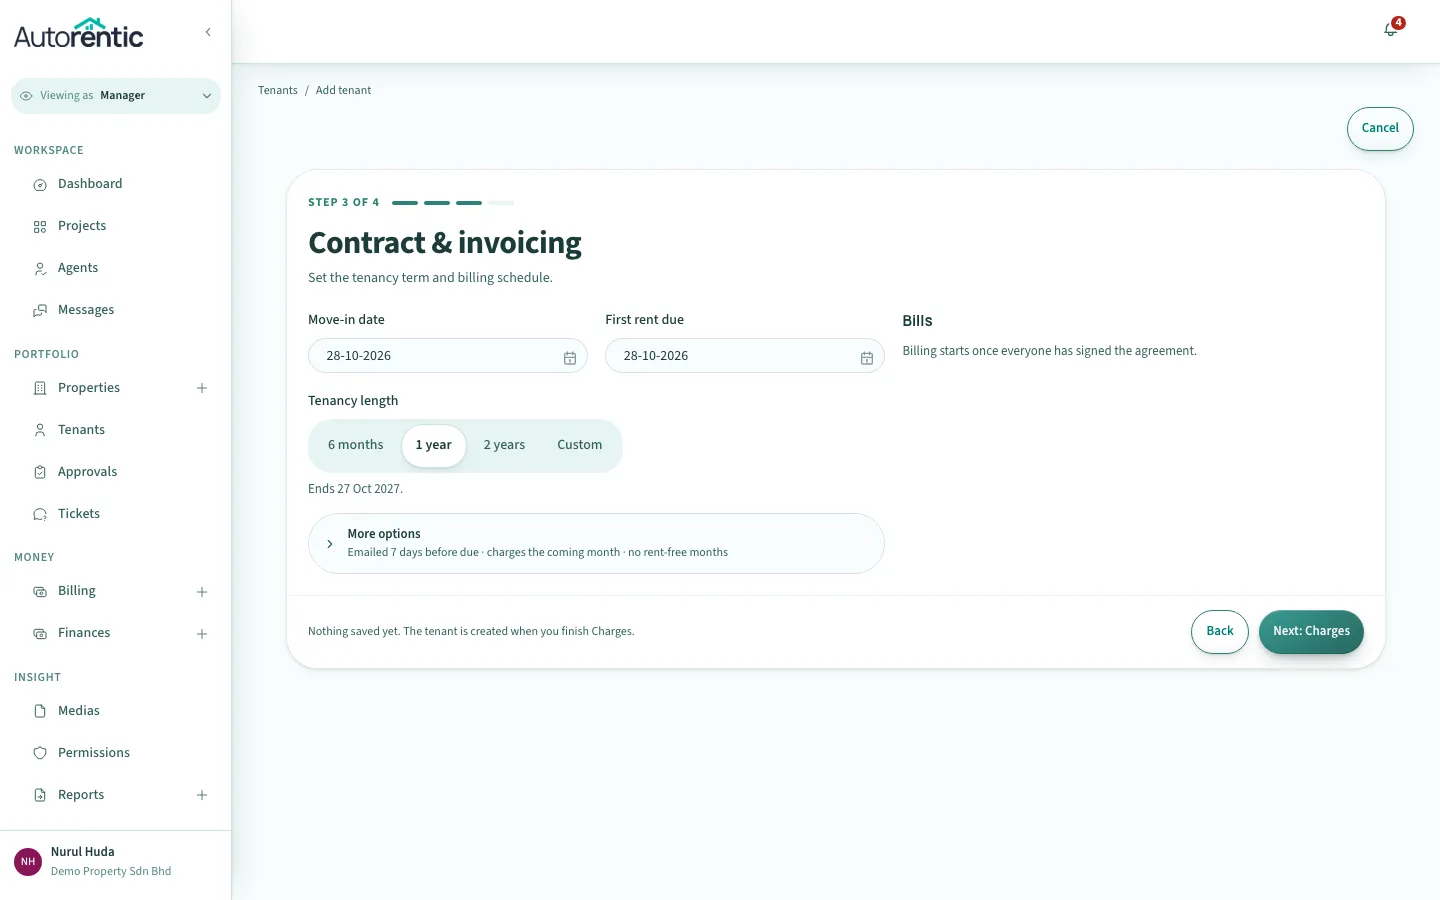
The Bills panel says billing starts once everyone has signed the agreement.
Choosing the agreement and creating the tenant
Section titled “Choosing the agreement and creating the tenant”- Under Agreement, keep Our template selected to edit the clauses in Autorentic.
- Or choose My own PDF to use your lawyer’s template, then upload it on this step.
- Optional: under Witness, type a witness’s Name and Email.
- Click Create and prepare.
- Click Create and prepare in the dialog that opens.
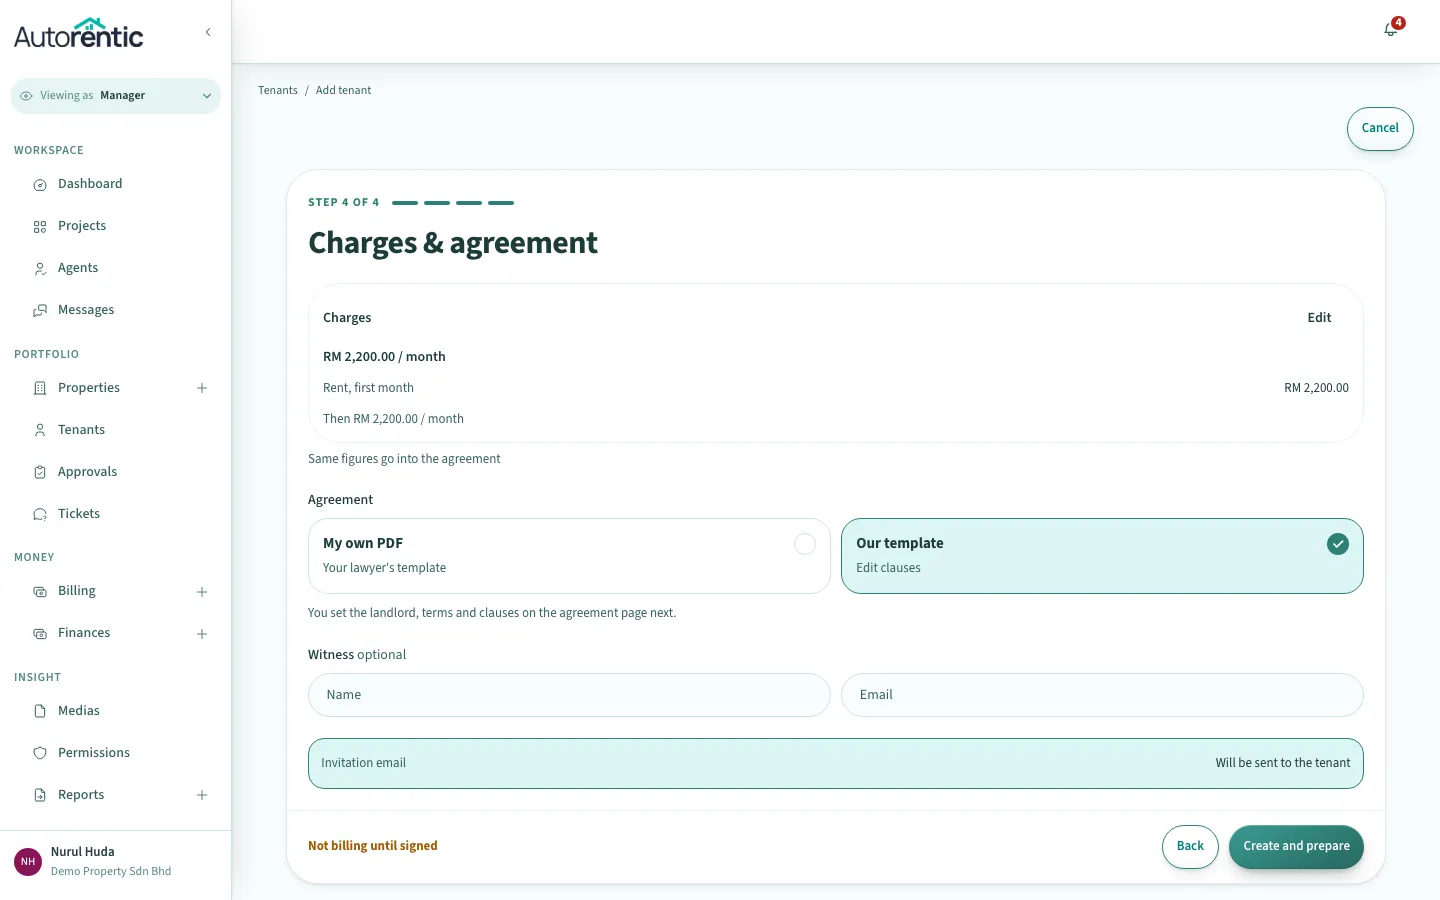
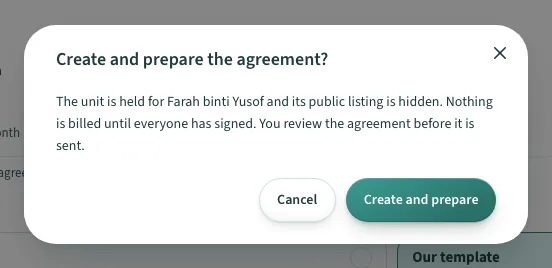
The dialog says nothing is billed until everyone has signed, and that you review the agreement before it is sent.
Filling in the landlord terms
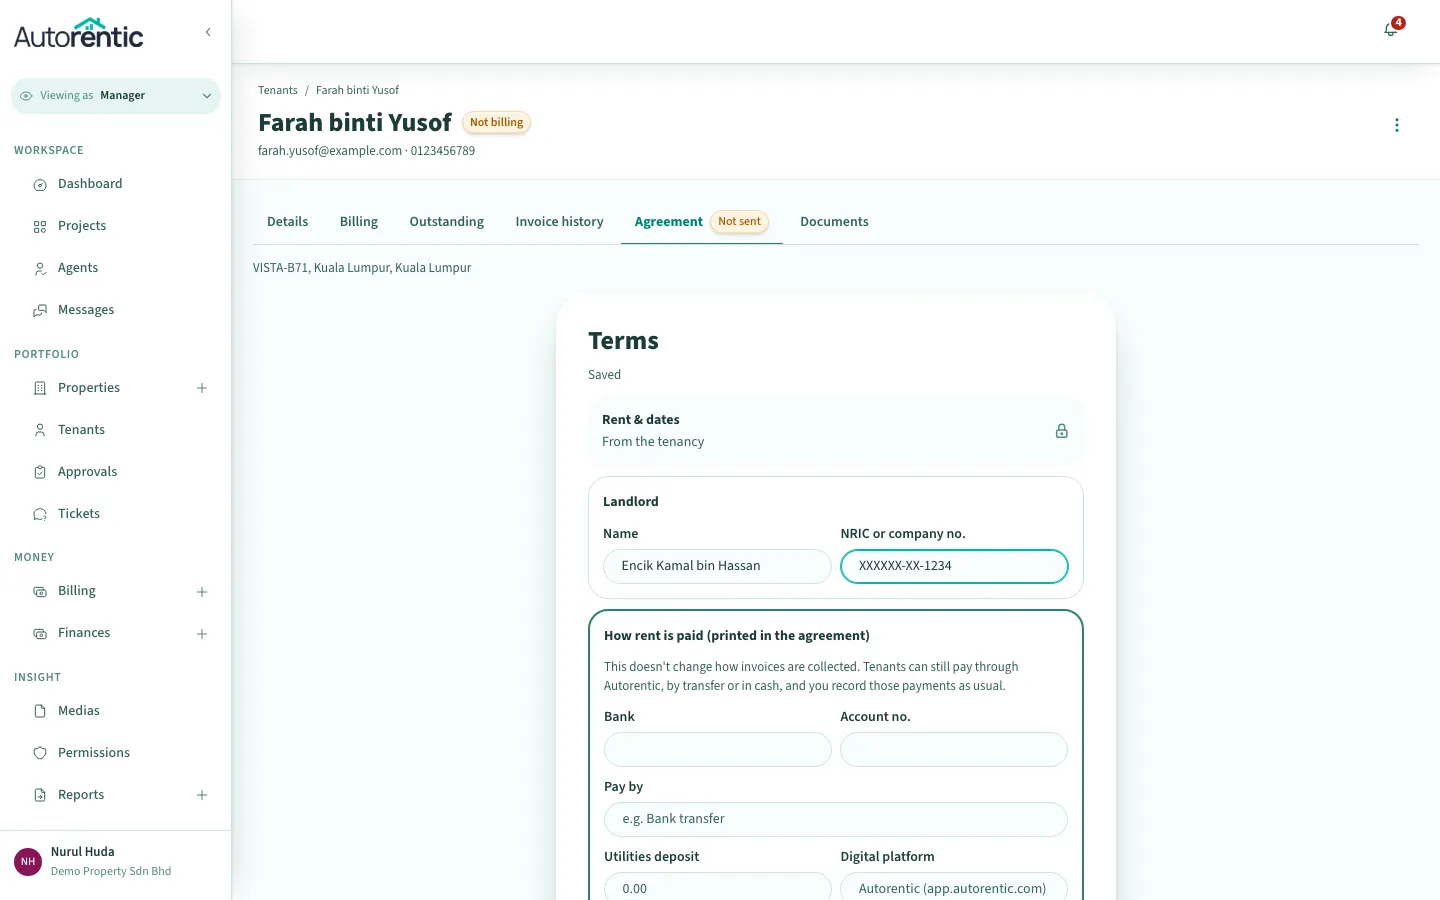
Section titled “Filling in the landlord terms”Autorentic opens the tenant’s agreement page. The rent, dates and unit are already filled in from the tenancy. You add the landlord and check the rest.
- Click Add landlord details on the Terms row.
- Type the landlord’s name in Name.
- Type the NRIC or company number in NRIC or company no.
- Fill in How rent is paid if you want it printed in the agreement: Bank, Account no., Pay by and the other fields in that section.
- Wait for Saved to appear. The form saves as you type. If a Save terms button shows, click it.
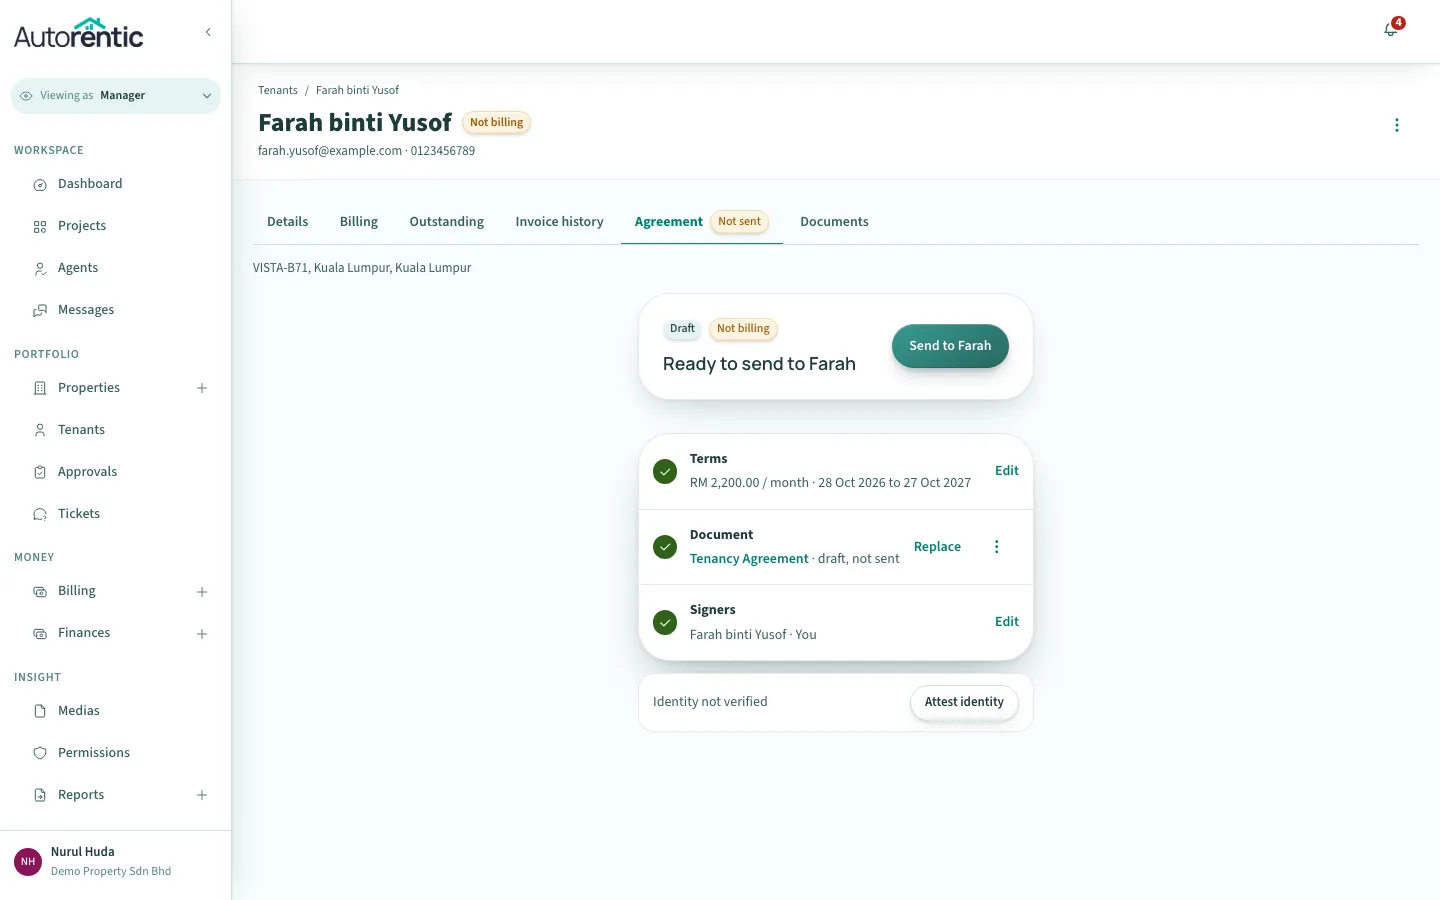
When the terms are saved, the page goes back to the agreement overview, where the Terms row is ticked.
Generating and sending the agreement
Section titled “Generating and sending the agreement”- Click Generate on the Document row.
- Click Send to Farah (the button shows the tenant’s first name).
- Read the dialog. It lists the tenant first, then you as landlord, and notes that billing waits for both signatures.
- Click Send to Farah in the dialog.
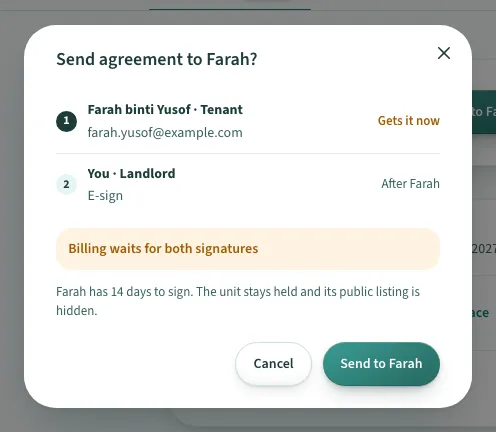
The dialog also says the tenant has 14 days to sign, and that the unit stays held while they do.
Checking the signing status
Section titled “Checking the signing status”The status box at the top of the agreement page shows where the agreement is. The tenant’s and your progress appear under the title.
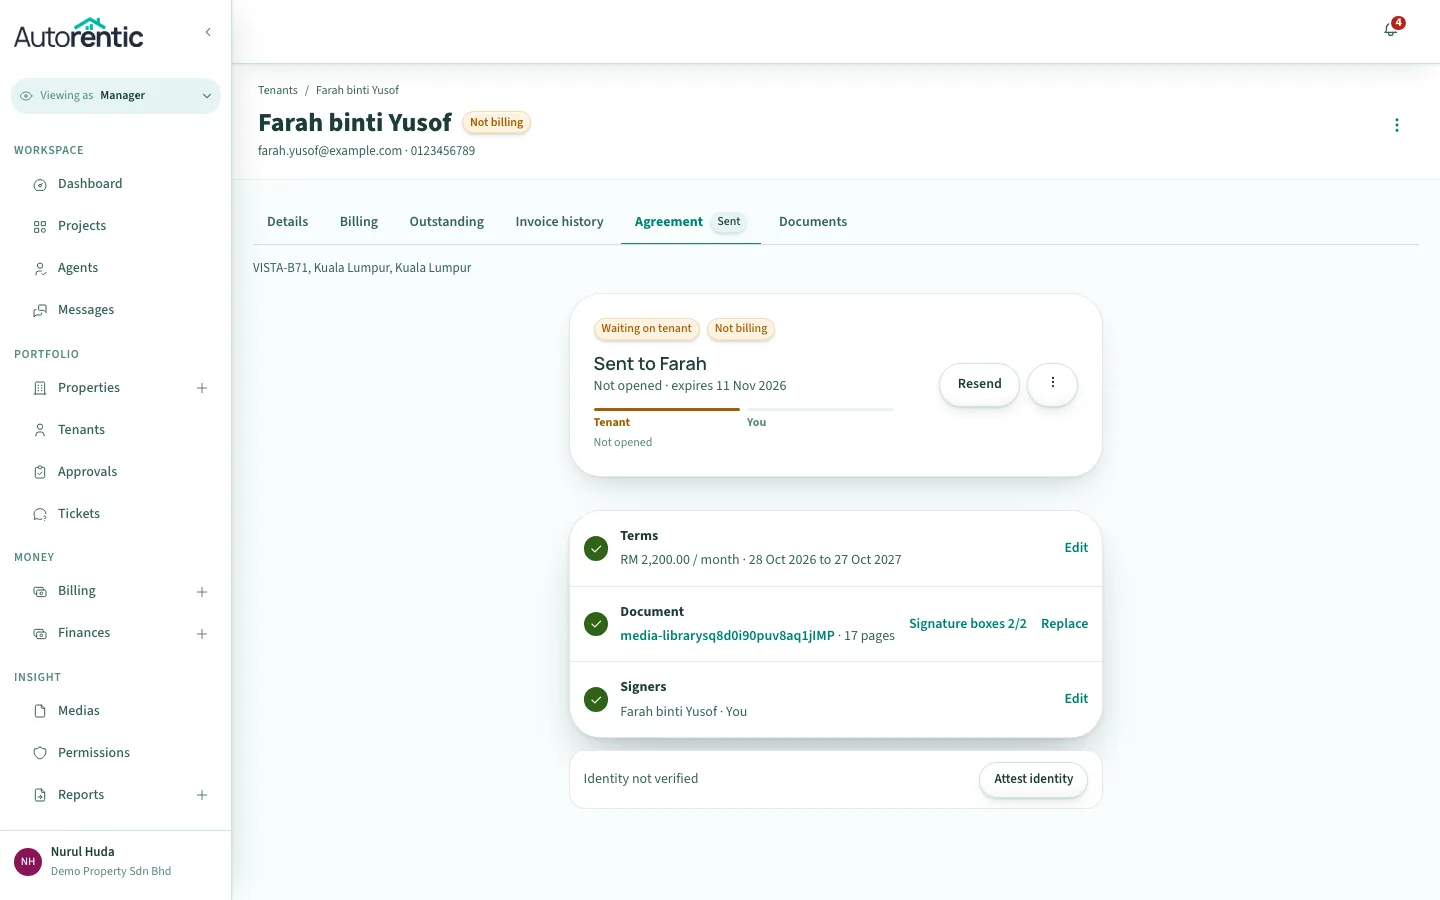
These are the titles you will see, and what each one means:
- Agreement not sent yet: the agreement is still a draft. Finish the terms and send it.
- Sent to [name]: the invitation is out and the tenant has not signed. Not opened means they have not opened it yet.
- [name] signed. Your turn.: the tenant has signed. Sign as landlord.
- [name] to witness: the witness still needs to sign.
- [name] asked for changes: the tenant asked for a change. The note they wrote is shown under the title. Review the request, update the agreement and send it again.
- Tenancy is live: everyone has signed and billing has started.
- Agreement expired: the tenant did not sign in time. The status shows how many days it was unsigned.
Billing stays off until everyone has signed. The tenancy shows Not billing until then.
When the tenant has not signed
Section titled “When the tenant has not signed”If the status still says Sent to [name] after a day or two, click Resend and confirm in the dialog. The old link stops working and the tenant gets a new one with a new sign-by date. Autorentic lets you resend once a day, so if the button is greyed out, the status shows Sent today. You can resend tomorrow.
The agreement expires on the date shown in the status, for example expires 10 Nov 2026. If the tenant does not sign by then, the status changes to Agreement expired.
What to do next
Section titled “What to do next”Once the tenancy is live, set up how the rent is billed in recurring bills.
Ready to try it?
Go back to Autorentic and do it now, while the steps are fresh.