

Start here
Guide published:
Read this guide first. It shows you how to start with Autorentic, and the other guides assume you have done these steps.
Prefer to watch first? This 20-second video shows the same screens, with no sound.
Get an account
Section titled “Get an account”Sign up yourself if you are setting up your own property management business. Accept an invitation if your agency already uses Autorentic and has invited you.
Sign up yourself
Section titled “Sign up yourself”- Go to app.autorentic.com and click Create account.
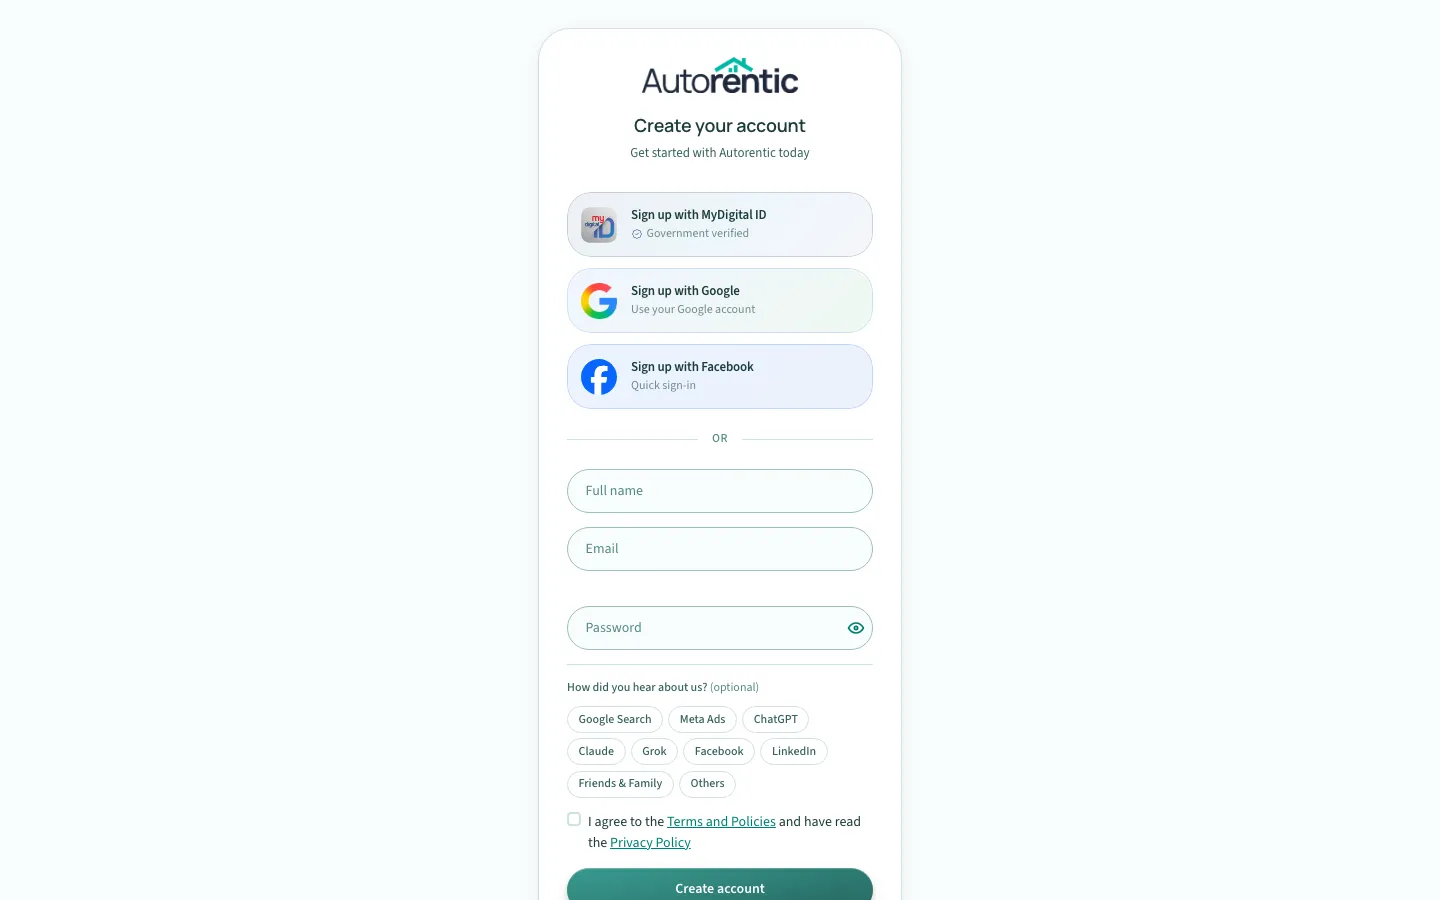
- Type your Full name.
- Type your Email address.
- Type a Password.
- Optional: under How did you hear about us?, click the option that fits.
- Tick I agree to the Terms and Policies and have read the Privacy Policy. You cannot create the account until you tick it.
- Click Create account.
- On How will you use Autorentic?, click Property manager or agent.
- Click Continue.
- On Who are you renting out as?, click A company or Myself.
- Fill in the details on the card. It asks only for what it needs now. The rest can wait until you issue your first invoice.
- Click Continue. You land on your Dashboard.
Accept an invitation from your agency
Section titled “Accept an invitation from your agency”Your agency sends you an email with an invitation link.
- Open the link in the email. The page shows who invited you, the role you will have, and the email address the invitation was sent to.
- Click Accept.
- If you do not have an Autorentic account yet, the page takes you to Create account. Sign up as described above.
- If you already have an account, the page takes you to Sign in. Sign in with your email and password.
To refuse the invitation, click Decline instead.
Finish the guided setup
Section titled “Finish the guided setup”The guided setup walks you through three steps: a project, your first property and your first tenant. It starts from the checklist on your dashboard.
- Click Dashboard under Workspace.
- Find the checklist called Get your first rent payment. It lists four steps and shows how many are done.
- Click Continue on the first step that is not done.
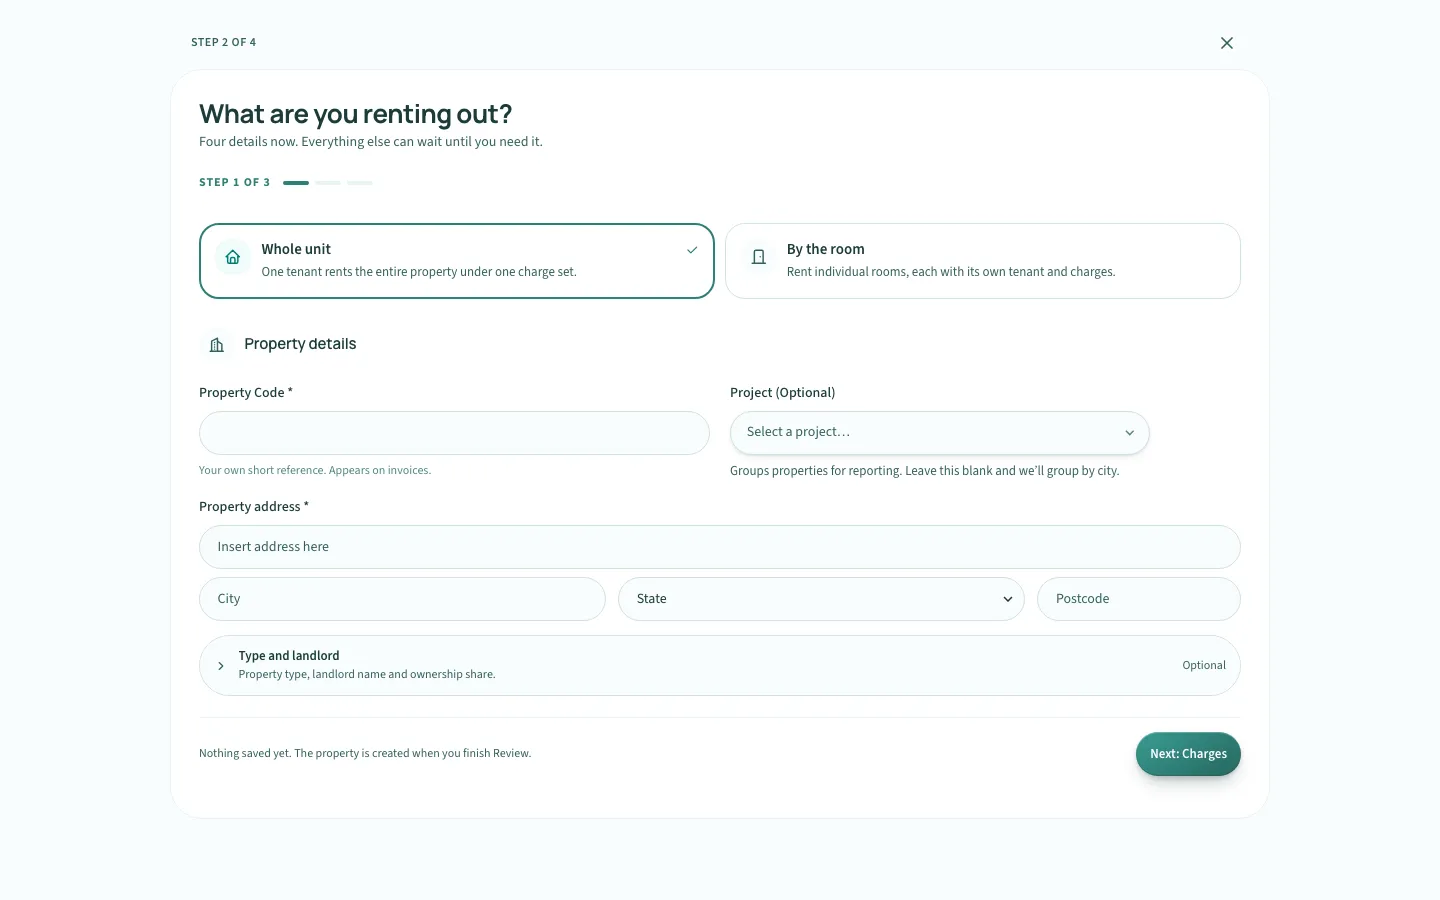
- Fill in the step, then click Save and continue to move to the next one.
The three steps ask these questions:
- Create a project, under the heading Where are your properties? A project groups your properties by location. One is enough to start.
- Add your first property, under the heading What are you renting out? Choose Whole unit or By the room. The full steps are in adding a property and its rooms.
- Add your first tenant, under the heading Who is renting it? You invite the tenant by email, and they confirm their own details. The full steps are in adding a tenant and sending the tenancy agreement.
To leave the walkthrough, click Close setup. You can open it again later.
Open the guided setup from a list
Section titled “Open the guided setup from a list”After your first run, you can start the same walkthrough from a list. On the Properties list, click Guided setup. The walkthrough opens at the property step. Rooms are set up inside a property, so the walkthrough starts there.
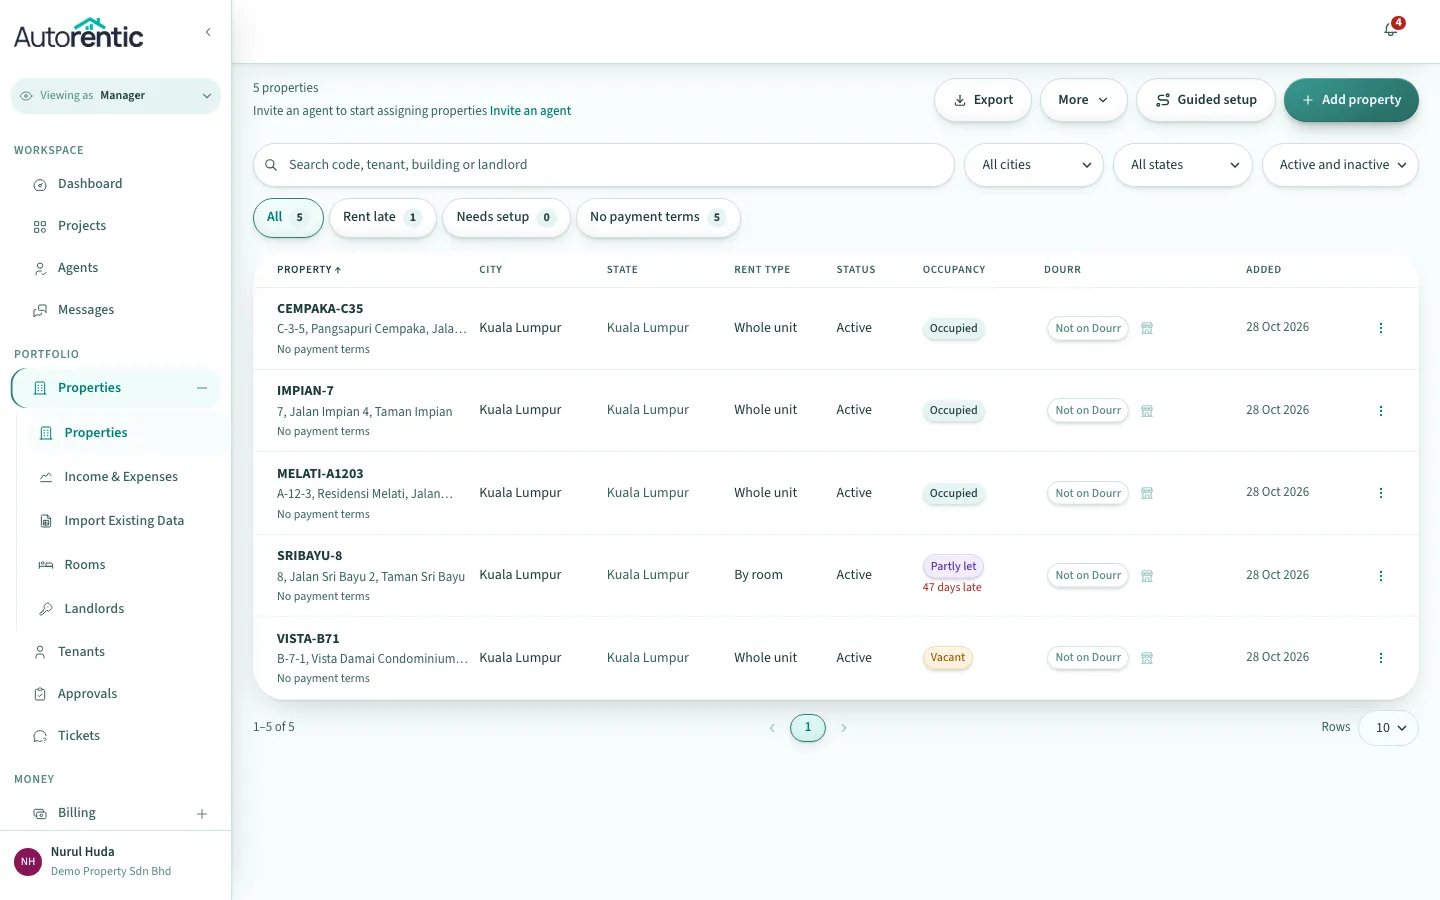
The Projects list has a Guided setup button too. It opens at the project step.
Set up the bank account for your payouts
Section titled “Set up the bank account for your payouts”Autorentic sends the money you collect online to the bank account on your agency profile. Set it up before your first tenant pays.
- Click your name at the bottom of the left menu, then click Profile.
- Click Edit Profile.
- Click Banking.
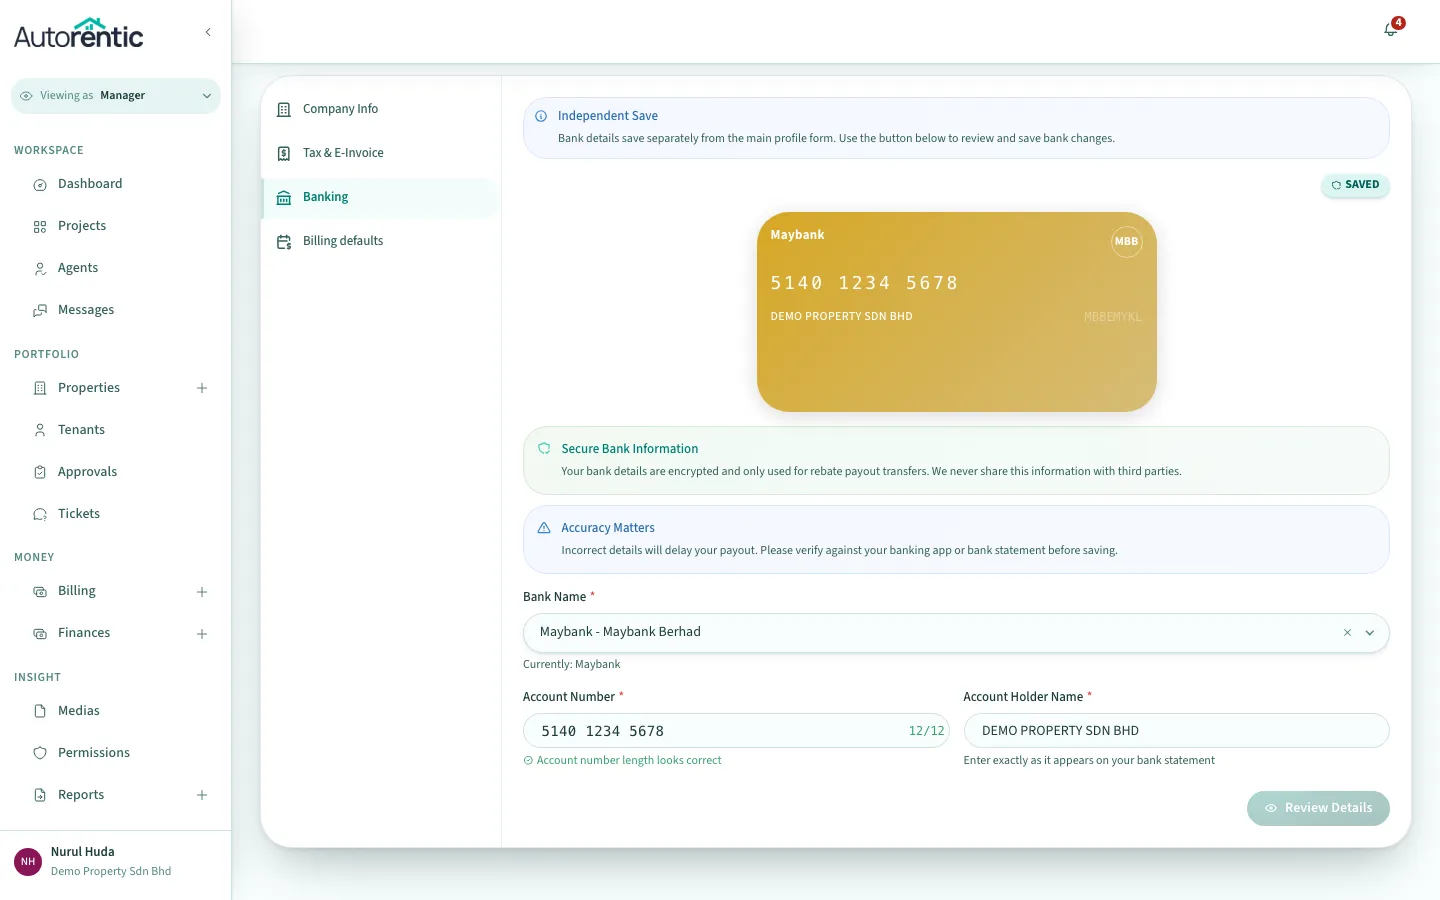
- Choose your bank in Bank Name.
- Type your bank account number in Account Number.
- Type the name on the account in Account Holder Name. Enter it exactly as it appears on your bank statement.
- Click Review Details, check what you typed, then click Confirm & Save.
The page warns you that incorrect details delay your payout. If the bank details are missing when a tenant pays rent online, Autorentic emails you a warning to add them.
Know your plan
Section titled “Know your plan”Autorentic has four plans: Starter, Advanced, Professional and Enterprise, and the features you can use depend on the plan you are on.
- Click Subscription in the menu.
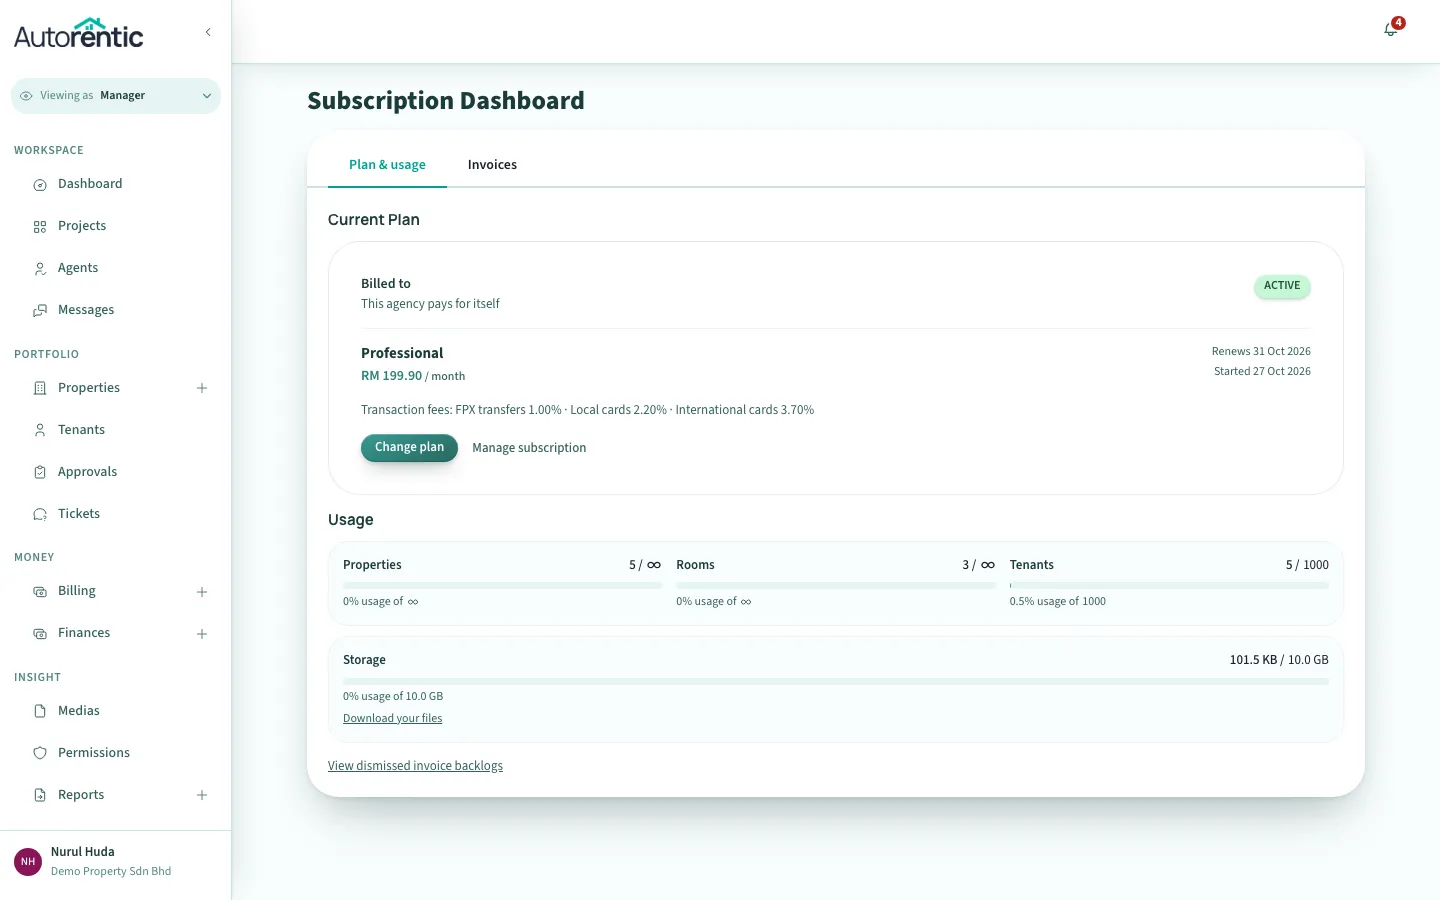
The page shows your current plan under Current Plan. Your plan name also appears at the top of your Profile page.
Your first week
Section titled “Your first week”Work through these in order. Each link opens a guide with the full steps.
- Add your first property. Read adding a property and its rooms.
- Add your first tenant and send the tenancy agreement for e-signing. Read adding a tenant and sending the tenancy agreement. If your tenants already signed on paper, read adding tenants you already have instead.
- Set up the monthly rent bill for each tenant. Read setting up monthly rent billing.
- Record rent a tenant paid you in cash or by bank transfer. Read recording a cash or bank-transfer payment.
- Check what you have earned and what has been paid out to you. Read checking your income and payouts.
Ready to try it?
Go back to Autorentic and do it now, while the steps are fresh.