

Adding tenants you already have
Guide published:
This guide is for tenancies that were signed before you started using Autorentic. If you want the tenant to sign online instead, follow adding a tenant and sending the tenancy agreement.
Prefer to watch first? This 30-second video shows the same screens, with no sound.
Which route to use
Section titled “Which route to use”- One tenant, agreement already signed on paper: choose Already signed in the Add Tenant form. Follow the first part of this guide.
- Many tenancies at once: use Import existing data. It takes one workbook. Follow the second part of this guide.
- A new tenancy the tenant should sign online: follow adding a tenant and sending the tenancy agreement.
Adding one tenant signed on paper
Section titled “Adding one tenant signed on paper”- Click Tenants under Portfolio.
- Click Add Tenant.
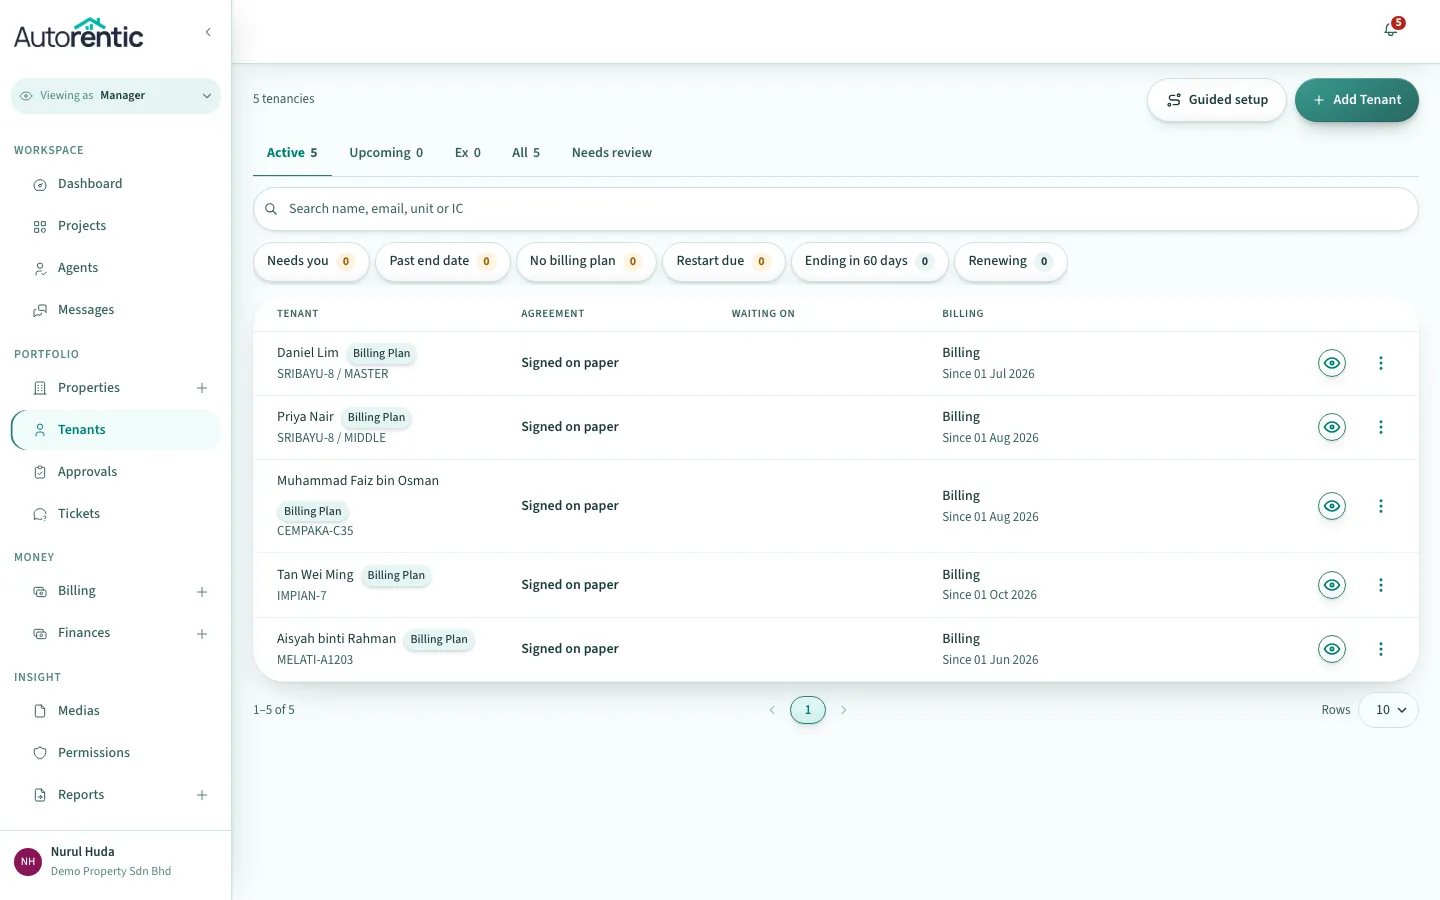
- Click Already signed.
- Type the tenant’s email in Email.
- Type the tenant’s First name.
- Type the tenant’s Last name.
- Type the tenant’s Contact number.
- Click Next: Unit.
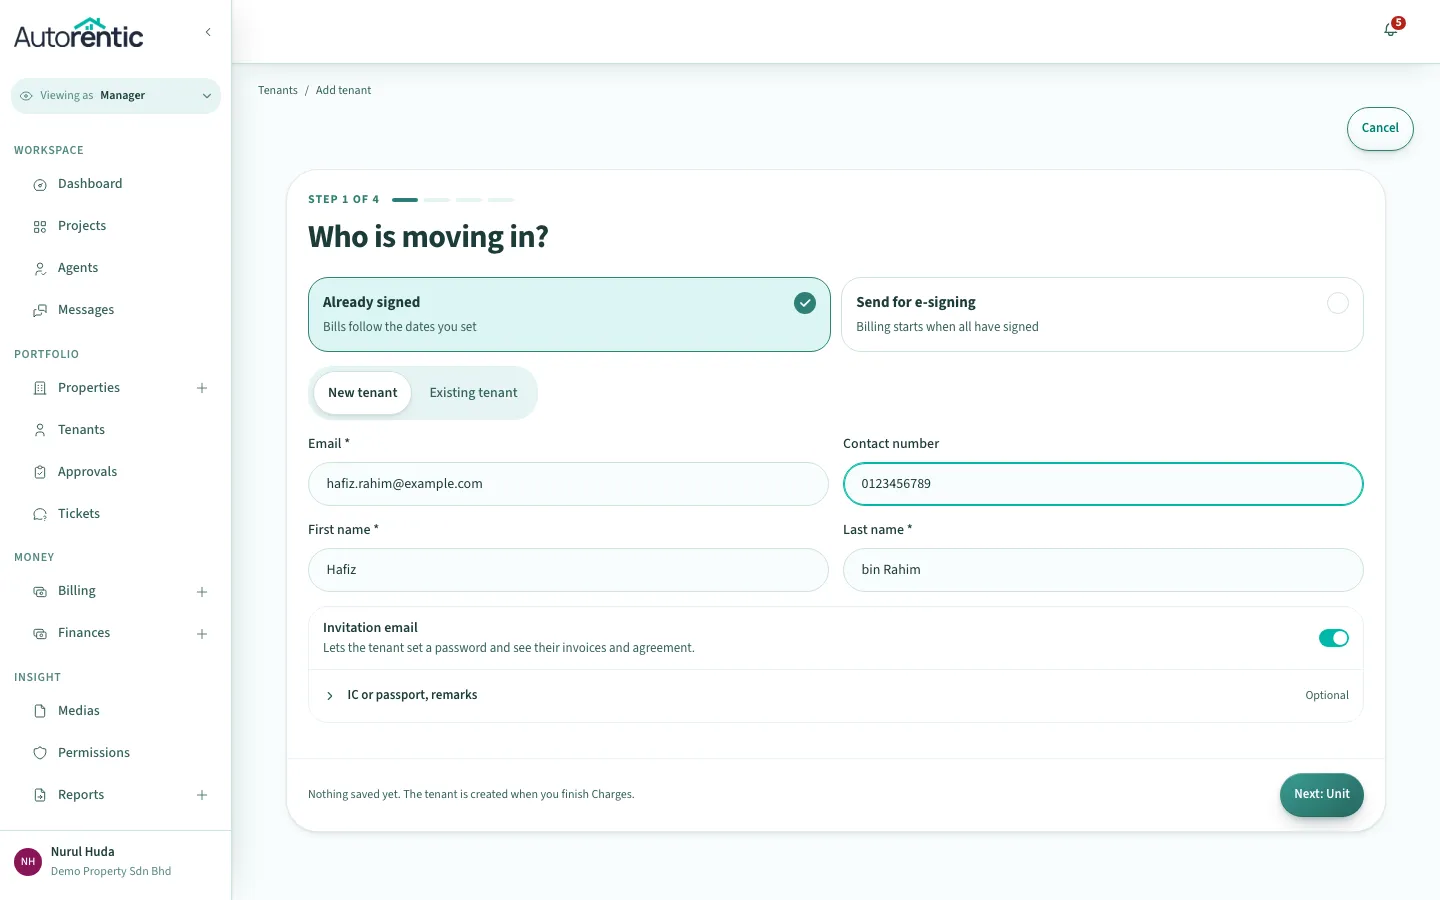
This route does not send the agreement for signing. There is no witness and nobody is asked to sign in Autorentic. The line under the route says Bills follow the dates you set.
The Invitation email box is ticked by default. The invitation lets the tenant set a password and see their invoices and agreement. Untick the box if you do not want the tenant invited.
Picking the unit
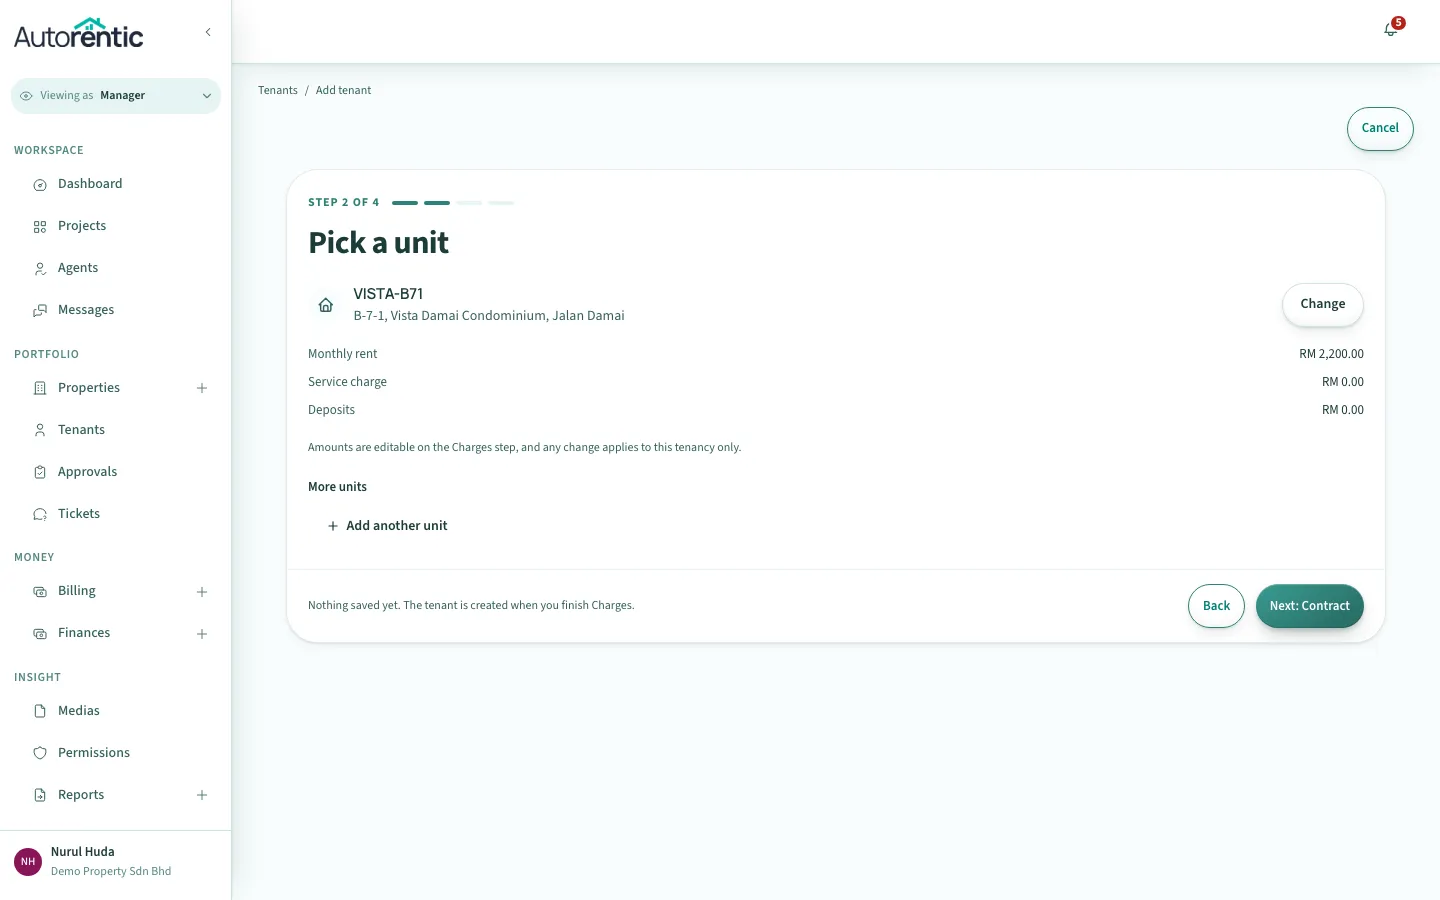
Section titled “Picking the unit”- Search for the unit by its property code and pick it from the list.
- Check the figures under the unit: Monthly rent, Service charge and Deposits.
- Click Next: Contract.
Setting the tenancy dates
Section titled “Setting the tenancy dates”- Check Move-in date and First rent due. These are the dates from the paper agreement.
- Choose the Tenancy length: 6 months, 1 year, 2 years or Custom.
- Click Next: Charges.
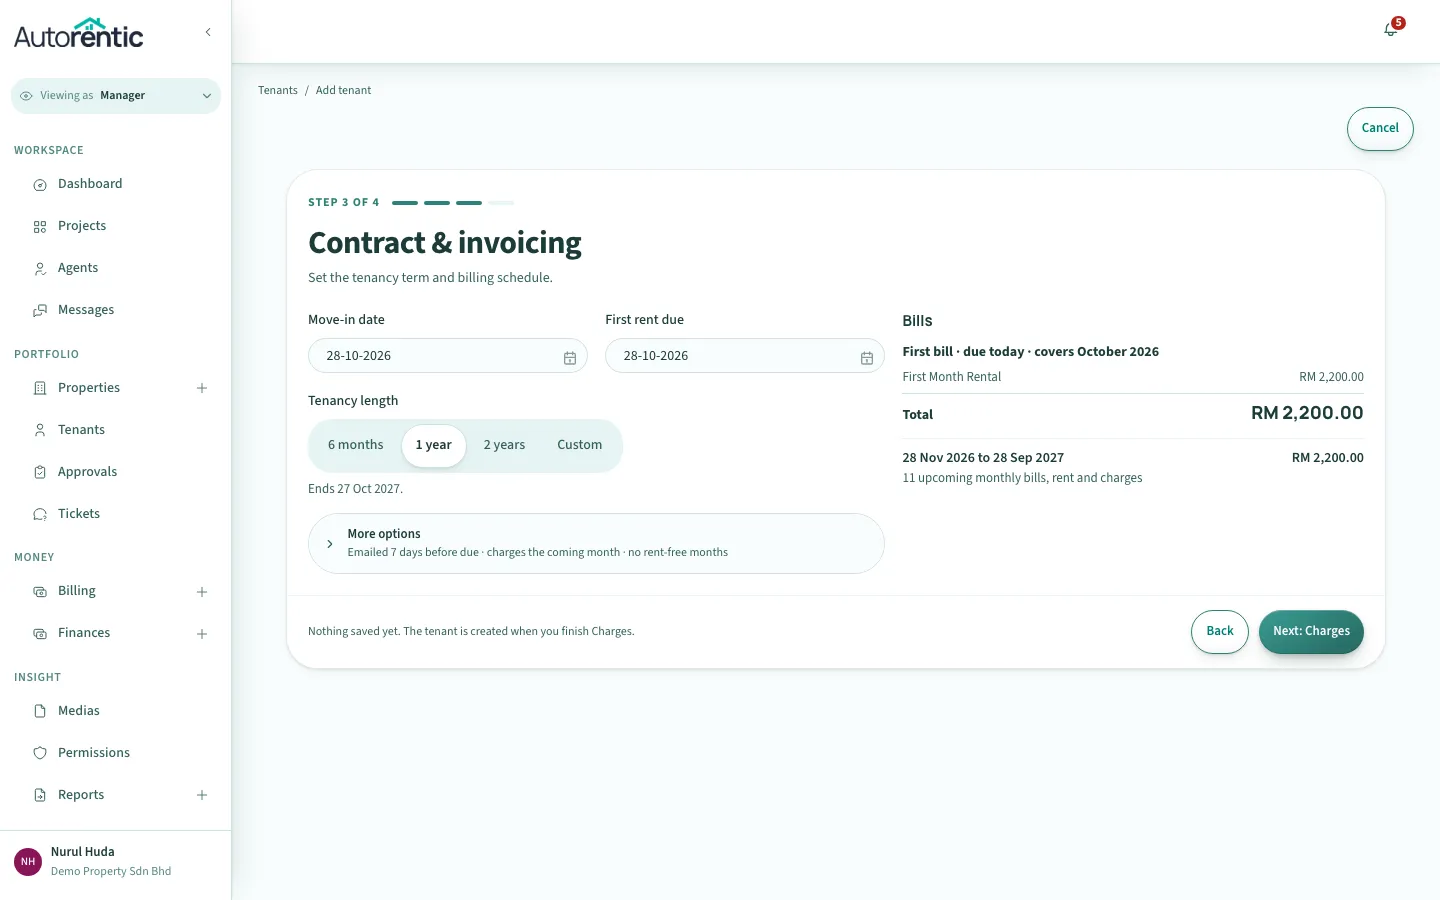
Bills follow these dates. The first bill in the confirmation step below uses them too.
Filing the signed copy
Section titled “Filing the signed copy”- Check the charges. The figures come from the unit, and a change applies to this tenant only.
- Under Signed agreement, choose Add later or File a copy.
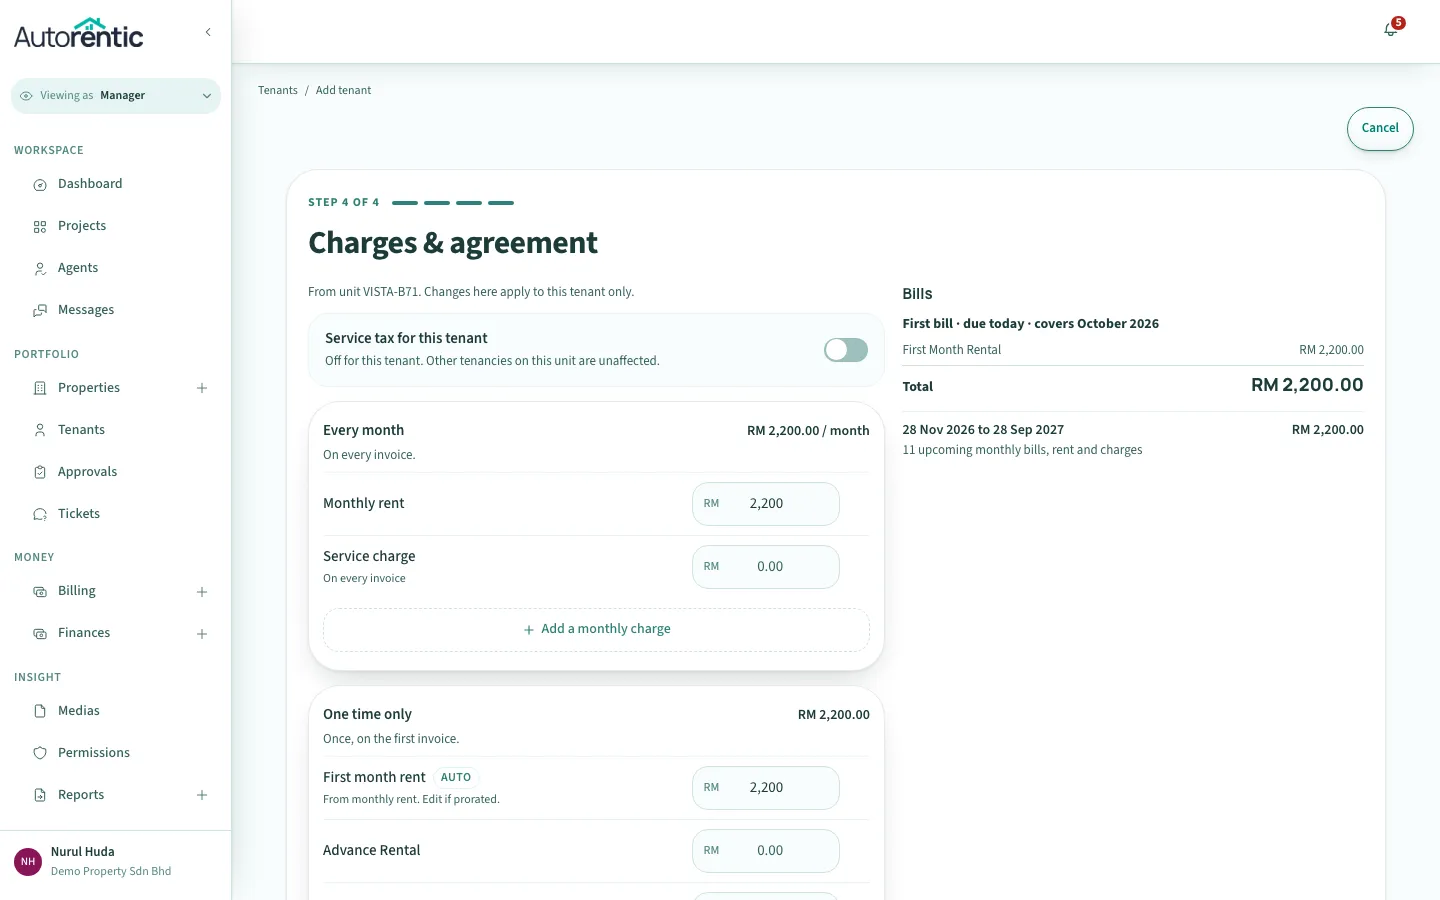
- Add later saves the tenancy without a signed copy.
- File a copy lets you keep the signed PDF in Autorentic. Continue with the next step.
- If you chose File a copy, click Choose PDF and pick the signed PDF from your computer. The drop area also takes a file dragged onto it.
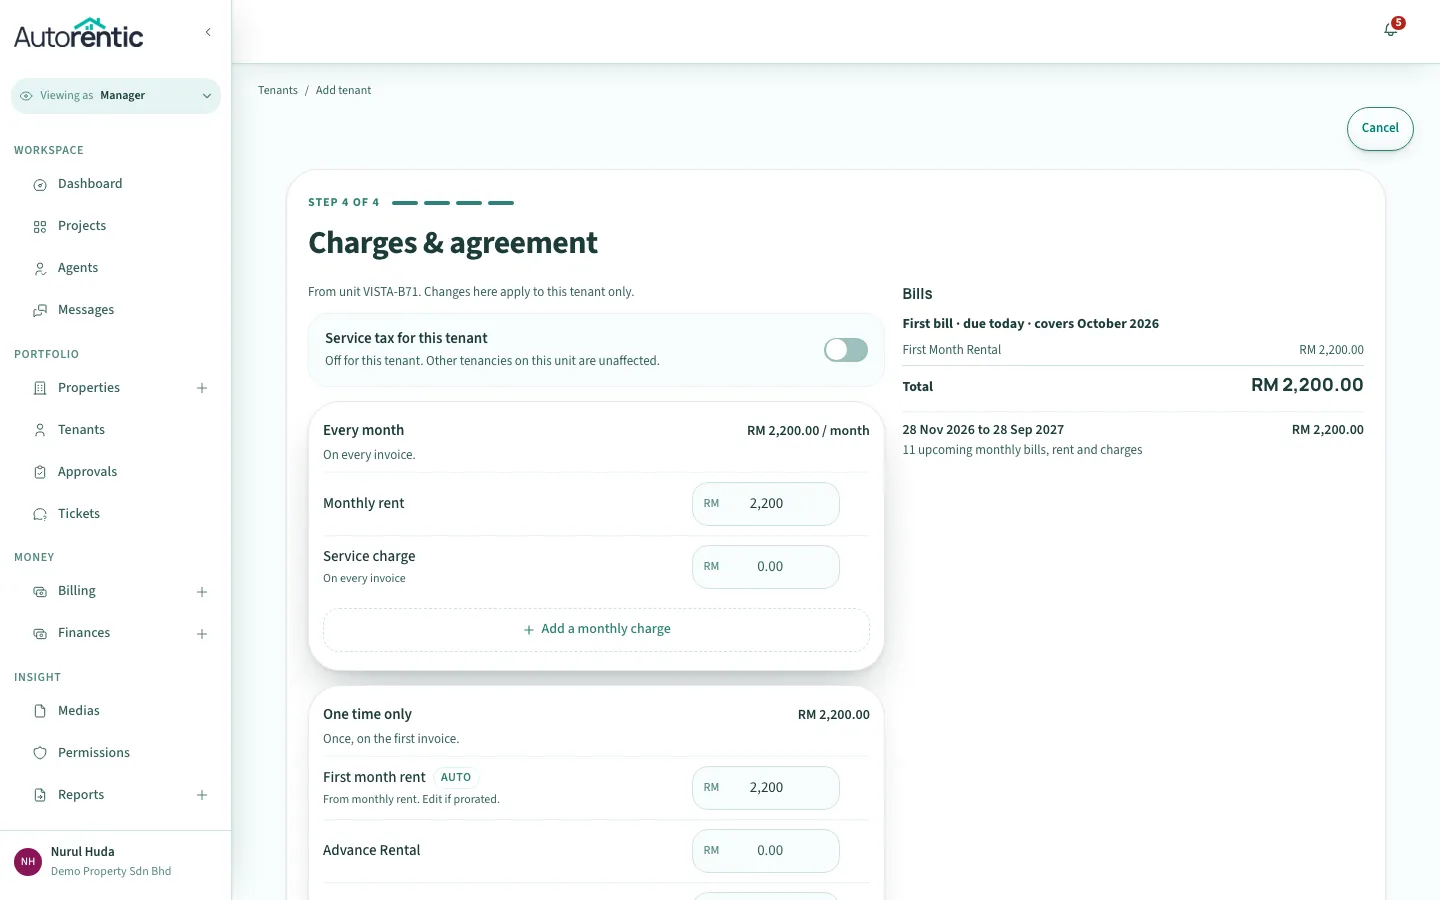
Only PDF files can be filed. Once the file is chosen, the wizard says Filed only. No one is asked to sign.
If the copy cannot be filed, the tenant is still added. Autorentic then shows Signed copy not filed. Keep your paper copy until the file is in Autorentic.
Confirming the first bill
Section titled “Confirming the first bill”- Click Add tenant.
- Read the dialog. It is titled Add [name]? and shows the first bill: its total, its due date, and the month it covers.
- Click Add tenant in the dialog.
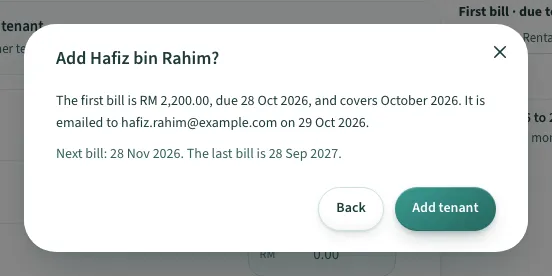
Nothing is saved until you click Add tenant in the dialog. The footer of the form also says You confirm the first bill before anything is saved.
How this differs from e-signing
Section titled “How this differs from e-signing”- There is no agreement to sign online, no witness, and no wait for the tenant to sign.
- Bills start from the dates you set. They do not wait for everyone to sign.
- You confirm the first bill before the tenant is saved.
Bringing many tenancies in at once
Section titled “Bringing many tenancies in at once”Only an agency admin can use the import.
- On the Properties page, click More.
- Click Import existing data.
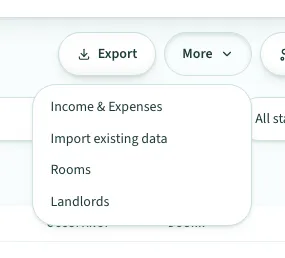
- Click Download workbook.
- Open the workbook and fill its tabs in order. The Read Me tab explains every column.
- Save the workbook as an Excel file (
.xlsx). The limit is 10MB. - Click the box that says Drop your filled-in workbook here, or click to browse, and choose your file.
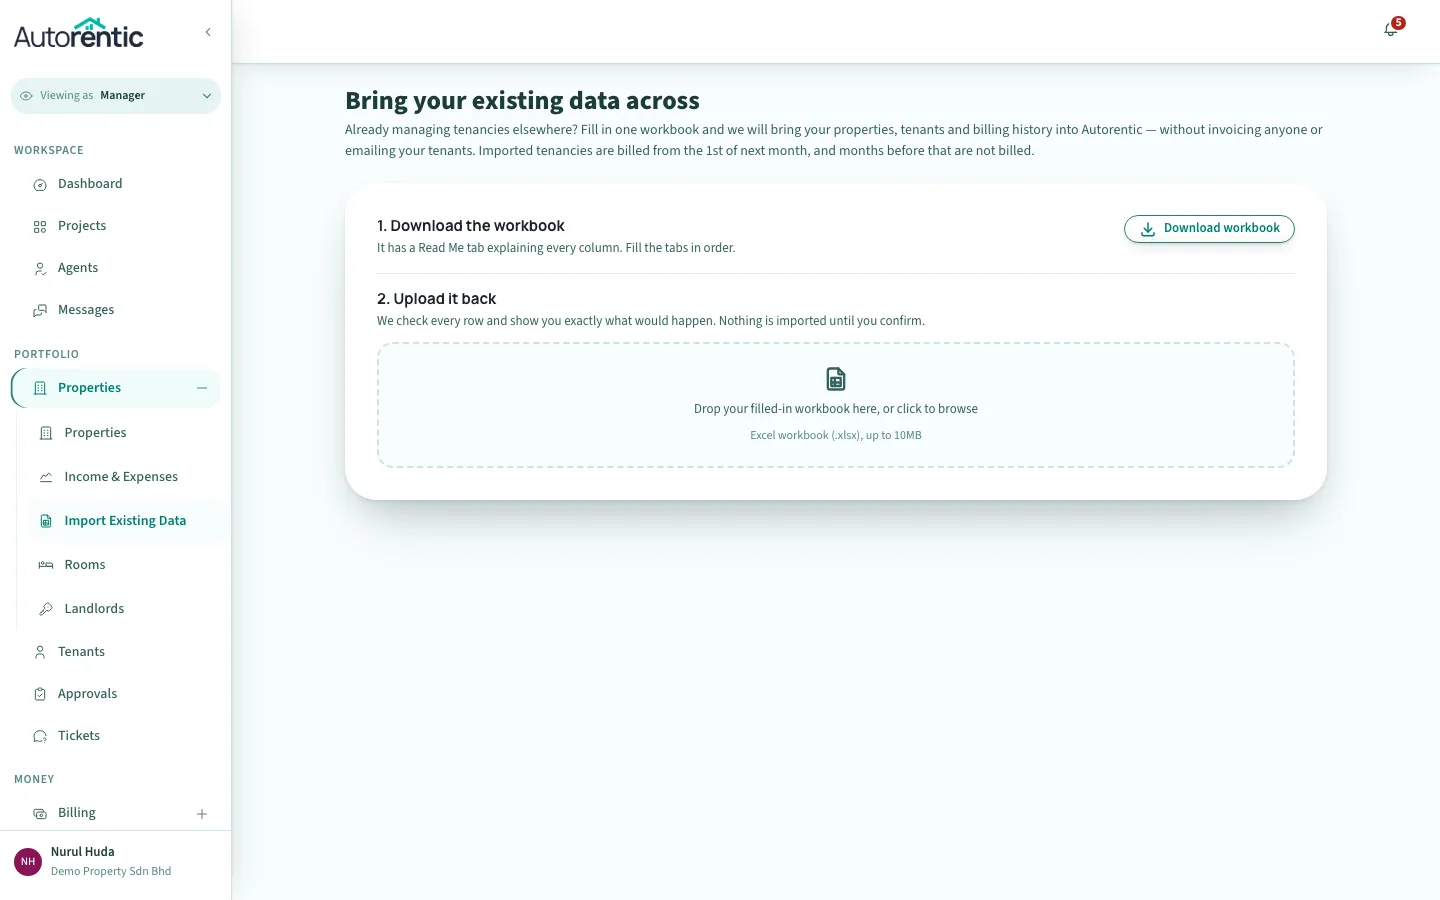
- Wait for 3. Check what will happen. Autorentic checks every row and shows what would happen. Nothing is imported yet.
- If the check lists problems, fix those rows in your workbook. Click Start over, then upload the workbook again.
- If the check finds no problems, click Import for real. The button stays greyed out while the check has errors.
- Read the result. Import complete means everything was brought across. Imported with some rows skipped means everything valid was brought across, and the rows listed still need attention.
The import brings your properties, tenants and billing history into Autorentic. It does not invoice anyone and does not email your tenants. Imported tenancies are billed from the 1st of next month. Months before that are not billed.
If the import says the uploaded file is gone, the page returns you to the upload step. Upload the workbook again.
What to do next
Section titled “What to do next”Once each tenancy is in place, check how its rent is billed in recurring bills.
Ready to try it?
Go back to Autorentic and do it now, while the steps are fresh.