

Setting up e-invoicing with LHDN MyInvois
Guide published:
Use this guide when you need your invoices sent to MyInvois, the e-invoice system of LHDN (the Inland Revenue Board of Malaysia). An e-invoice is an invoice that LHDN checks and marks as Valid or Rejected. Once your agency is set up, Autorentic can send your invoices to LHDN for you.
Prefer to watch first? This 20-second video shows the same screens, with no sound.
Nothing is sent to LHDN until you turn e-invoicing on. This guide shows you how to turn it on, then how to read the results.
Before you start
Section titled “Before you start”You need these details for your agency:
- Tax Identification Number (TIN). This is your agency’s tax number.
- Business Registration Number (BRN), if your agency is a company. If your agency is an individual, you need your NRIC (MyKad Number) instead.
- MSIC Code. This is a five-digit code for the business you do.
The Tax & E-Invoice settings also show a panel titled MyInvois Intermediary Setup. The app says this is required before you turn e-invoicing on. The panel holds the Autorentic company details that you add to the MyTax portal, so read it first.
Turn on e-invoicing
Section titled “Turn on e-invoicing”- Click your name in the menu to open the Account menu.
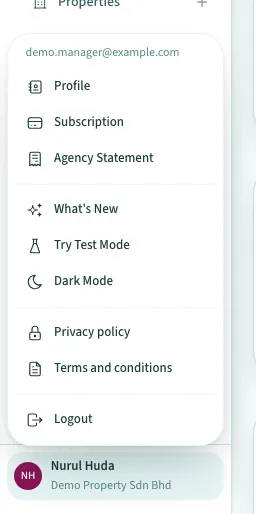
- Click Profile.
- Look at the Tax & E-Invoice tab. This is the read-only view. Click Edit Profile to change anything.
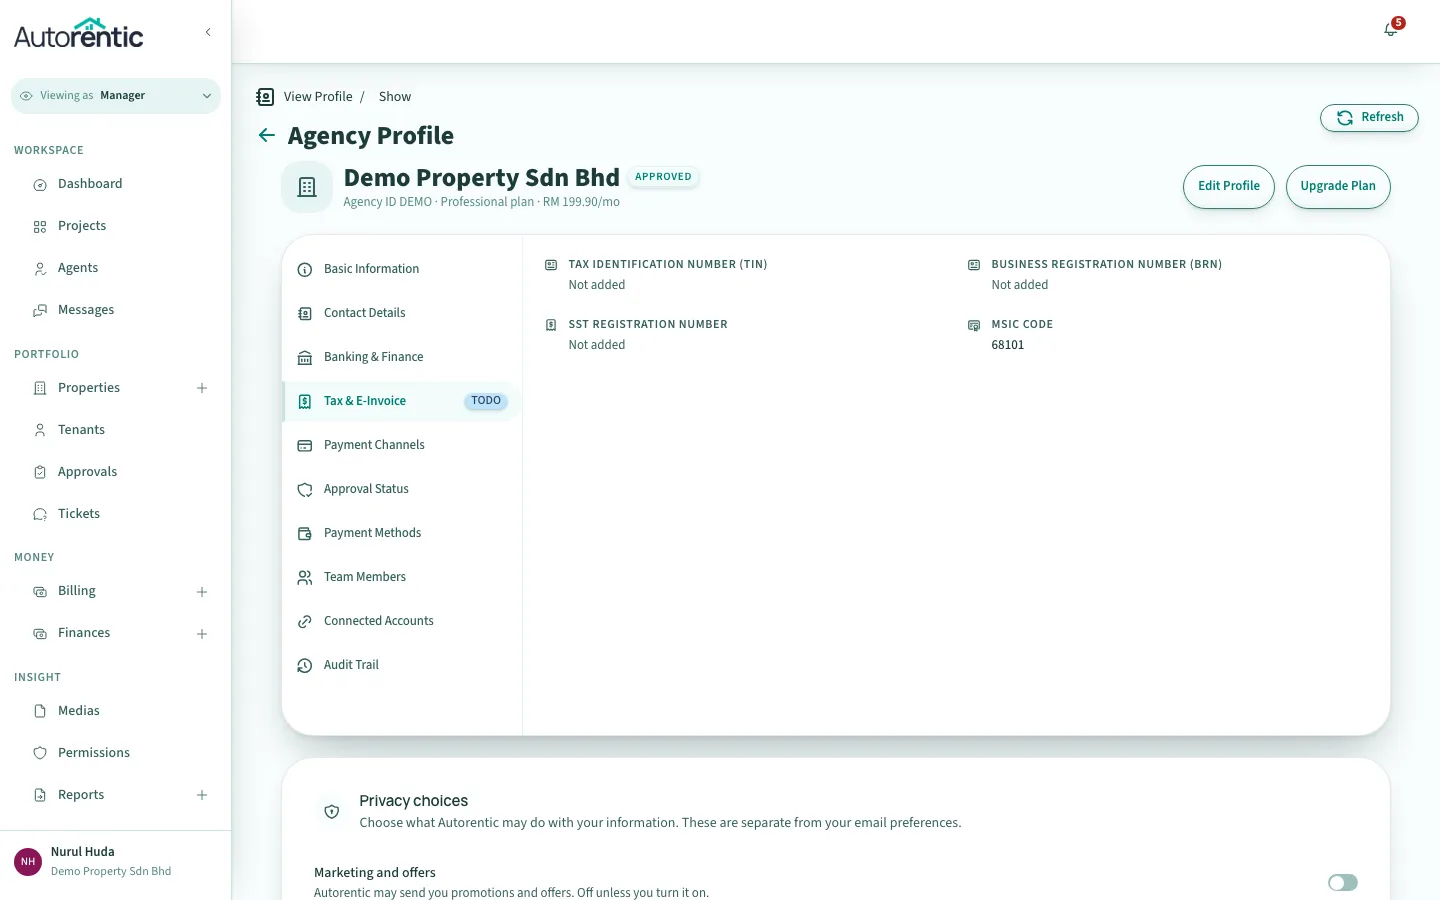
- Click Edit Profile. Then click the Tax & E-Invoice tab.
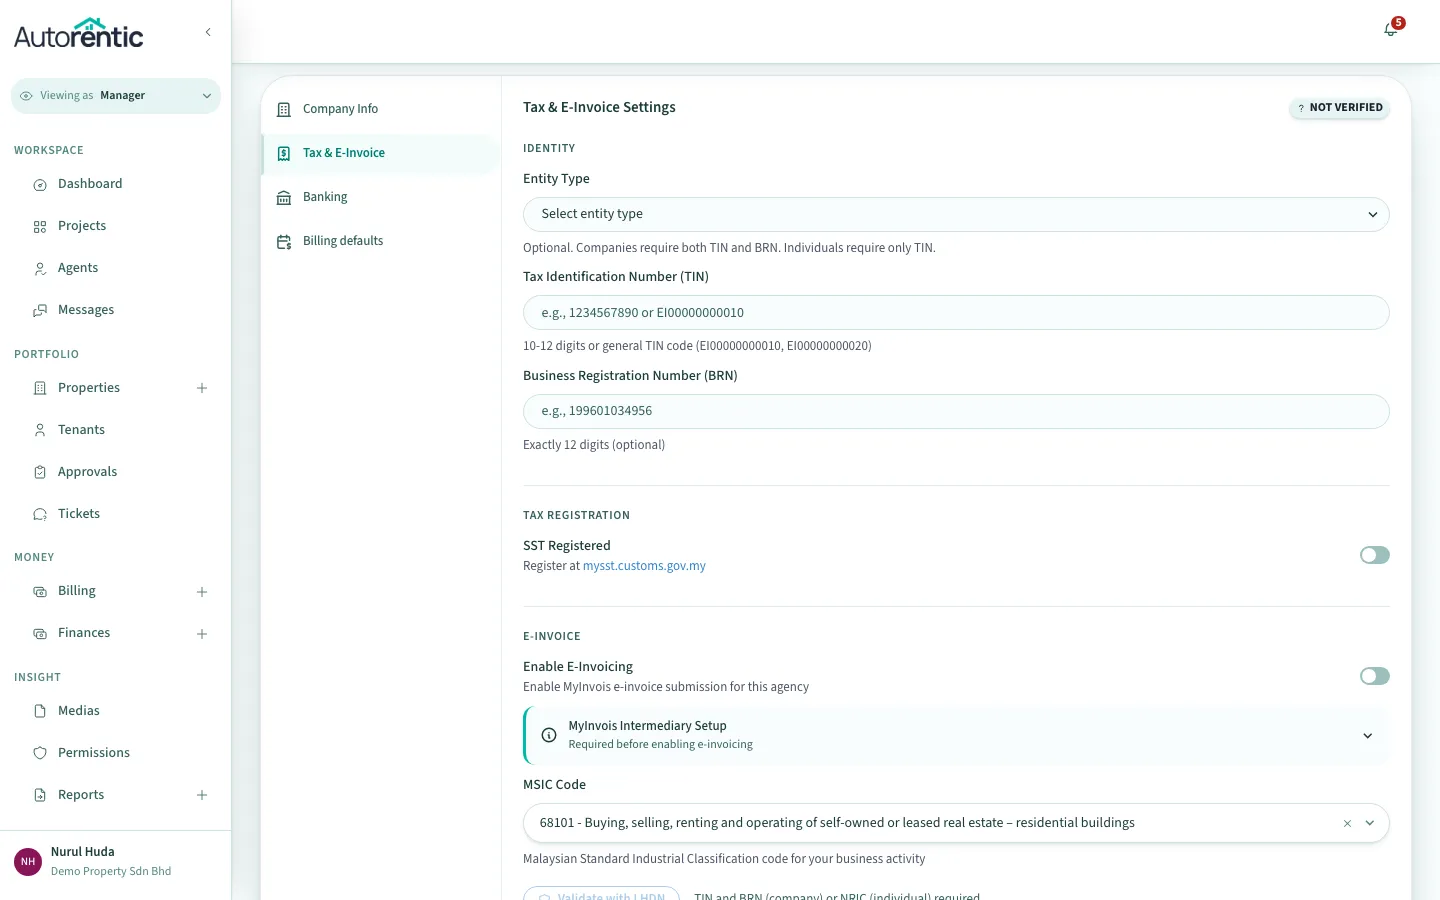
- Click the switch next to Enable E-Invoicing.
The fields you need now show a *. The Auto-Submit Invoices switch also appears.
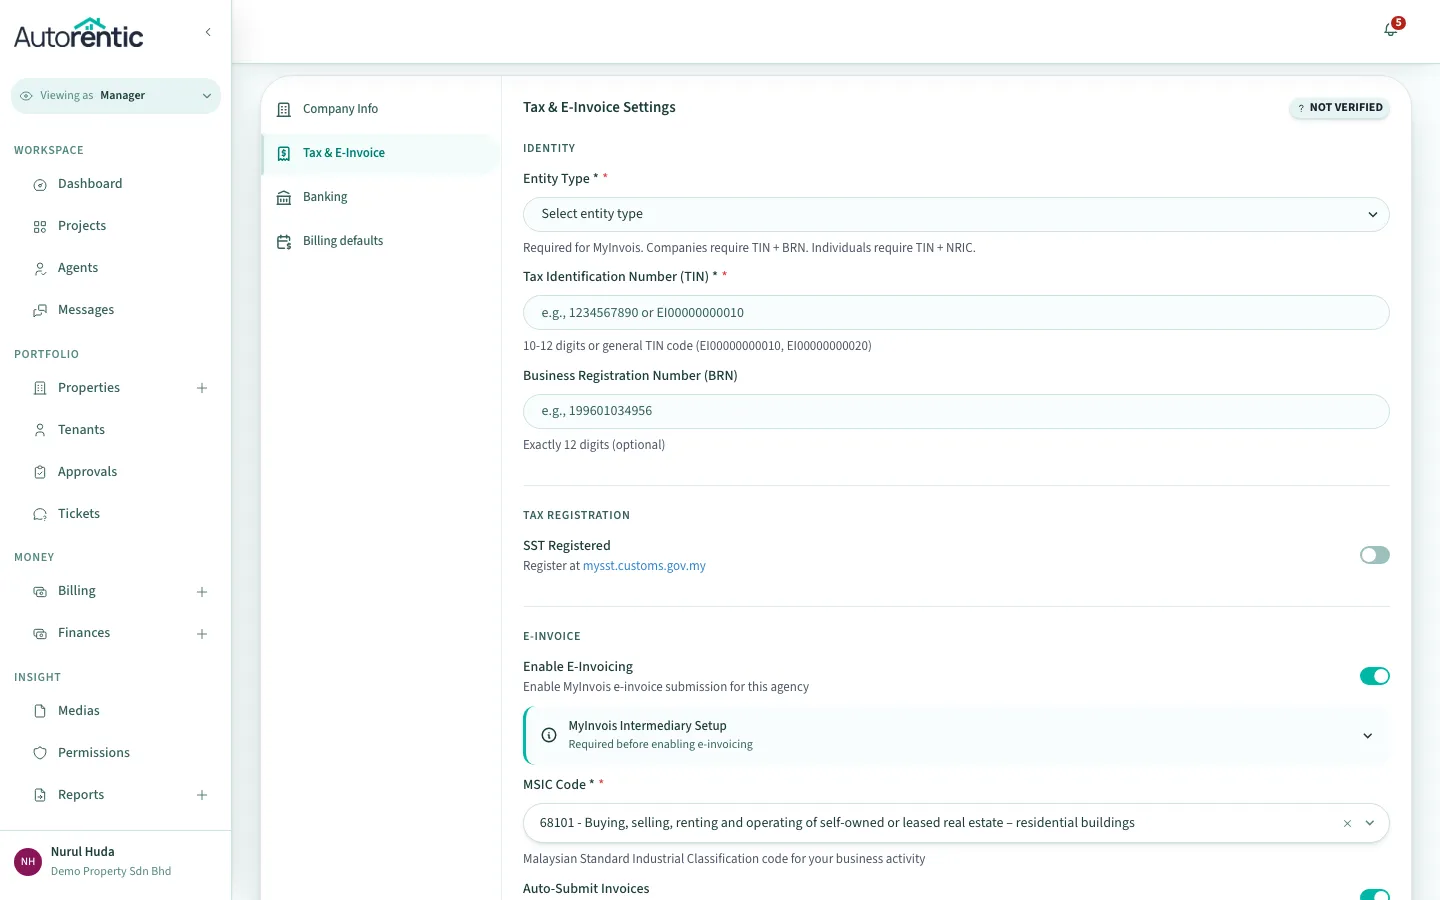
- Choose Entity Type: Company/Entity or Individual.
- Type your Tax Identification Number (TIN).
- Type your Business Registration Number (BRN) if you chose Company/Entity. Otherwise type your NRIC (MyKad Number).
- Choose your MSIC Code.
- Click Save Changes.
Each field checks its own rule when you save. A TIN is 10 to 12 digits, or one of the two general TIN codes shown in the field’s helper text. A BRN is exactly 12 digits. An NRIC is 12 digits, with or without dashes. An MSIC Code is exactly 5 digits.
You can also click Validate with LHDN before you save to check the TIN and BRN with LHDN.
Choose automatic or manual sending
Section titled “Choose automatic or manual sending”The Auto-Submit Invoices switch decides who sends each invoice to LHDN. It is on by default.
With Auto-Submit on: Autorentic sends an invoice to LHDN as soon as it is finalized. The switch also sends fixed-fee invoices to landlords.
With Auto-Submit off: you send each invoice yourself.
- Open the invoice from Billing, then Invoices.
- Click Manage.
- Click Submit to MyInvois.
The Submit to MyInvois item only appears when e-invoicing is on, the invoice is finalized, and the invoice has not been sent yet.
Read the e-invoice status
Section titled “Read the e-invoice status”Each invoice shows its status in the E-Invoice column of the invoice list. The same words appear in the e-Invoices list.
| On screen | What it means |
|---|---|
| Not submitted | The invoice has not been sent to LHDN. |
| With LHDN | Autorentic has sent it. LHDN has not answered yet. |
| Valid | LHDN accepted the invoice. |
| Rejected | LHDN did not accept the invoice. The reason is written under the status in the e-Invoices list. |
| Cancelled | The LHDN submission was cancelled. |
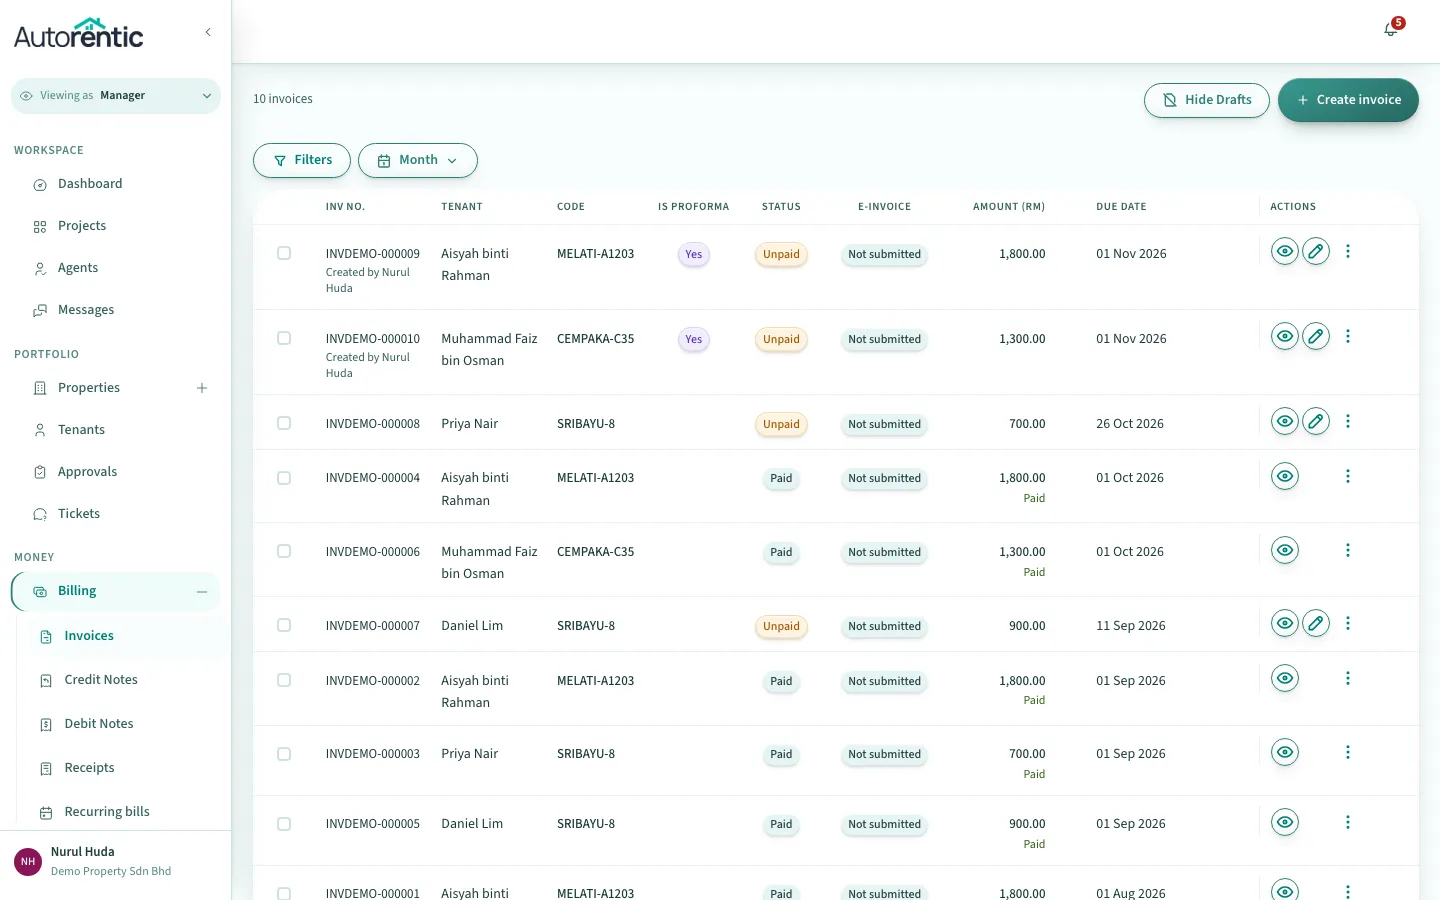
To see every attempt on one invoice, open the invoice and click MyInvois Submissions. Each attempt shows its status, the time it was submitted and any reason LHDN gave. This section only appears after an invoice has been sent. There are no sent invoices in the demo account, so this screen is described here and not shown.
Cancel a submitted invoice within 72 hours
Section titled “Cancel a submitted invoice within 72 hours”You can cancel an e-invoice in MyInvois only within 72 hours of its submission.
- Open the invoice, then click Manage.
- Click Cancel MyInvois. The item appears only while the invoice is With LHDN or Valid, and within 72 hours of its submission. After 72 hours it is gone.
- In Choose cancellation scope, pick one option:
- Cancel MyInvois Only. The LHDN submission is cancelled. The invoice stays active, and you can submit it again.
- Cancel Invoice Completely. The LHDN submission is cancelled and the invoice is cancelled in Autorentic. This cannot be undone.
- Type a Cancellation Reason (required).
- Tick I understand and confirm my decision.
- Click Confirm Cancellation.
The dialog shows Time remaining. It turns red when less than 12 hours are left.
If the invoice has a credit note or debit note that was also sent to LHDN, the cancellation is blocked. The dialog is titled Cannot Cancel Invoice and lists those notes. Cancel each one within its own 72 hours first, then cancel the invoice.
After 72 hours: issue a credit note
Section titled “After 72 hours: issue a credit note”When the 72 hours have passed, you can no longer cancel the invoice. Make a correction with a credit note instead. A credit note reduces the amount of the invoice.
- Open the invoice, then click Manage.
- Click Issue Credit Note (or Issue Credit Note (Local) on an invoice that was sent to LHDN). Your credit note is saved in Autorentic.
- To send the credit note to LHDN as well, open the invoice, click Manage, and click Submit Credit Note to LHDN. This item appears when the invoice has been sent to LHDN.
Find all your e-invoices
Section titled “Find all your e-invoices”The e-Invoices list shows every invoice, credit note and debit note sent to LHDN, plus landlord fee invoices.
- Click Finances under Money.
- Click e-Invoices.
The e-Invoices item only appears after you turn e-invoicing on. Until then, open it by address at /agency/e-invoices, where the page says that nothing has been sent yet.
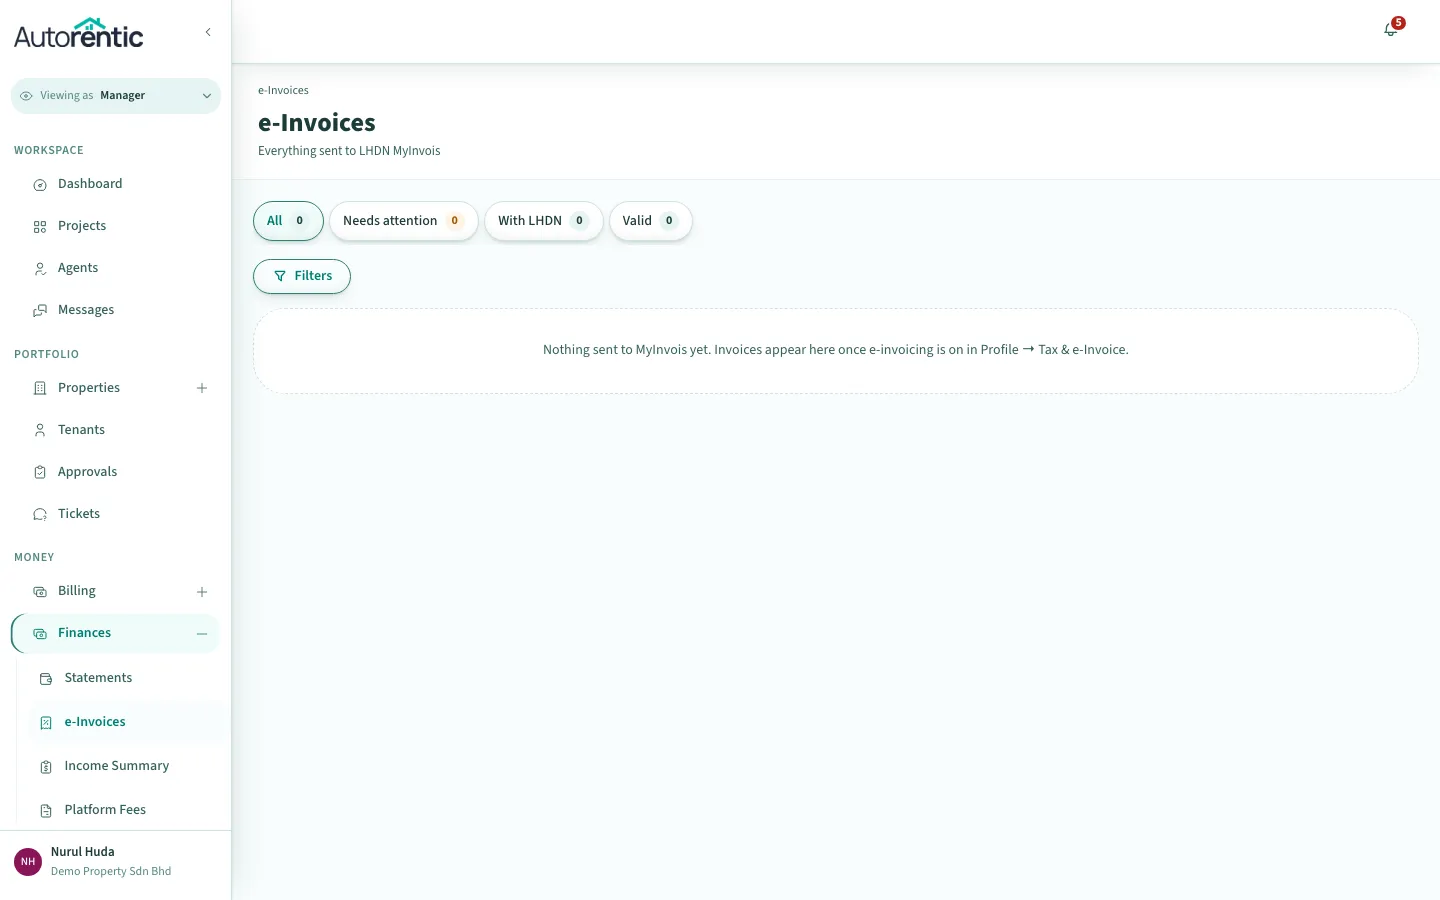
At the top are four filters: All, Needs attention, With LHDN and Valid. Each row shows the Document number, Billed to, Total, Status and the date it was Sent. You can also filter by Type, Sent date and Document number.
Click a row to open it:
- a tenant invoice opens the invoice,
- a credit note or debit note opens that note,
- a landlord fee invoice downloads its PDF.
A landlord fee invoice that LHDN rejected shows a Resubmit button in its row.
What to do next
Section titled “What to do next”- If an invoice shows Rejected, read the reason under the status in the e-Invoices list. Correct the detail it names, then open the invoice, click Manage, and click Submit to MyInvois.
- If an invoice shows Valid but was wrong, and the 72 hours have passed, issue a credit note, as described above.
- To see how invoices are created each month, read setting up monthly rent billing.
Ready to try it?
Go back to Autorentic and do it now, while the steps are fresh.