

Adding a property and its rooms
Guide published:
A property is the building or unit you rent out. When you add one, Autorentic first asks how you rent it: to one tenant for the whole unit, or to separate tenants room by room. Your answer decides the rest of the form and what each tenant pays, so choose it before you fill in anything else.
Prefer to watch first? This 30-second video shows the same screens, with no sound.
| Whole unit | By the room | |
|---|---|---|
| Who rents it | One tenant rents the whole property | Each room has its own tenant |
| Charges | One set of charges for the property | One shared set for all rooms, with its own charges for any room that differs |
| What gets created | 1 unit | 1 unit and one room for each room you add |
Both start the same way. This guide takes about five minutes for a whole unit and a little longer for rooms.
Creating a whole unit
Section titled “Creating a whole unit”- Click Properties under Portfolio in the menu on the left.
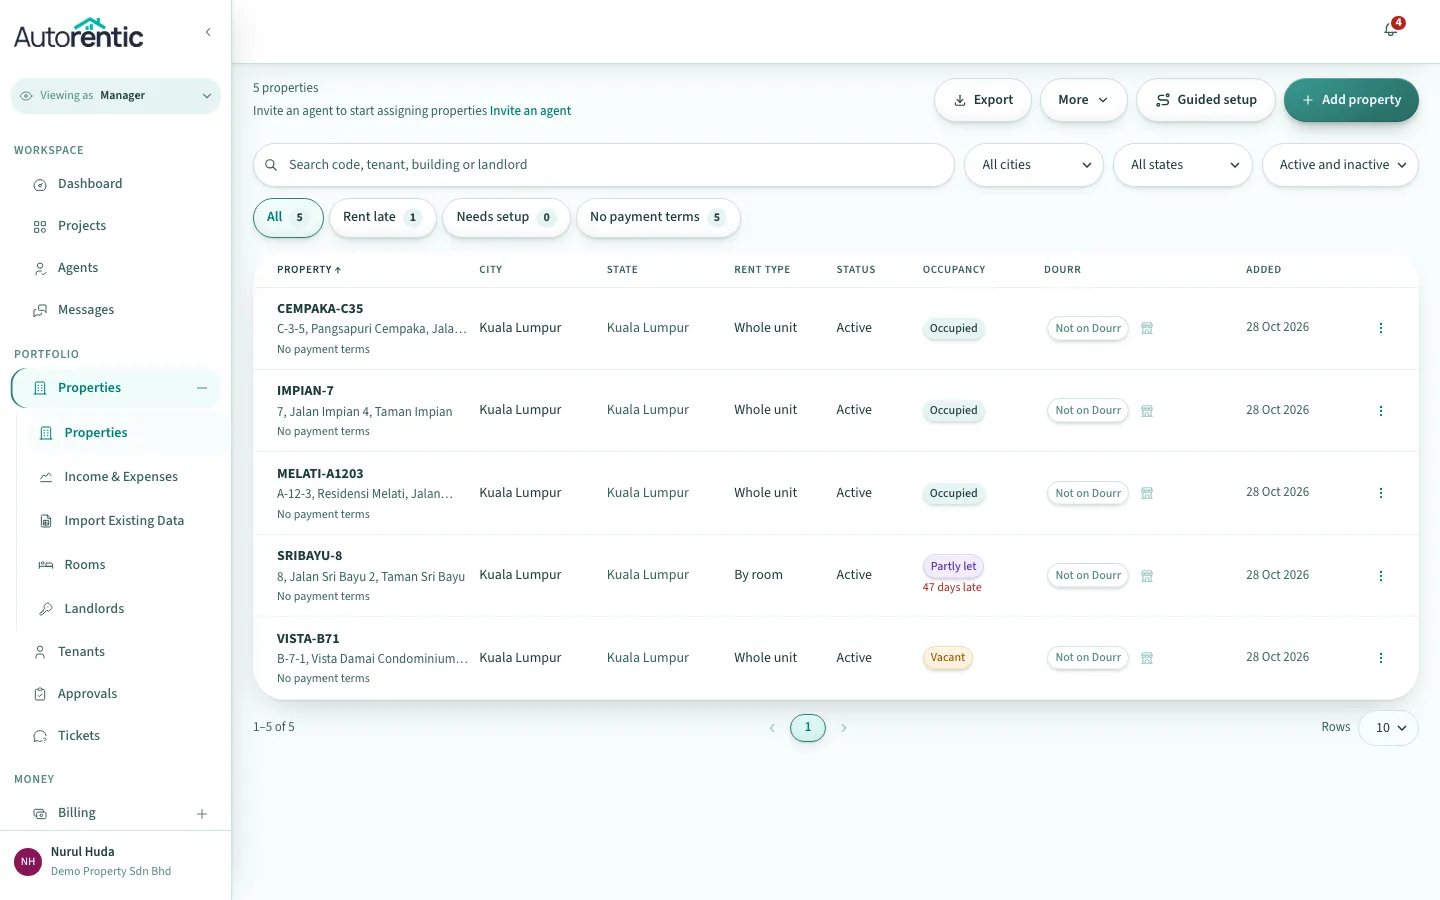
- Click Add property.
- Keep Whole unit selected. It is the default.
- Type a Property Code, your own short reference such as MKT01 or D01. It appears on invoices.
- Type the Property address.
- Type the City, choose the State and type the Postcode.
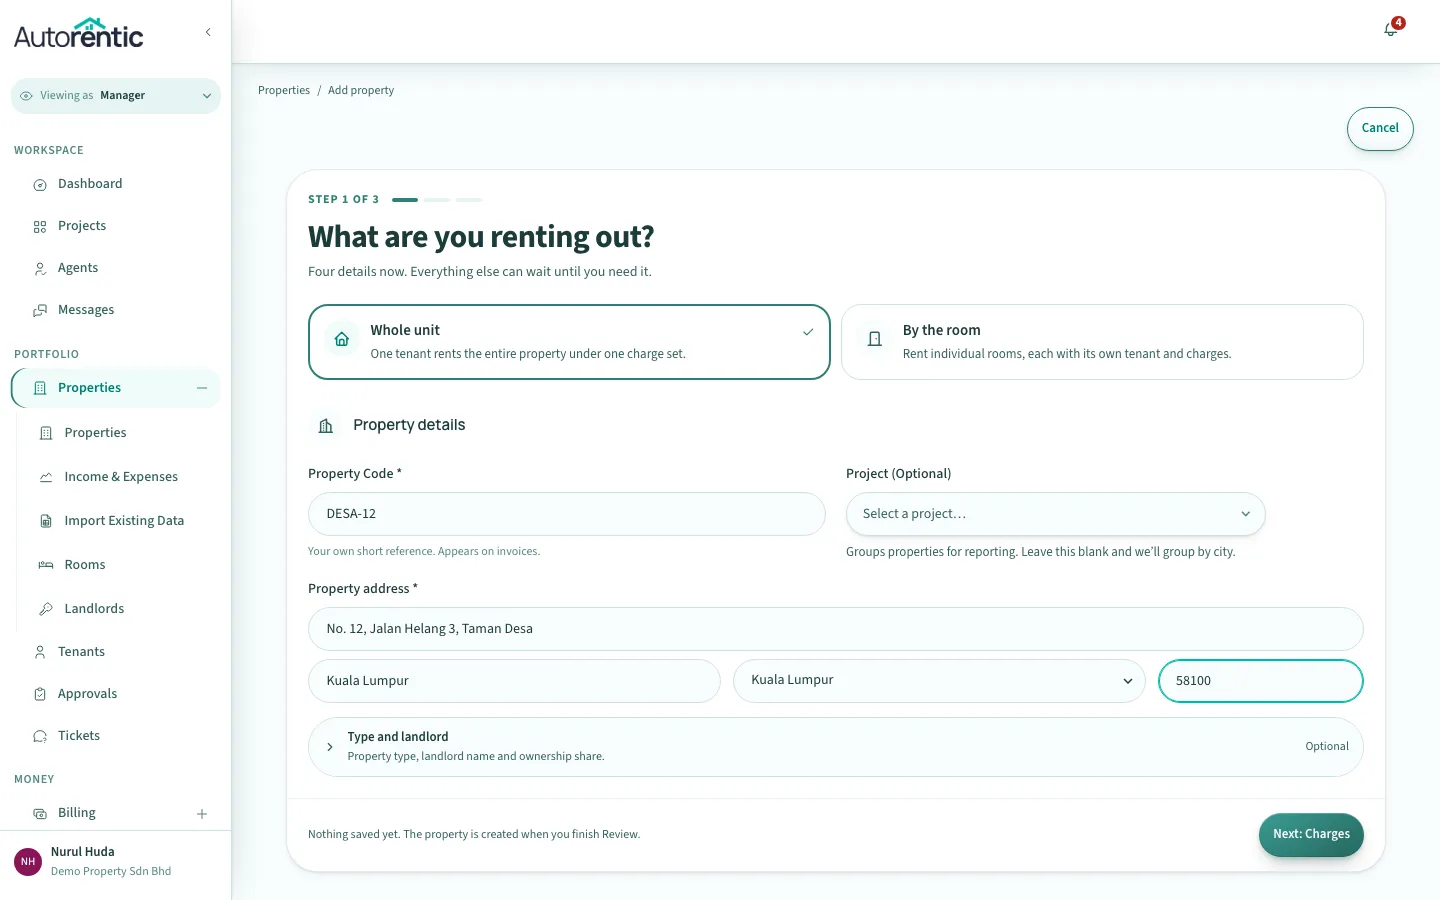
- Click Next: Charges.
- Type the Monthly rent in RM. First month rent fills in from it automatically. Change it only if the first month is prorated.
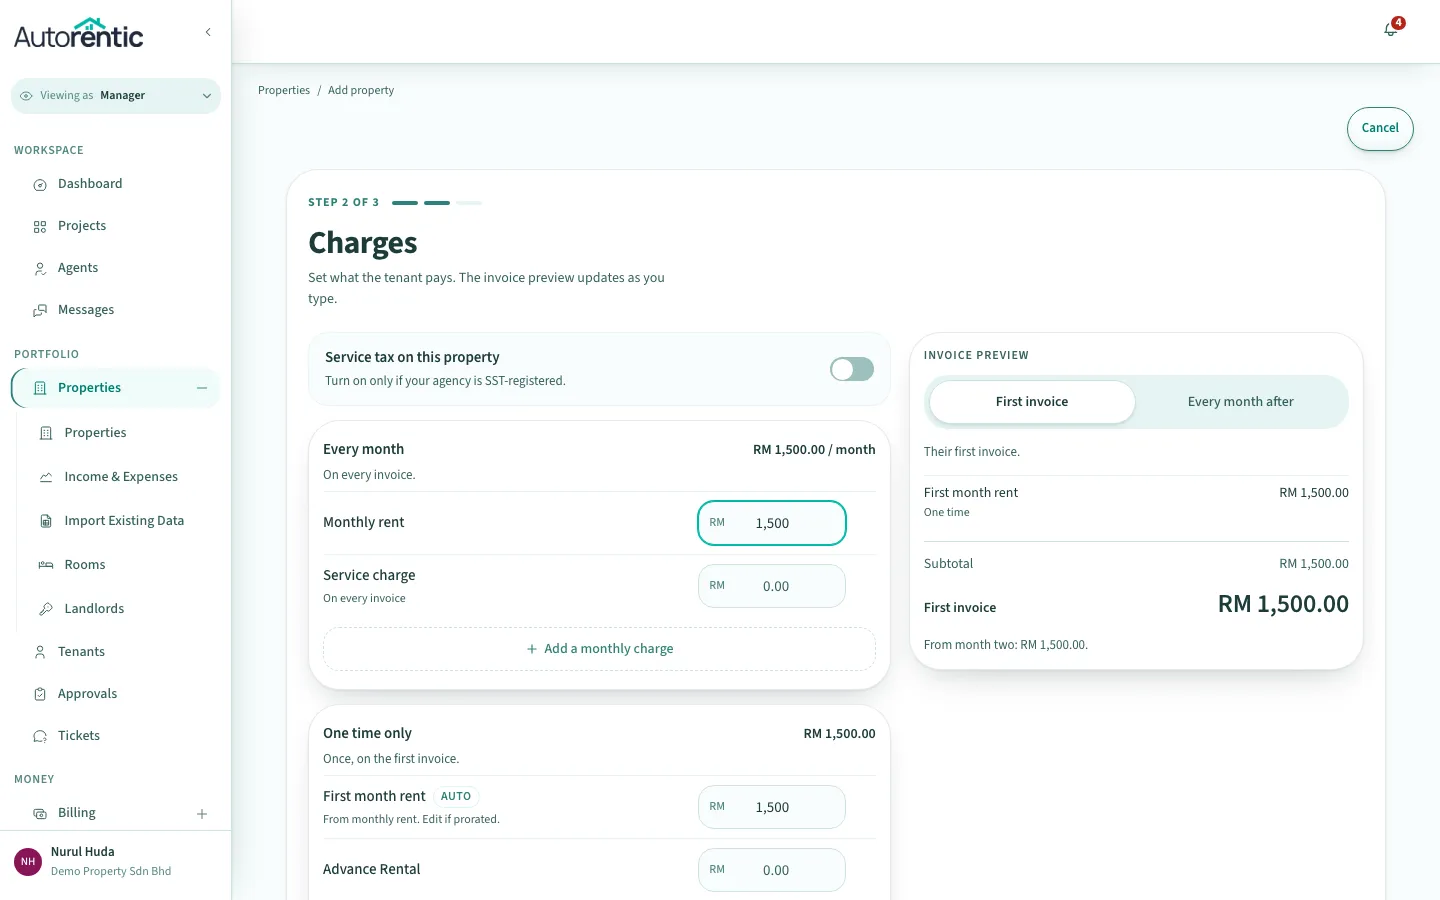
- Click Next: Review.
- Check the summary, then click Create property.
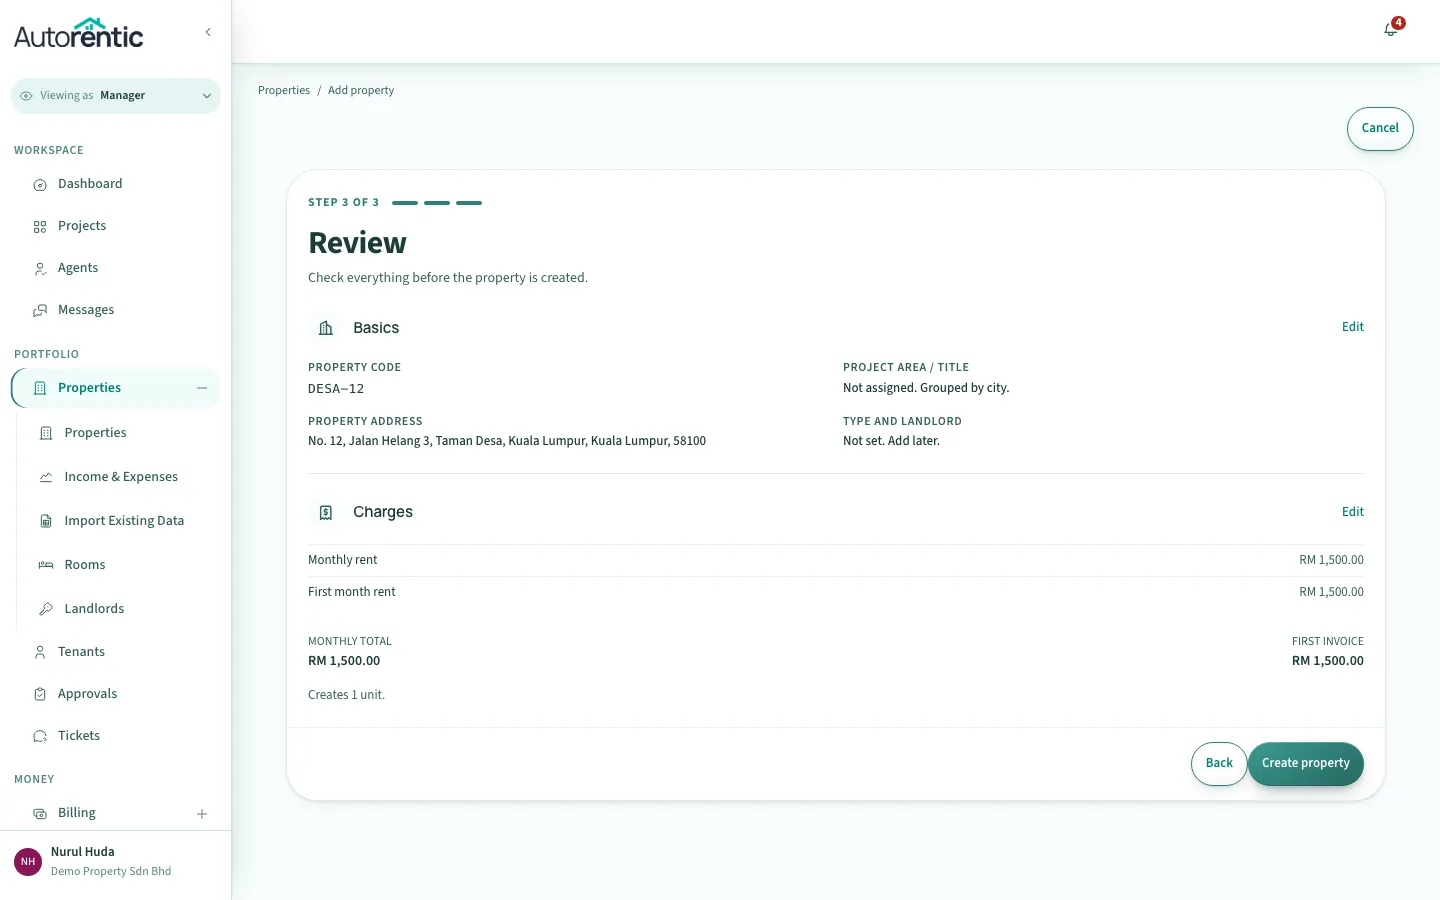
You go back to the Properties list. To find the new property, type its code in the search box, which reads Search code, tenant, building or landlord.
Creating a property by the room
Section titled “Creating a property by the room”Start as in the whole-unit steps 1 and 2. Then:
- Type the Property Code and the Property address, as in steps 4 to 6 above.
- Click By the room. Whole unit is no longer selected.
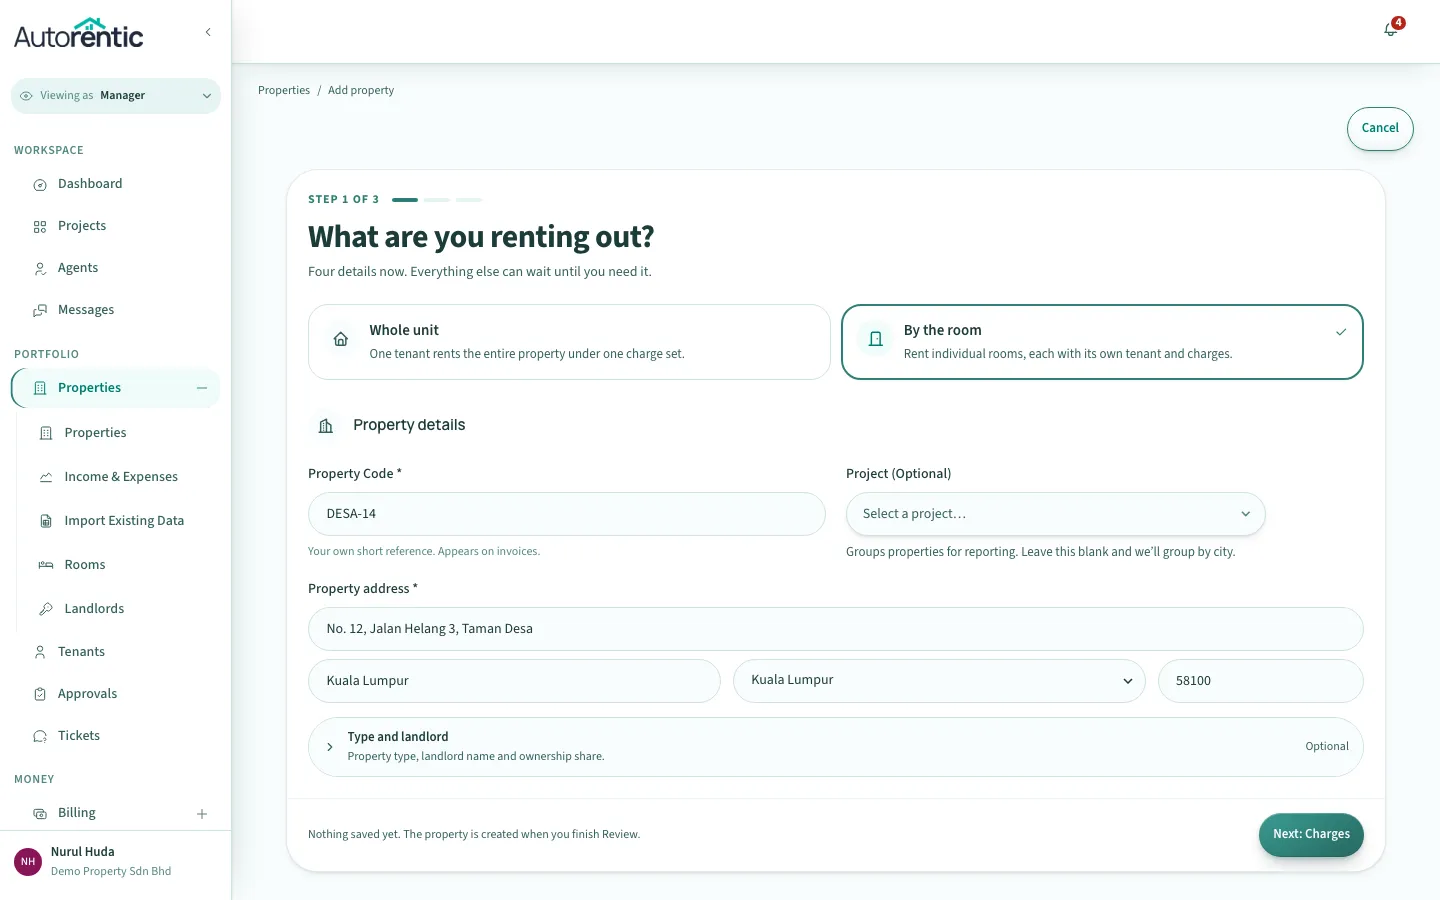
- Click Next: Charges.
- Type the monthly rent that every room pays. This is the shared set.
- Click Next: Rooms. The Rooms step opens with one room already in the list.
- Click Add room once for each further room. Rooms are named Room A, Room B and so on, and each gets a room code made from your property code, such as MKT01-A.
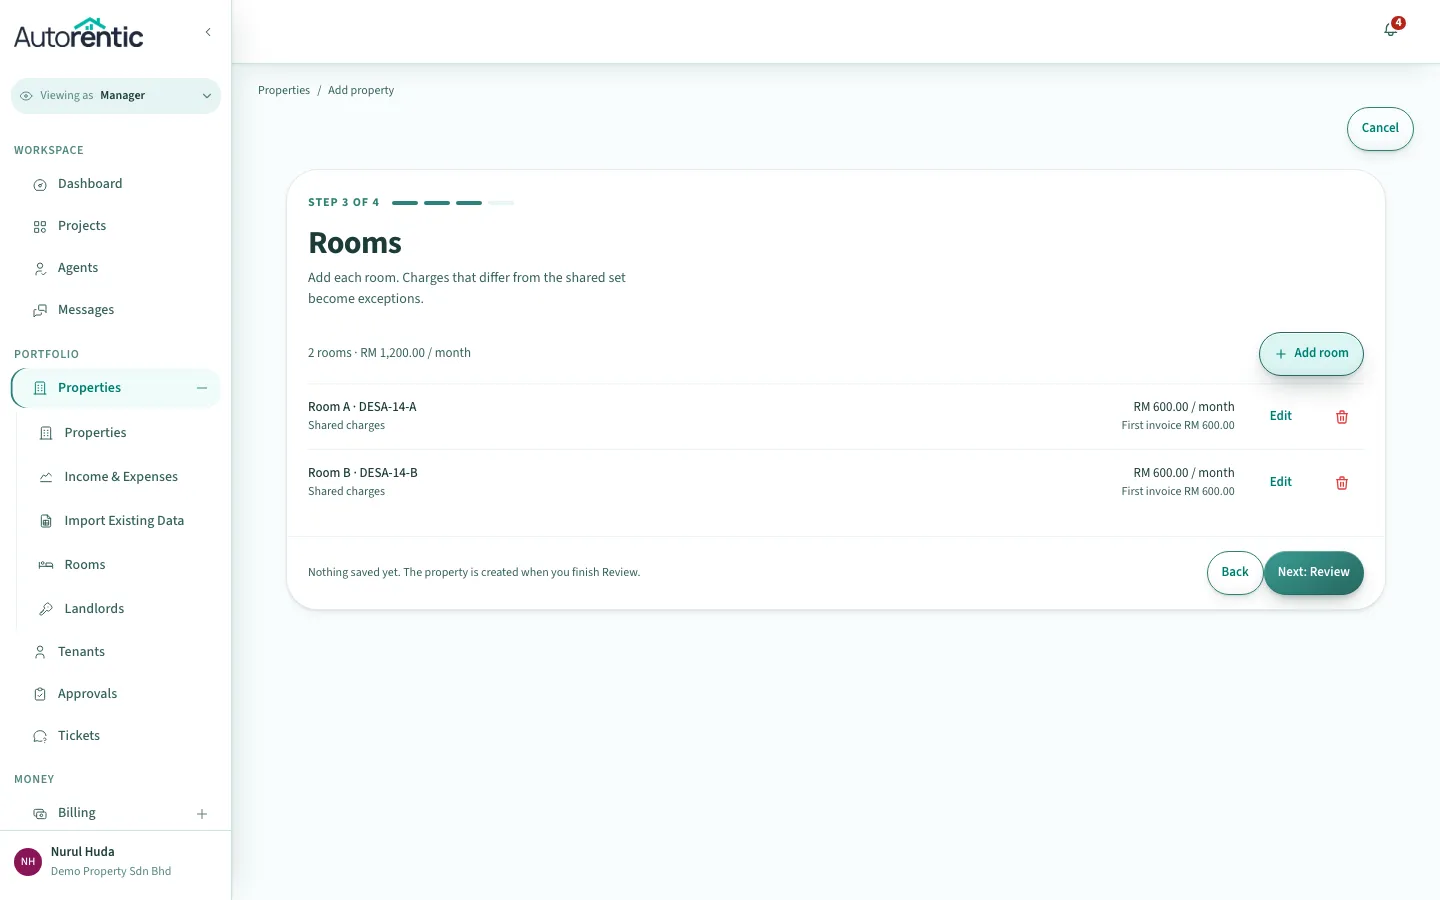
- For a room that pays a different amount, click Edit on that room, change its charges, and click Done. Only rooms that differ from the shared set are listed as exceptions.
- Click Next: Review and check the total for each room.
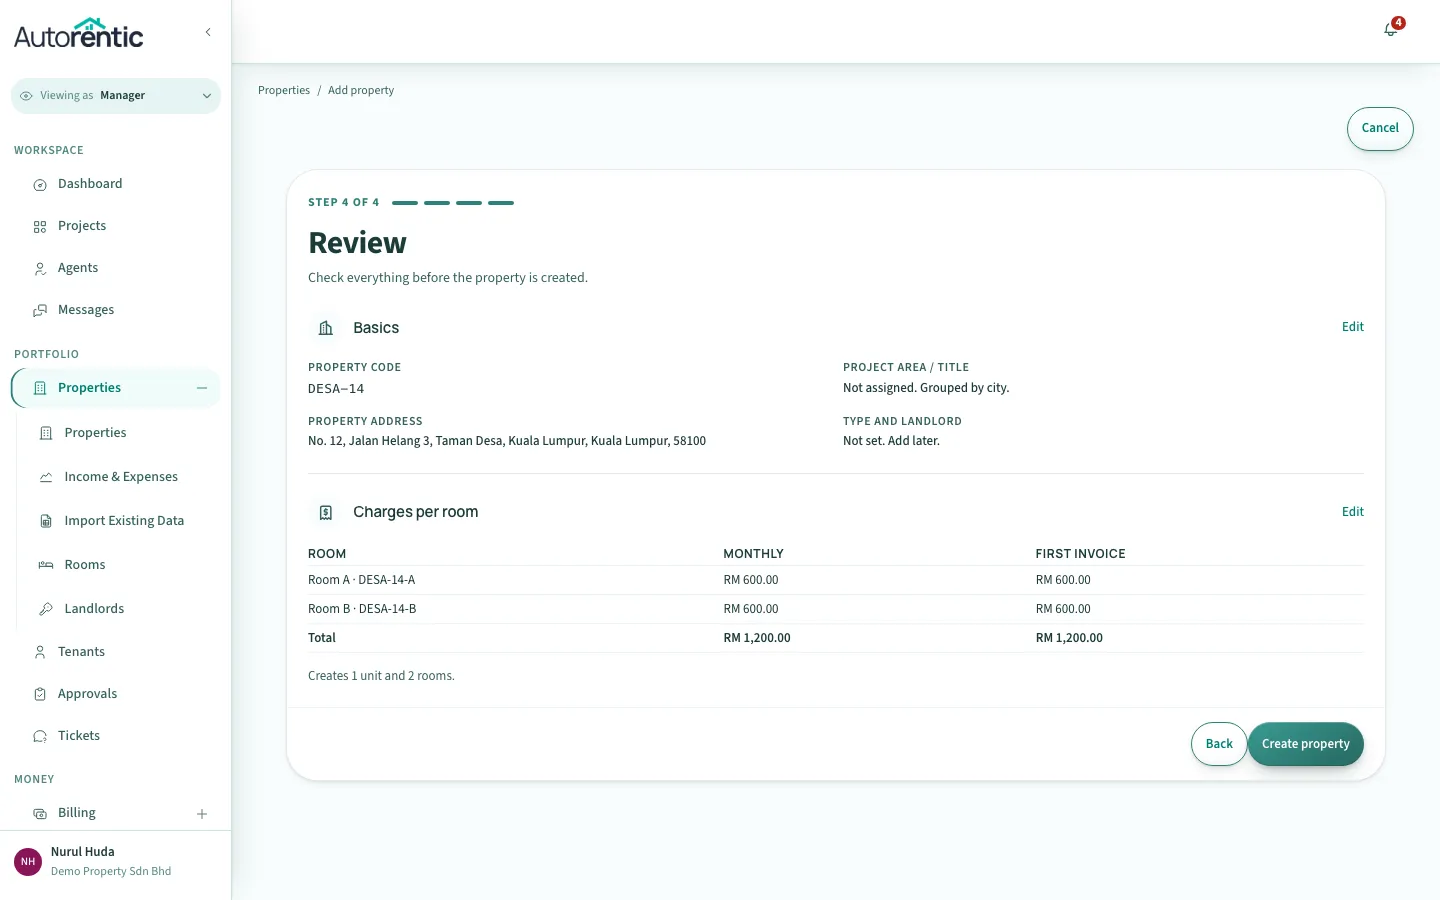
- Click Create property.
Adding a room to a property later
Section titled “Adding a room to a property later”Rooms can be added after the property exists, but only to a property rented by the room.
- Click Properties under Portfolio.
- Click the More actions icon (three dots) at the end of the property’s row, then click Edit.
- Click the Rooms tab. If the property is rented as a whole unit, there is no Rooms tab. See the note below.
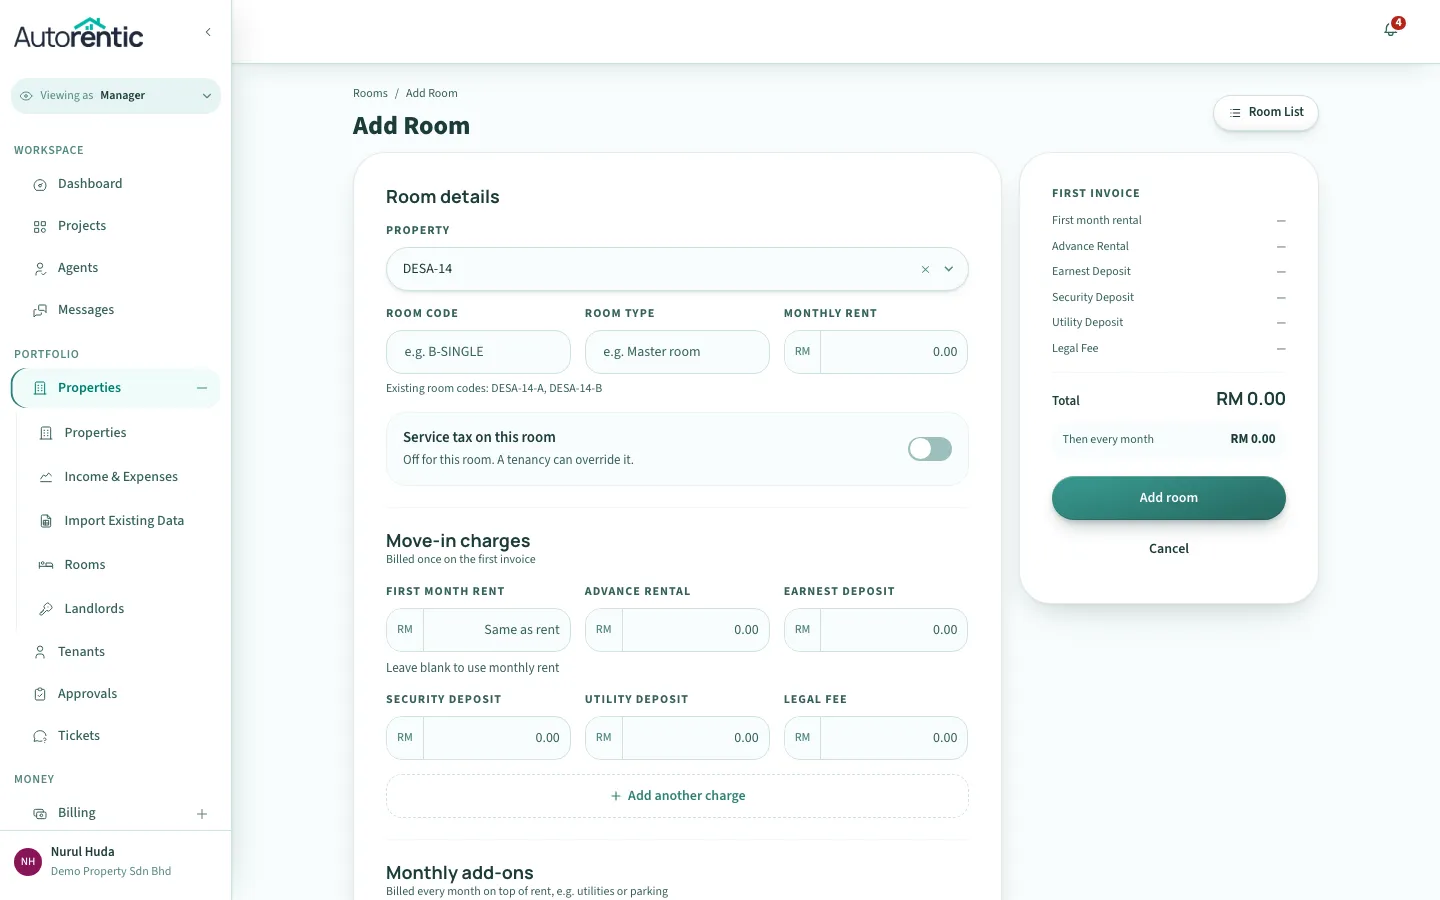
- Click Add room at the top right of the list.
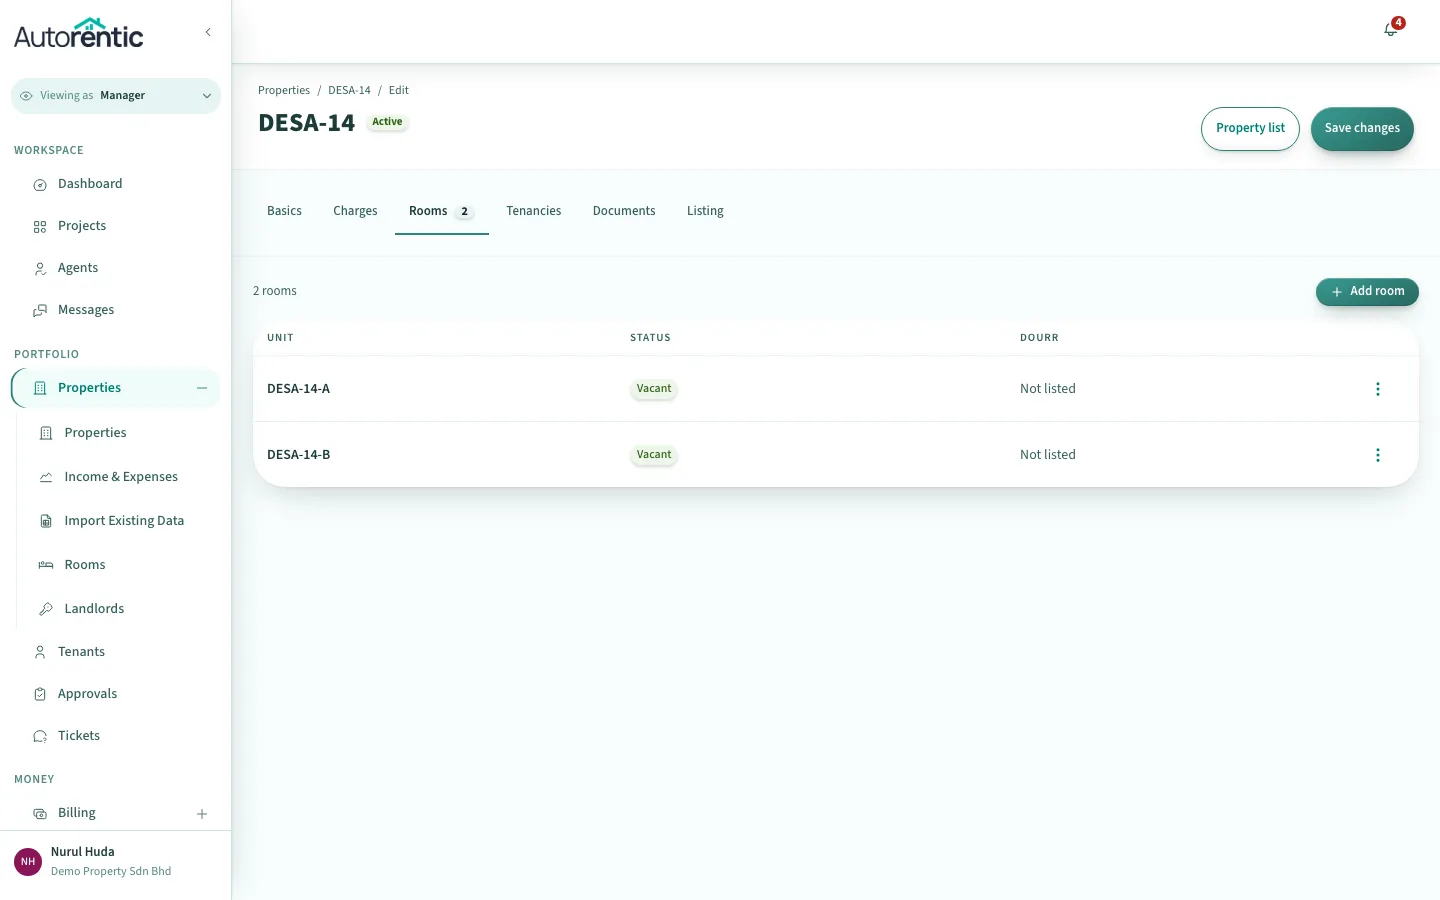
- Type a Room Code, such as B-SINGLE. The form lists the codes already used for this property under the field, so pick one that is not on that list.
- Type the Monthly Rent. You can also add a Room type, such as Master room. Leave First month rent blank to use the monthly rent.
- Check the First invoice panel on the right, then click Add room.
If the property is a whole unit and you want rooms: open its Edit page, go to the Basics tab, change the rent type to a room, and click Save changes. Changing a room property back to a whole unit removes its rooms, after you confirm. If a room still has a tenant, the switch is blocked until that tenant is removed.
What to do next
Section titled “What to do next”Once the property or its rooms exist, add a tenant and send the agreement. For a quick tour of the menu first, read Finding your way around.
Ready to try it?
Go back to Autorentic and do it now, while the steps are fresh.