

Ending or renewing a tenancy
Guide updated: The Invoices step now lists bills prepared but not yet sent, so you choose which ones to cancel.See all changes to this guide
Use this guide when a tenant’s end date is close or has passed. You can renew the tenancy for a new term, or you can end it. A tenancy is the arrangement for one unit. An agreement is the signed document. A renewal adds a new term to the same tenancy, so the tenant keeps the same statement of account and the same deposit.
Prefer to watch first? This 15-second video shows the same screens, with no sound.
Find the tenancies that need a decision
Section titled “Find the tenancies that need a decision”The Tenants list, under Portfolio, marks a tenancy Ending soon when its end date is within 60 days. A tenancy past its end date, with no renewal recorded, shows Past end date. Autorentic stops billing a tenancy on its end date, so rent is not invoiced after it until you renew.
The Dashboard can also show a notice titled A tenancy has ended, or N tenancies have ended. It appears when a tenancy’s end date has passed and no billing plan is running for it. Click Review tenancy, or Review tenancies when there are several, to open that tenant’s billing tab. The notice names the tenant and the date the tenancy ended. It names up to three tenants and shows the rest as a number.
Renew a tenancy
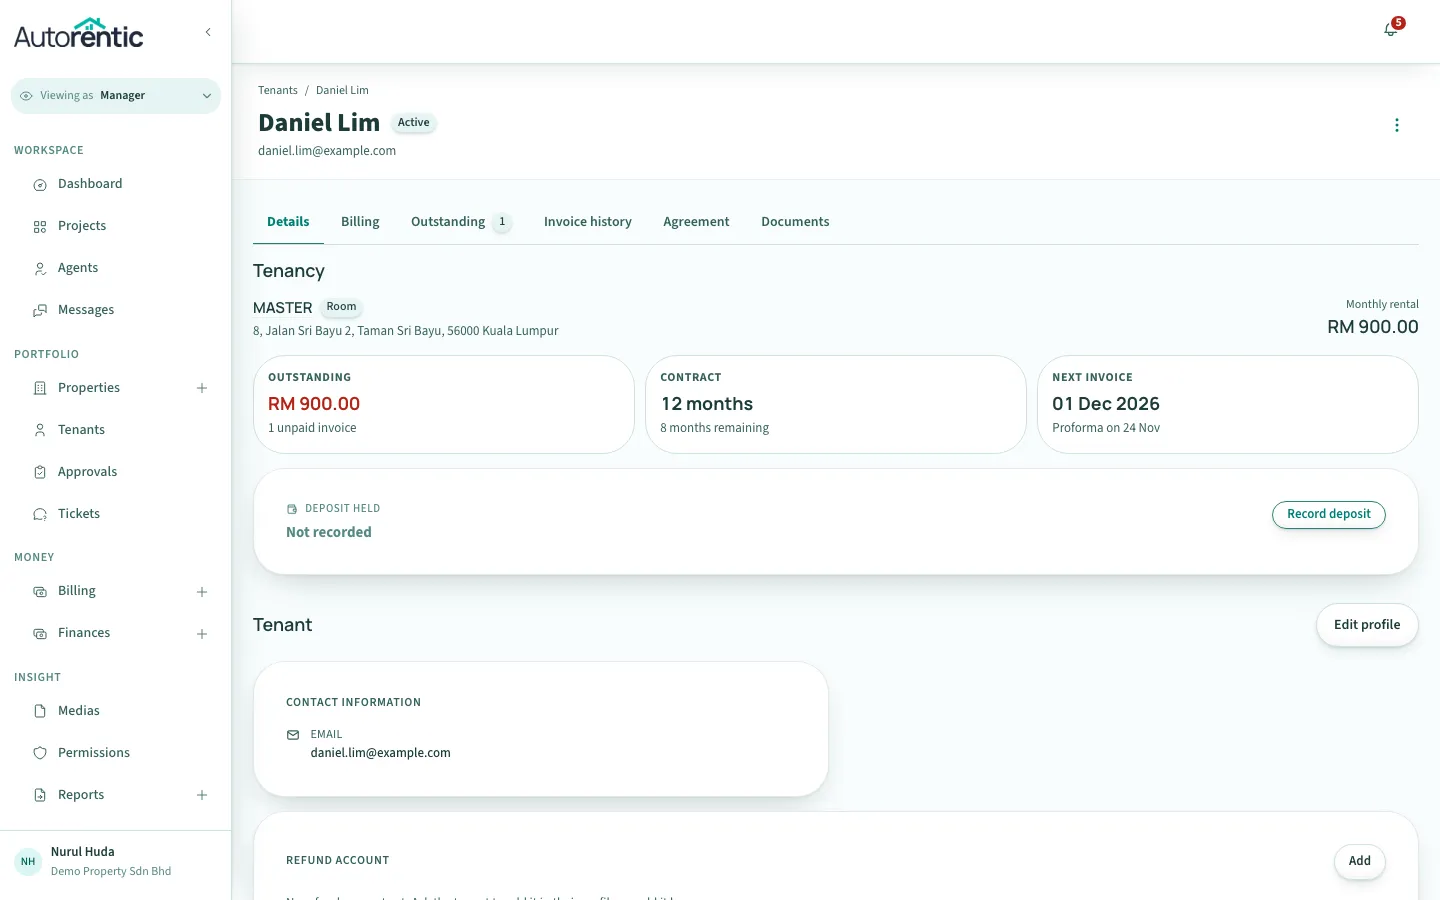
Section titled “Renew a tenancy”- Click Tenants under Portfolio, then click the tenant.
- On the tenant page, find the renewal card, then click Renew. If the end date has already passed, the button reads Renew tenancy.
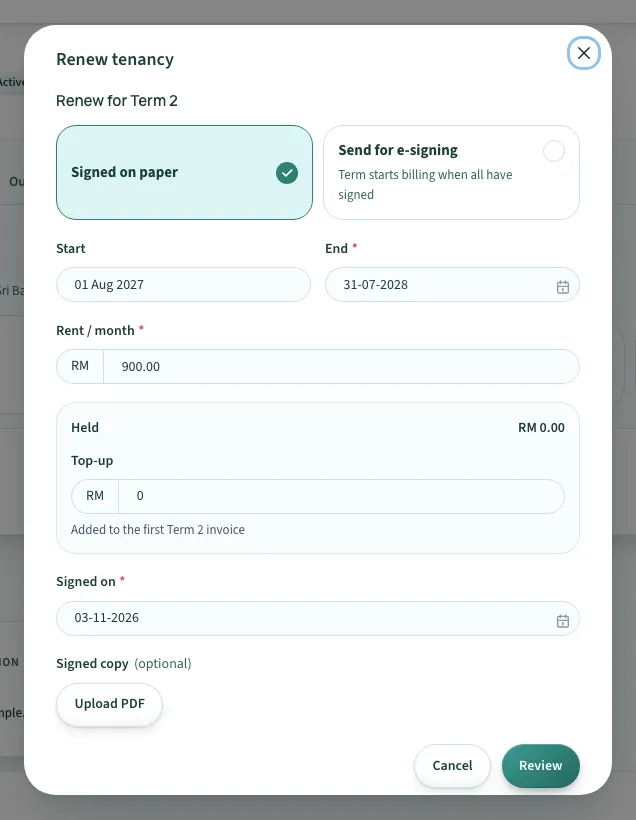
The Renew for Term 2 window opens. The number is the next term. Work through it from top to bottom.
- At the top, choose Signed on paper or Send for e-signing.
- In Start, choose the date the new term begins.
- In End, choose the date the new term ends.
- In Rent / month, type the rent for the new term in RM.
- In Top-up, type any extra deposit the tenant must pay for this term, or leave it at 0. The top-up is billed on the term’s first bill.
Then follow the section for the way you chose.
If the renewal was signed on paper
Section titled “If the renewal was signed on paper”- In Signed on, choose the date both parties signed the paper agreement.
- Click Review.
- Click Start Term 2.
The term is recorded straight away. Billing follows the new term’s dates. You can upload a copy of the signed PDF under Signed copy, but it is optional.
If you want the tenant to sign online
Section titled “If you want the tenant to sign online”This route needs the Advanced plan. On another plan, the option shows Advanced plan and a See plans button.
- Under Where does the agreement come from?, choose My own PDF or Our template.
- If the form asks for an email address, type the tenant’s address under Email for signing.
- Click Review.
- In the dialog that asks whether to send the renewal to the tenant, click Continue.
The term is recorded and the agreement page for that term opens, with the message Term 2 is ready. Add the agreement to send it. Add the agreement there and send it from that page. The renewal does not go out from this window.
The signing order is the tenant first, then you as landlord, then a witness. The term starts billing only when everyone has signed. Until then, the current term keeps billing to its own end date.
If the start date has already passed
Section titled “If the start date has already passed”If the new term starts before today, the app asks what to do about the months that were missed under Missed invoices:
- Invoice the difference raises invoices now for the missed months.
- Waive it starts billing at the next invoice date, and the missed months are not charged.
For an e-signed renewal, you make this choice when you send it.
After you record a renewal
Section titled “After you record a renewal”The tenant page shows the new term, and you can open each term from the term switcher. An e-signed renewal appears to the tenant in My Rental as an Offer to renew, which they can sign or decline. If the tenant answers I won’t renew, the tenancy shows Won’t renew in the list, with an End tenancy button.
End a tenancy
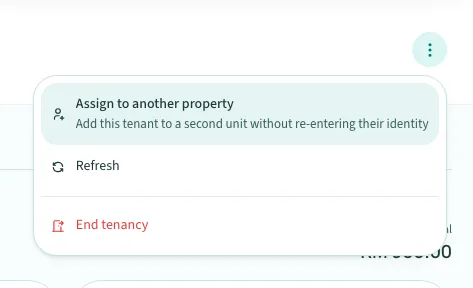
Section titled “End a tenancy”- Open the tenant, then click the three-dot button (Manage tenant) at the top right of the tenant page.
- Click End tenancy.
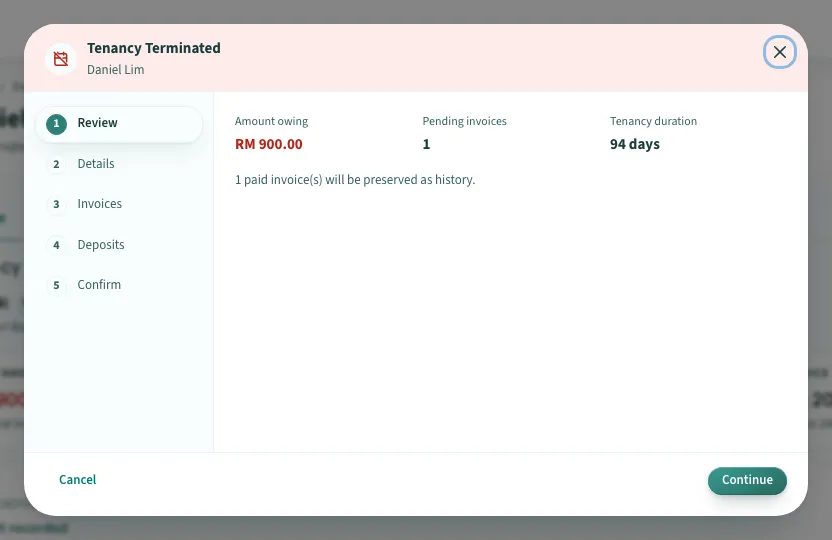
The Tenancy Terminated window opens. It has six steps, shown along the top: Review, Details, Invoices, Deposits, Property and Confirm. The Property step only appears when the unit has a public listing. Click Continue to move on, and Back to change an earlier step.
- On Review, read Amount owing, Pending invoices and Tenancy duration. Then click Continue.
- On Details, choose a reason under Reason.
- Under Termination mode, choose Immediate or With notice.
- In Termination date, choose the day the tenant leaves.
- Click Continue.
- On Invoices, choose Leave outstanding or Write off for each unpaid invoice. Leave all outstanding and Write off all set every invoice at once.
- Under Not sent yet, tick each bill you want cancelled. These bills are prepared but have not gone to the tenant. A bill for a period after the tenancy ends starts ticked. A bill covering time before the end starts unticked, because the tenant still owes it. The section only appears when there are such bills. A bill shared with another tenancy is not listed here: Autorentic replaces it with a bill for the other tenancy alone.
- Click Continue.
- On Deposits, check the deposit settlement, then click Continue.
- On Confirm, click Confirm Termination.
You cannot end the tenancy while a tenant’s payment is still Processing. Wait for it to finish, then start again.
What happens after you confirm
Section titled “What happens after you confirm”- Future bills stop. Autorentic stops invoicing the tenancy as soon as you confirm, in either mode. Bills not yet prepared are never raised, and any renewal you had recorded but not started is cancelled too.
- Bills not sent yet. The ones you ticked under Not sent yet are cancelled. The ones you left unticked are still sent to the tenant on their send date.
- Unpaid invoices. Leave outstanding keeps the invoice collectible, so the tenant still owes it. Write off cancels the invoice and posts a credit.
- The unit. With Immediate, the unit is released when you confirm. With With notice, the tenant keeps the unit until the notice period ends. Autorentic releases the unit at 12:15 am on the notice end date.
What to do next
Section titled “What to do next”- If the tenant is still living in the unit, do not end the tenancy. Renew it, or change its end date with Edit contract.
- If a tenant’s payment is Processing and you cannot end the tenancy, wait until the payment finishes, then end it.
- To see how rent is billed each month, read setting up monthly rent billing.
What changed in this guide
- The Invoices step now lists bills prepared but not yet sent, so you choose which ones to cancel.
- Says where the Manage tenant button is, the three dots at the top right.
- First published.
Ready to try it?
Go back to Autorentic and do it now, while the steps are fresh.