

Working with landlords
Guide published:
A landlord is the owner of a property you manage for. You record them in Autorentic and link their properties to them. You can stop there, which keeps them on record only. Or you can invite them to their own portal, where they follow rent, invoices and statements for the properties you share with them.
Prefer to watch first? This 20-second video shows the same screens, with no sound.
This guide takes about ten minutes. Nothing you do here sends money. Autorentic shows the payment terms you set, but the money moves outside the app.
Adding a landlord and linking a property
Section titled “Adding a landlord and linking a property”This works without inviting the landlord. You can invite them later.
- Under Portfolio, click Properties.
- Click Properties in the menu that opens.
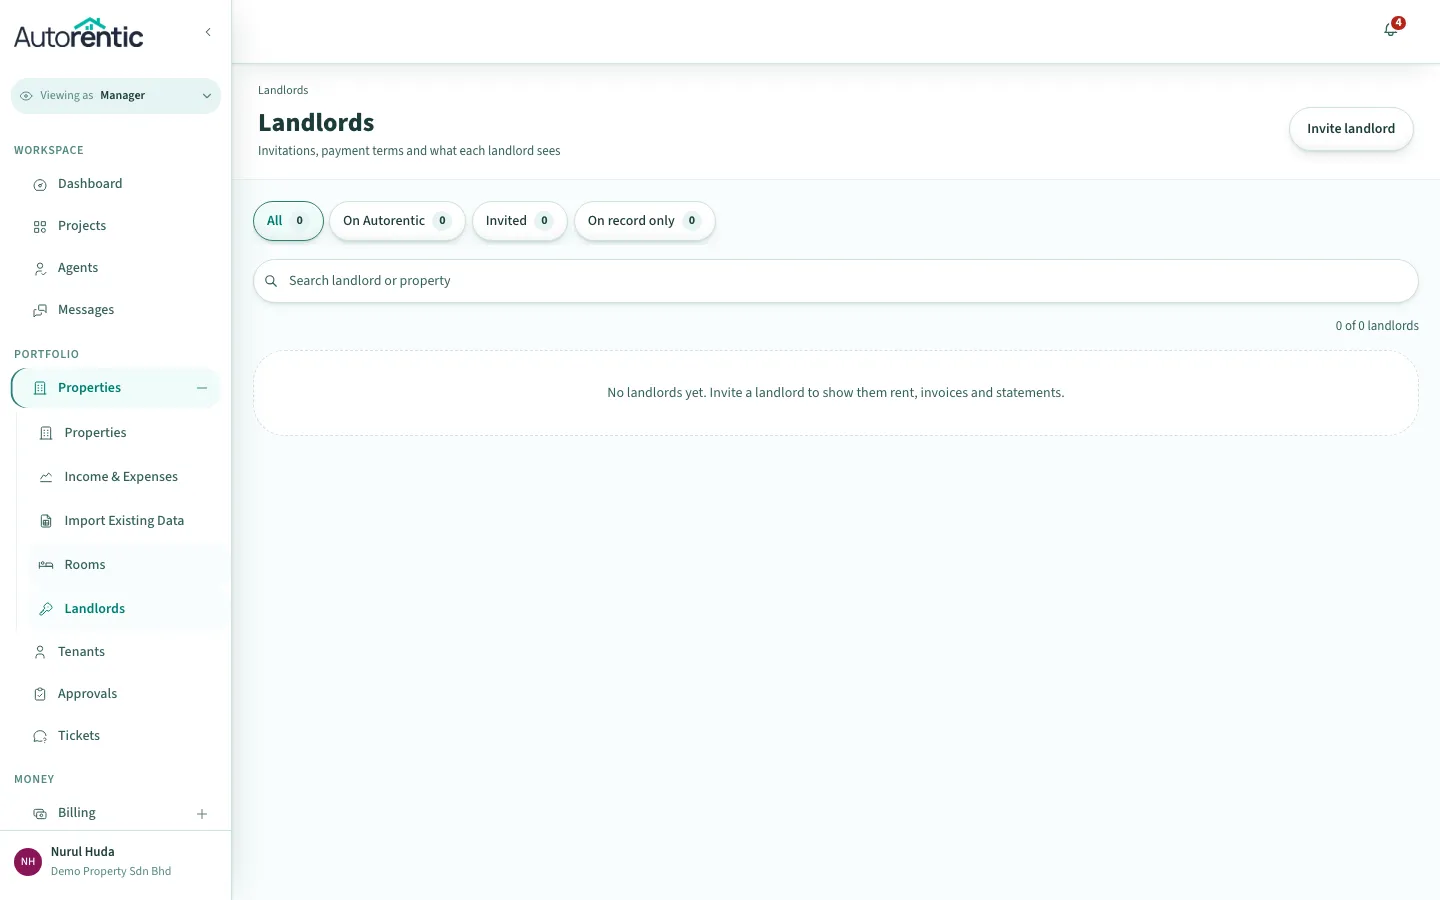
The list of landlords is on the Landlords page. It is empty until you add one.
- Type the property code in the search box, for example MELATI-A1203.
- Click the More actions button (three dots) at the end of the property’s row.
- Click Landlord and payment.
- Under Landlord, click Choose.
- Click Someone new.
- Type the landlord’s full name in Full name.
- Type their email address in Email (needed to invite).
Autorentic asks for an email even when you do not invite them, because the landlord record needs one.
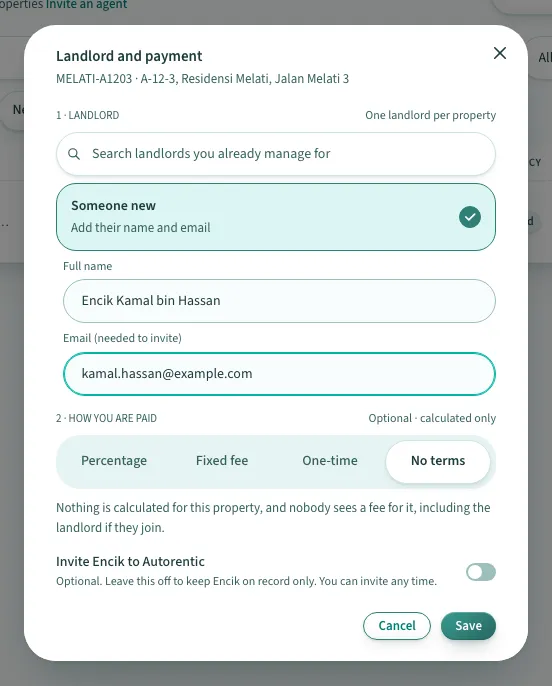
- Leave the invite switch at the bottom of the window off. It is the last switch in the window, and its label starts with Invite and ends with to Autorentic.
- Click Save.
With the switch off, Autorentic records the landlord and links the property, and sends them nothing. You can invite them later from the Landlords page.
A property has one landlord at a time. To give a property to someone else, open the same window, click Change, and read the section Changing a property’s landlord below.
Setting how you are paid
Section titled “Setting how you are paid”You can record the landlord’s terms with the property, or leave the property on No terms. With No terms, nothing is calculated for the property, and the landlord sees no fee for it.
To set terms, choose one of the options under How you are paid in the same window:
- Percentage: your fee is a share of the rent collected.
- Fixed fee: your fee is a fixed amount each month.
- One-time: your fee is a number of months of rent, charged once.
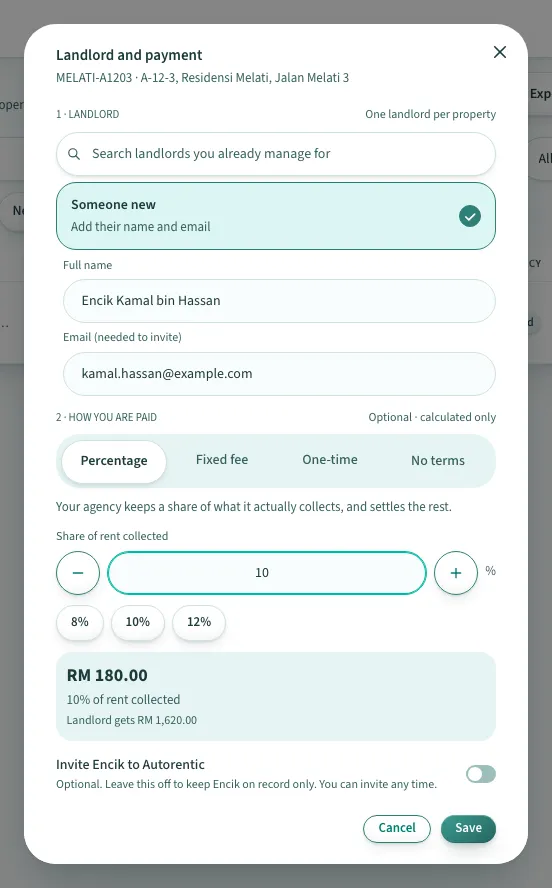
- Click the option you need, for example Percentage.
- Type the amount in the field under it, for example 10 for a share of rent collected. You can also click one of the amounts shown below the field.
The box under the field shows the figure before you save. For a 10 percent share of RM 1,800.00 rent collected, it reads RM 180.00 as your fee, and Landlord gets RM 1,620.00.
- Click Save.
Terms you set for a property with no terms yet start today. Changing terms on a property that already has terms starts on the 1st of next month, so last month’s figures do not change. Removing terms follows the same rule. A change of landlord takes effect today.
Finding the landlord again
Section titled “Finding the landlord again”- Under Portfolio, click Properties.
- Click Landlords in the menu that opens.
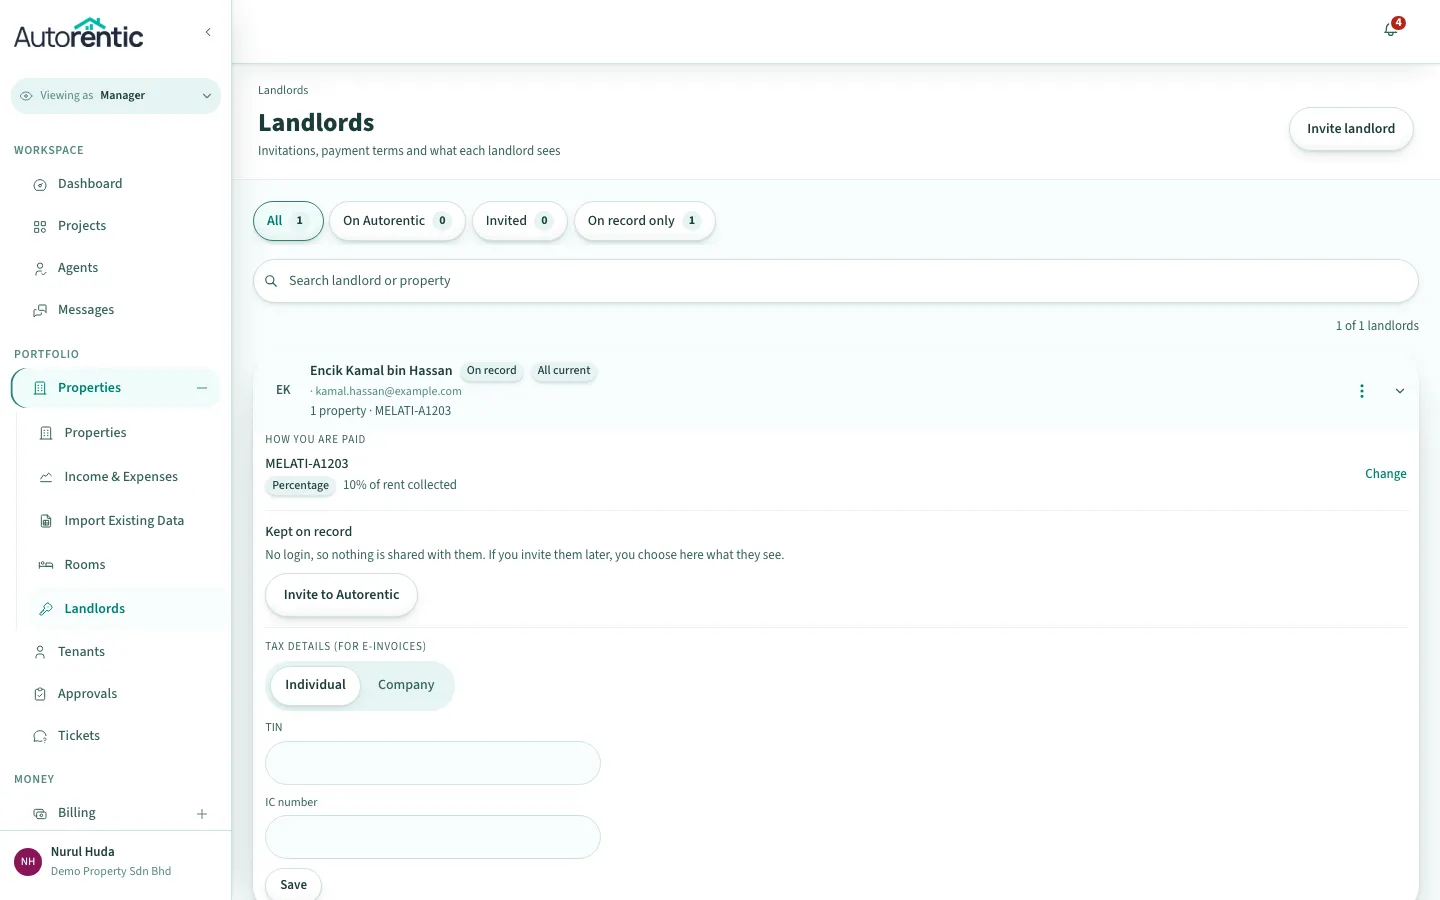
The list shows each landlord with a status badge. The badges mean:
- On record: the landlord has no login. Nothing is shared with them.
- Invited: you have sent an invitation, and they have not joined yet.
- On Autorentic: they have joined and sees their properties in their own portal.
- Expired: the invitation ran out before they joined.
Use the filter buttons above the list to show only one group. On record only is the group of landlords with no login.
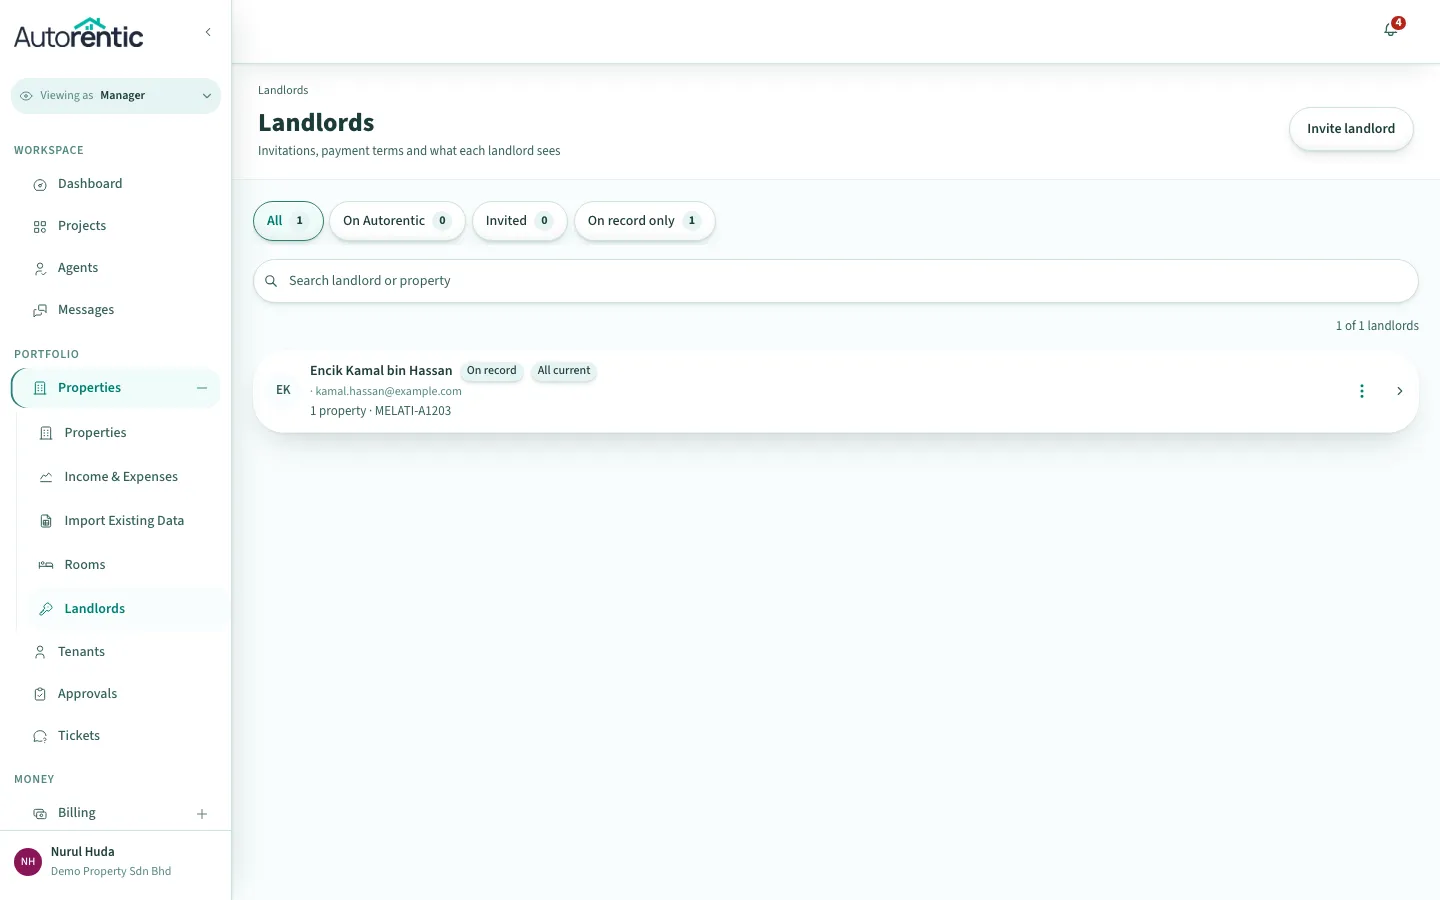
- Click a landlord’s name to open their row.
The row shows how they are paid for each property, and their tax details for e-invoices. If they are on record only, it shows Invite to Autorentic.
Inviting a landlord to their own portal
Section titled “Inviting a landlord to their own portal”An invitation is an email to the landlord with a link to join Autorentic. It works for 7 days. When they accept, they see the properties you put in the invitation and the payment terms on them. They can see nothing else, and they cannot change anything.
- Open the landlord’s row, as shown above.
- Click Invite to Autorentic.
The form opens with the landlord’s name, email and the properties already ticked.
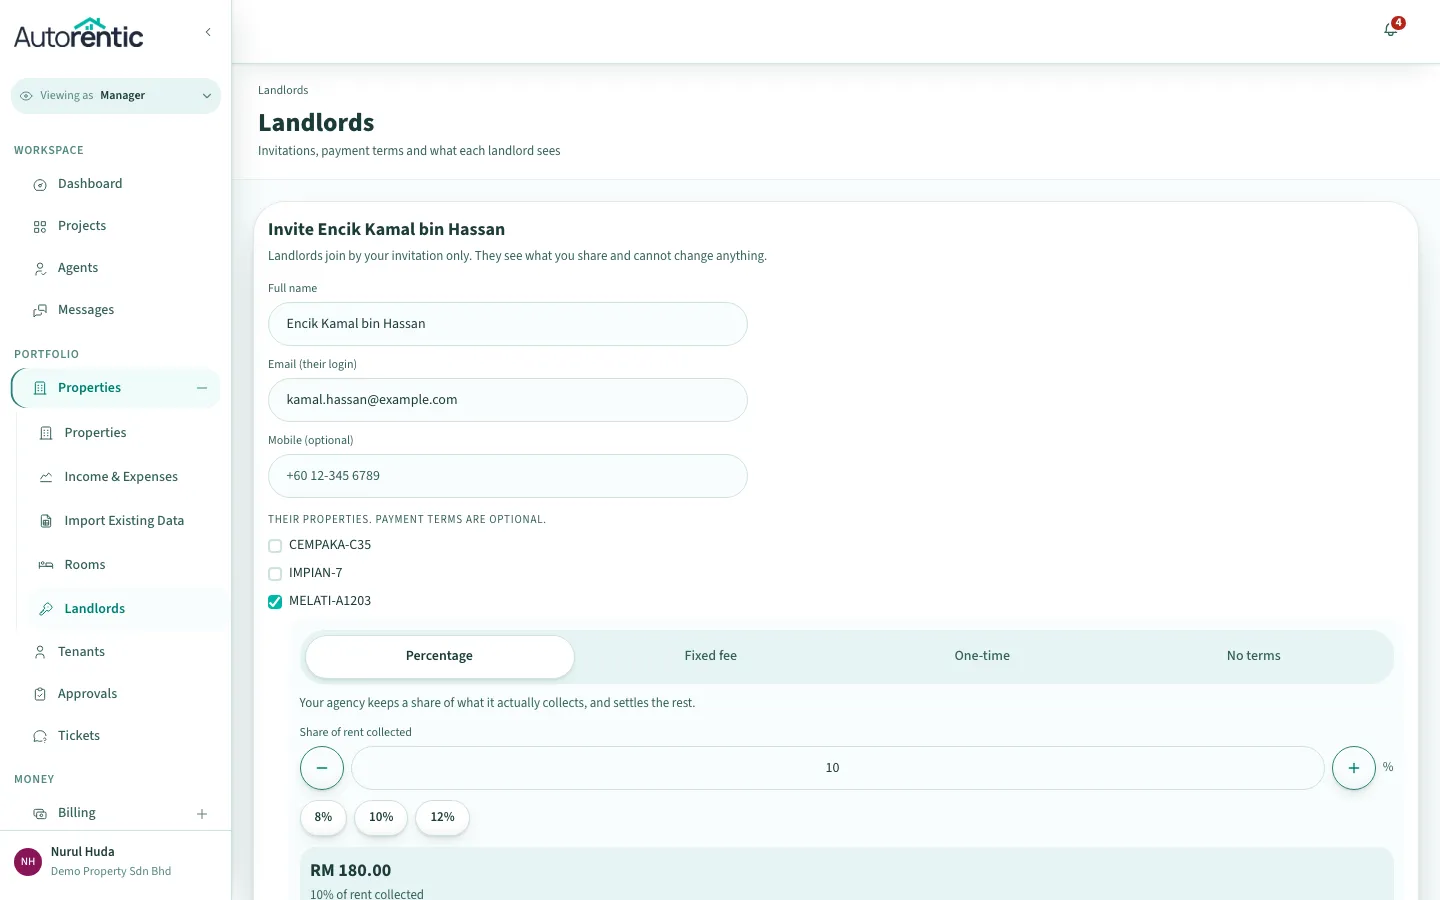
- Check the name, the email and the ticked properties. Only the ticked properties are added to the landlord.
- Click Send invitation.
Each property has one landlord. A property that already belongs to another landlord who has joined Autorentic cannot be ticked, and the form says who holds it.
If you sent an invitation by mistake, open the landlord’s row and click Cancel invitation. The link stops working at once. If the link ran out, click Resend invitation.
What the landlord sees in their portal
Section titled “What the landlord sees in their portal”When the landlord has joined, they see:
- Their portfolio: every property you manage for them, and any other agency that manages properties for them. Each property opens to its tenancy, documents and maintenance tickets.
- Statements and earnings: the money for their properties, worked out from your invoices.
- Messages: a conversation with each agency that manages for them.
- Settings: their own bank details and alerts.
Some of this depends on what you share. Each landlord row has a What [name] sees list, with six items. Each item is either Off or Shared:
- Maintenance tickets: tickets raised on their properties.
- Repair costs and quotes: amounts before they reach the statement.
- Arrears detail by tenant: who is late, by how much and for how long. Without this, the landlord sees no late-rent detail for a tenant.
- Tenancy documents: the signed agreement, addendums and handover forms.
- Tenant name and contact: turning this on asks you for a reason, which is kept on record. It is the only item that needs one.
- Inspection reports.
Click Share everything safe to share every item except tenant name and contact. Click Share nothing to turn all of them off.
The landlord cannot change any of this, and they cannot see the tenant’s identity document numbers.
What is not in the app
Section titled “What is not in the app”- The landlord does not sign their own tenancy agreement. You sign as landlord, and they see the signed PDF with its date.
- The landlord cannot invite you or another agency.
- Autorentic does not move the landlord’s money. Its figures show what is owed, and the payment happens outside the app.
Changing a property’s landlord
Section titled “Changing a property’s landlord”- Open the Landlord and payment window for the property, as shown above.
- Click Change next to the current landlord.
- Click Someone new, or click an existing landlord.
- Type a short reason in the box that appears, for example unit sold, sale agreement dated 12 Sep. The reason is written to the audit log, and it must be at least four characters.
- Click Save.
The previous landlord loses access to the property straight away. Their statements and documents dated before the handover stay with them.
What to do next
Section titled “What to do next”- If a landlord shows Expired, open their row and click Resend invitation. Each resend sends a new 7-day link.
- If they say the wrong account accepted the invitation, open their row, click the menu with three dots, and click Unlink login. Then invite the right person.
- If a landlord has asked for a new invitation or to be contacted, their row shows the request. Click Resend invitation to send them a new link.
- To see how rent is billed each month, read setting up monthly rent billing.
Ready to try it?
Go back to Autorentic and do it now, while the steps are fresh.